Life gets busy. Sometimes the craving for a slice of homemade cake strikes when you have absolutely no energy for complicated baking or washing a mountain of bowls just to make a simple treat.
That is when I pull out my grandmother’s recipes for cakes. These are genuinely very easy, one-bowl, mix-and-bake recipes - but trust me, they taste miles better than any store-bought pre-mix. Plus, they have simple variations, whether you carve a vanilla or a chocolate cake.
So let me share with you two easy recipes for cakes that are perfect for when you need a delicious and comforting cake, fast, without any fuss.
This post may contain affiliate links for which we may be compensated if a purchase is made through the links provided at no extra cost to you. For more information, please read our affiliate disclosure.
Table of Contents
A Wholesome Update On Classic Recipes For Cakes
What I love most about grandmother's approach is the simplicity - it’s essentially a one-bowl, mix-and-dump method.
While her original recipe was great, we have made a few adjustments over the years to make it slightly more wholesome. We now use brown, non-refined sugar instead of standard white sugar, which adds a lovely, subtle caramel undertone.
Also, grandma's original recipe actually called for a full cup of sugar, but I gradually decreased it down to half a cup. We prefer the cake less sweet these days, but feel free to add more sugar if you prefer a sweeter treat.
We also switched to using whole wheat self-rising flour for a nuttier texture and health benefits. If you have never used whole wheat flour before, I recommend starting gradually. Try using just half a cup of whole wheat flour mixed with 1.5 cups of regular white self-rising flour at first, and slowly increase the ratio over time. It took my family a little while to get used to the different taste and denser texture, but now we just love it.
Below is the master "base" batter, and how to easily turn it into either a classic vanilla or a rich chocolate cake.
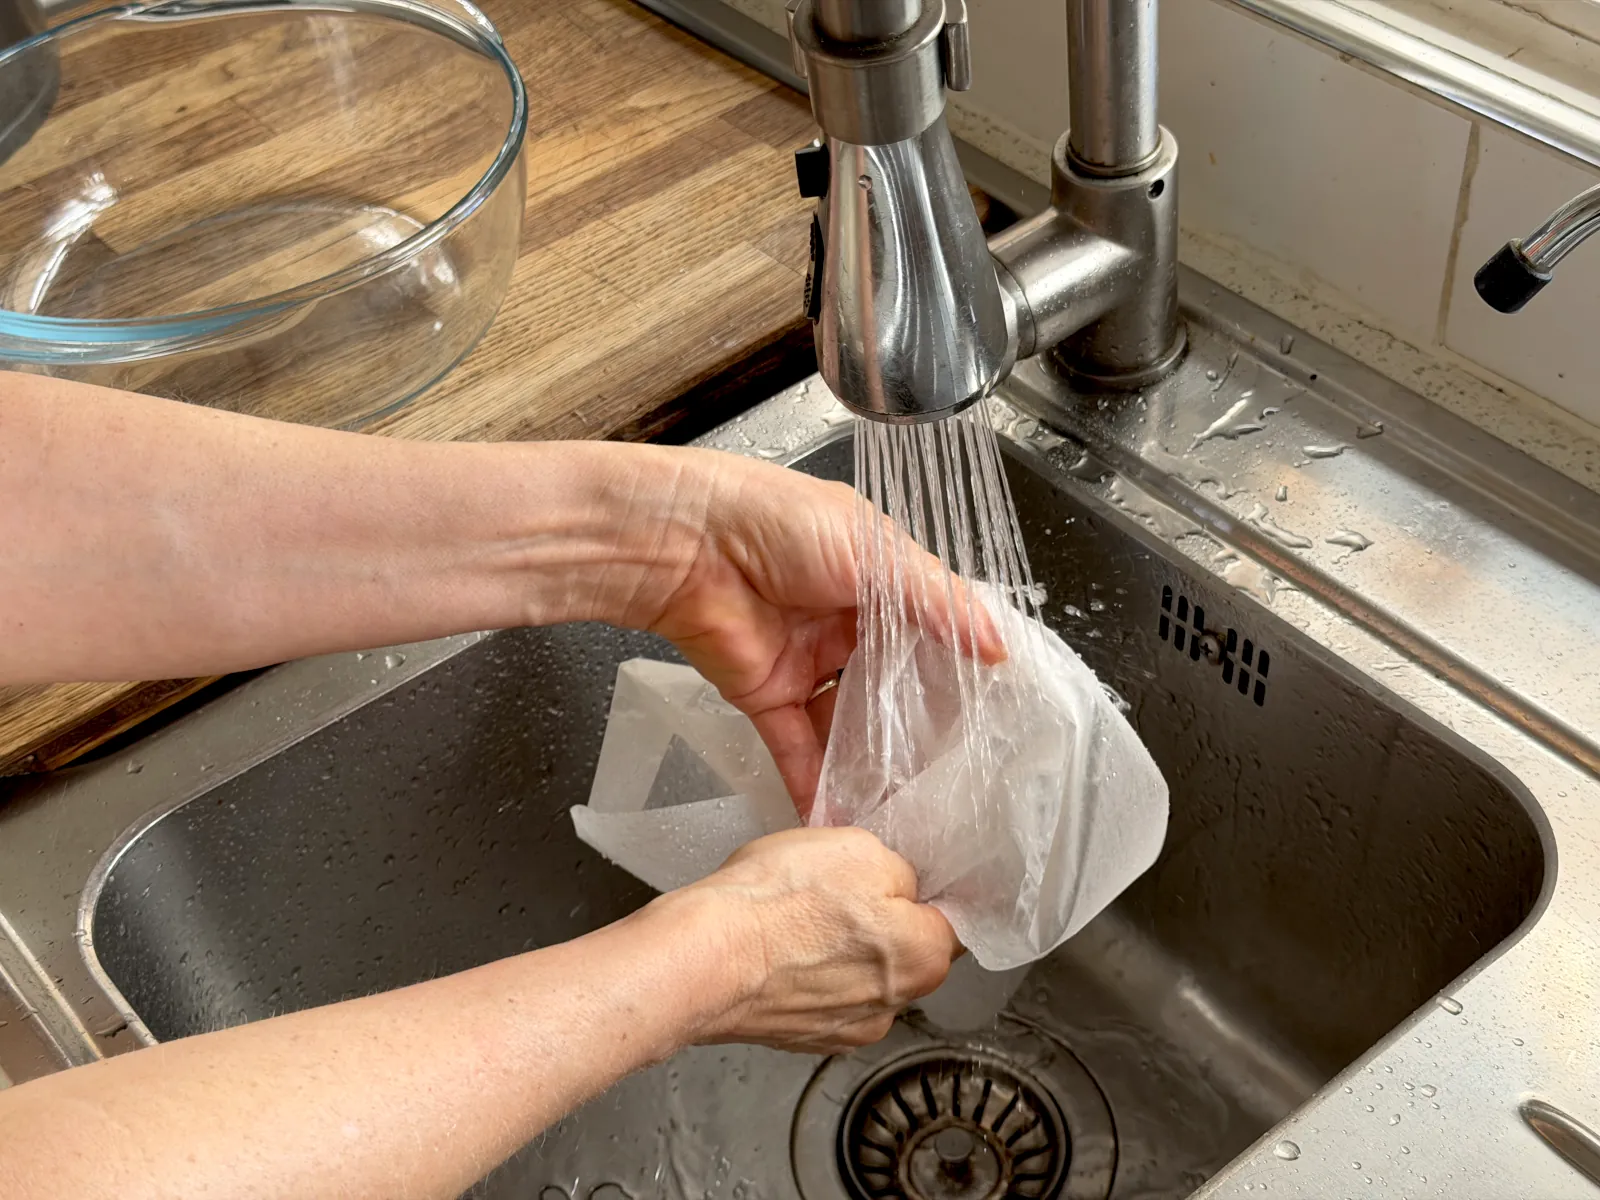
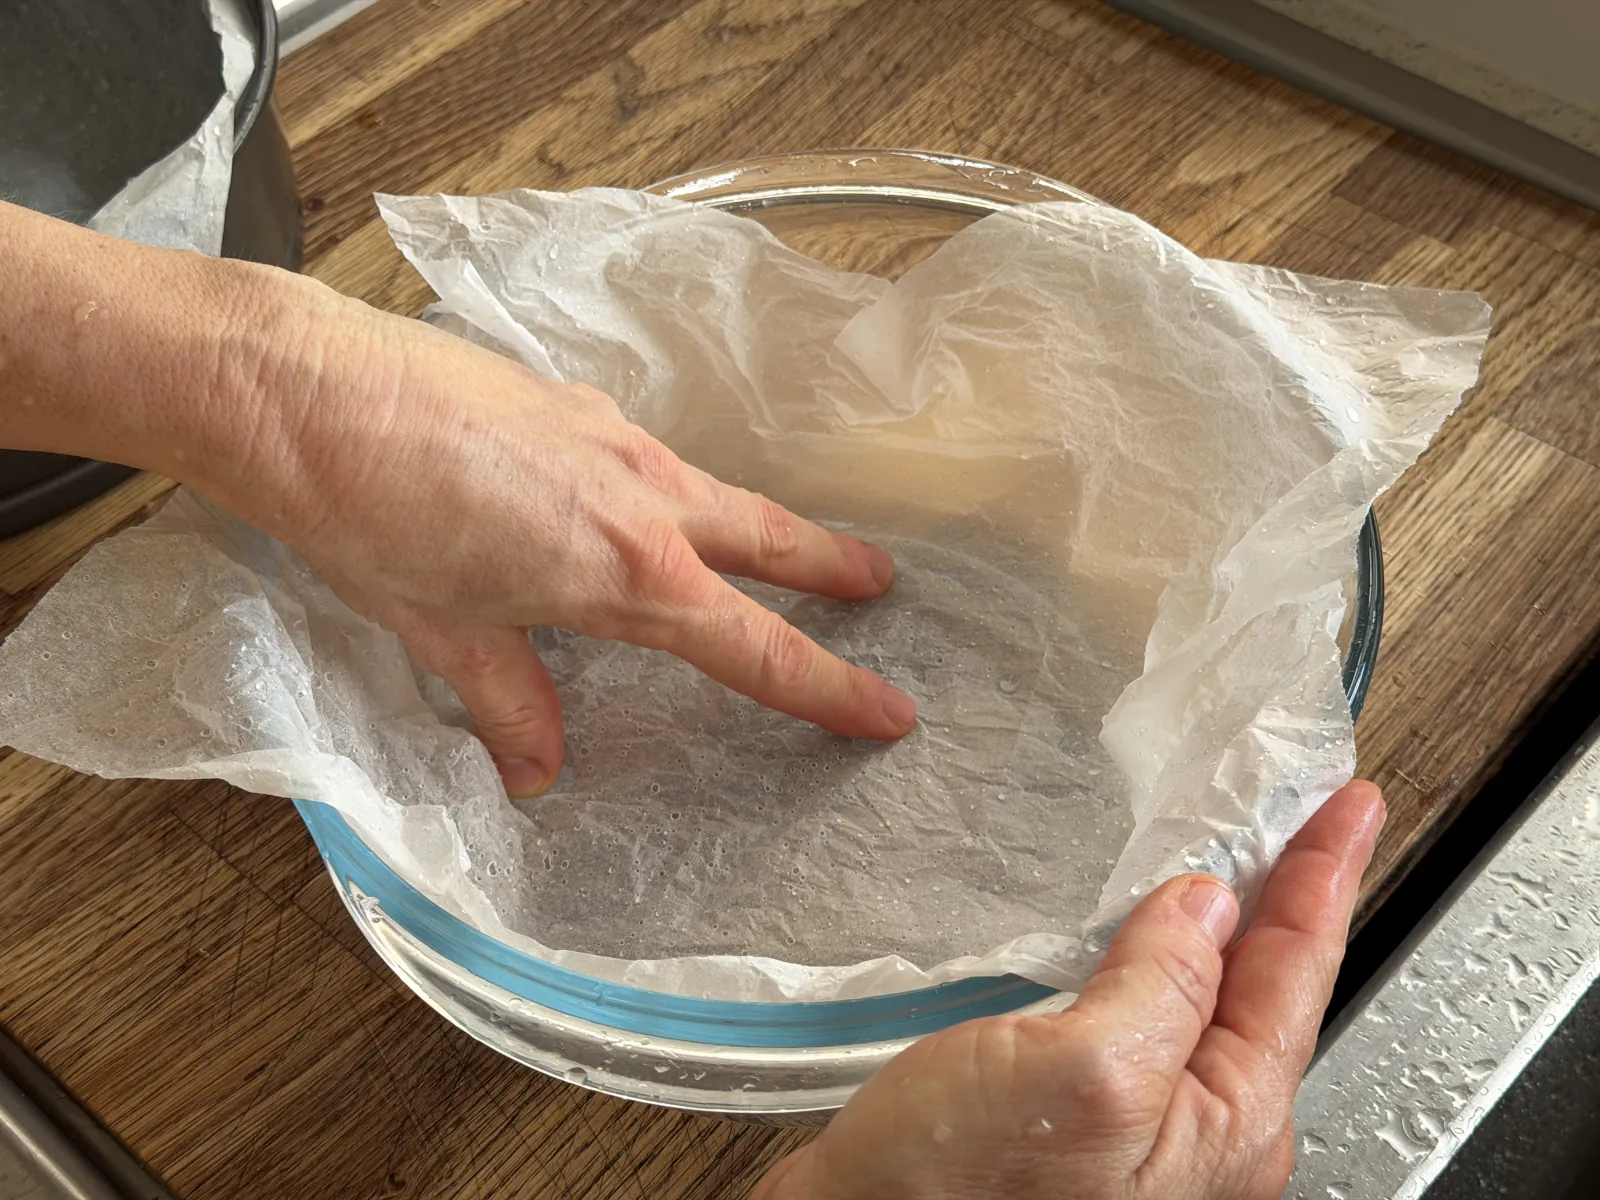
The Essential Kitchen Hack: Jamie Oliver’s Parchment Trick
Before you grab your mixing bowl, let's prep your 9-inch / 230 mm round baking pan. I use a fantastic trick I learned from Jamie Oliver years ago that changes the game for lining baking tins.
How to do it: Tear off a sheet of parchment/baking paper and run it right under the tap water until it's soaked. Scrunch it tightly into a ball, then unravel it and shake off the excess water. The paper will now be soft and malleable. It stretches easily into the corners of your pan without springing back up and holds the shape perfectly!
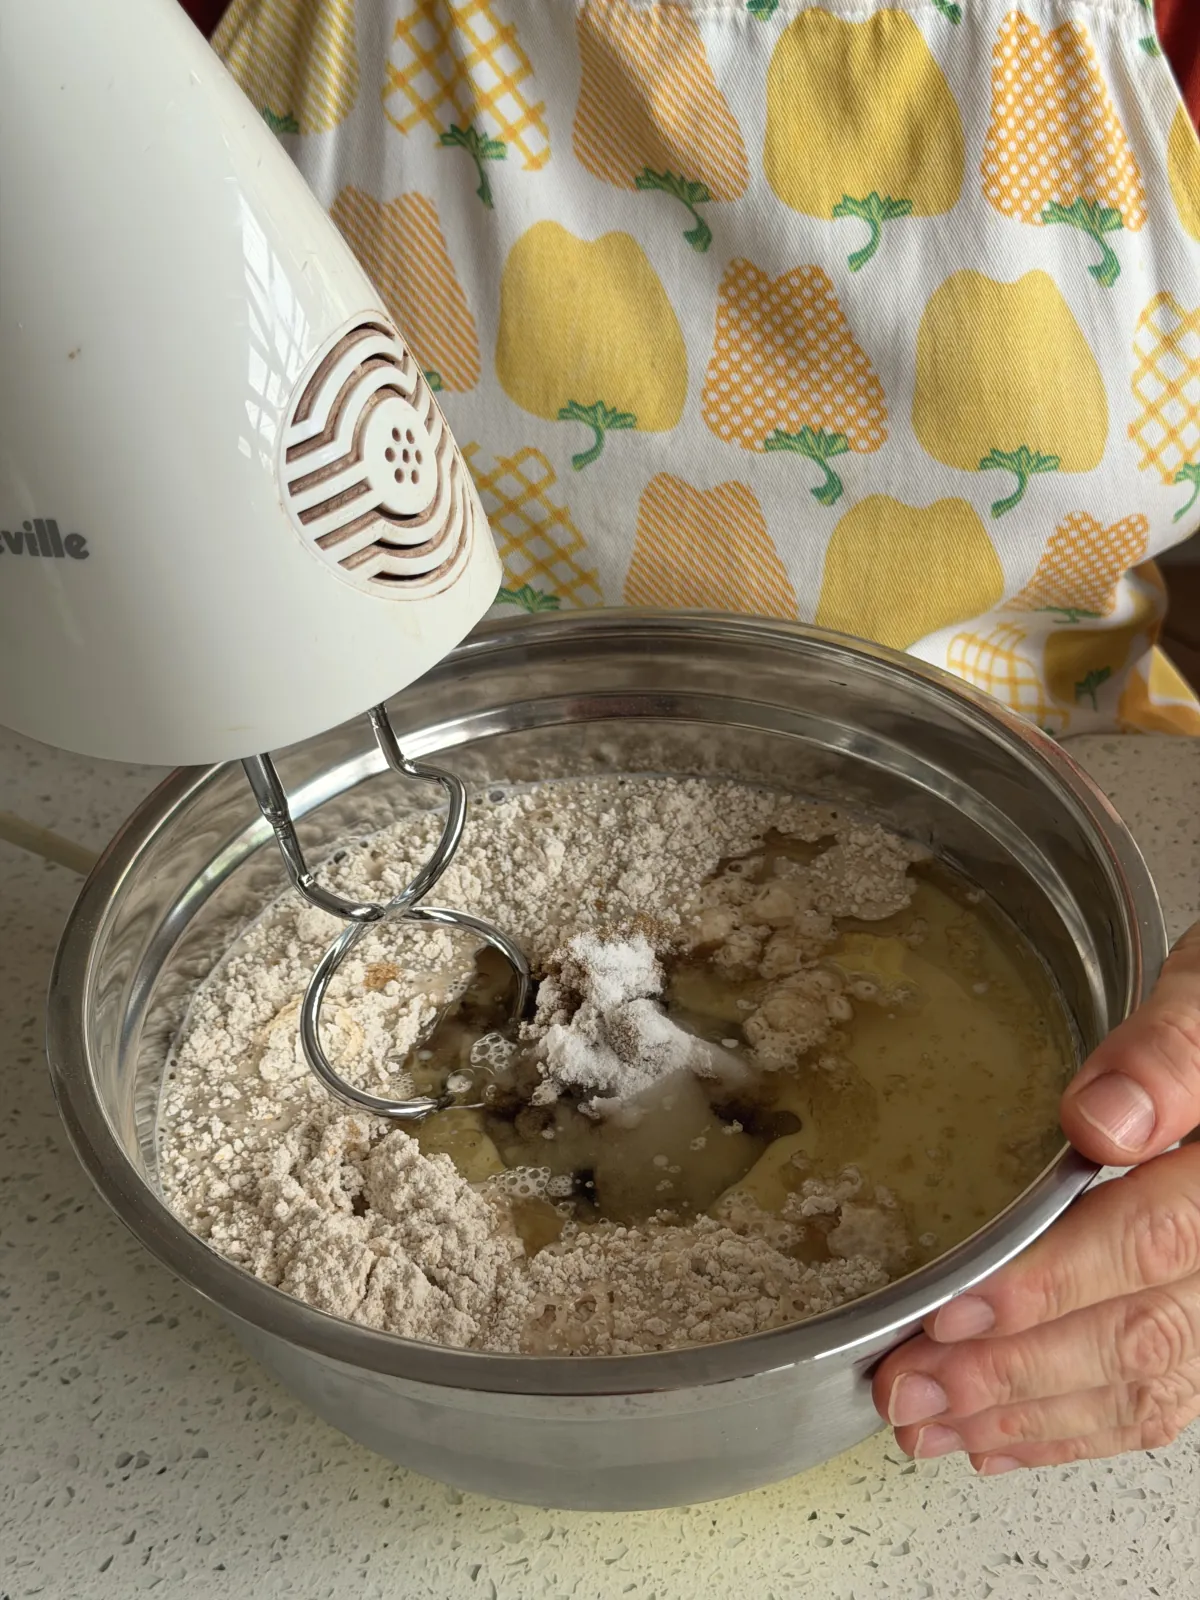
The Master "Base" Batter
This recipe uses whole wheat self-rising flour. Be aware that whole wheat absorbs more liquid than white flour, making the batter thicker and the final cake denser.
The fix: If you find the batter too thick or prefer a lighter, fluffier cake, add a splash more milk until you reach your desired consistency.
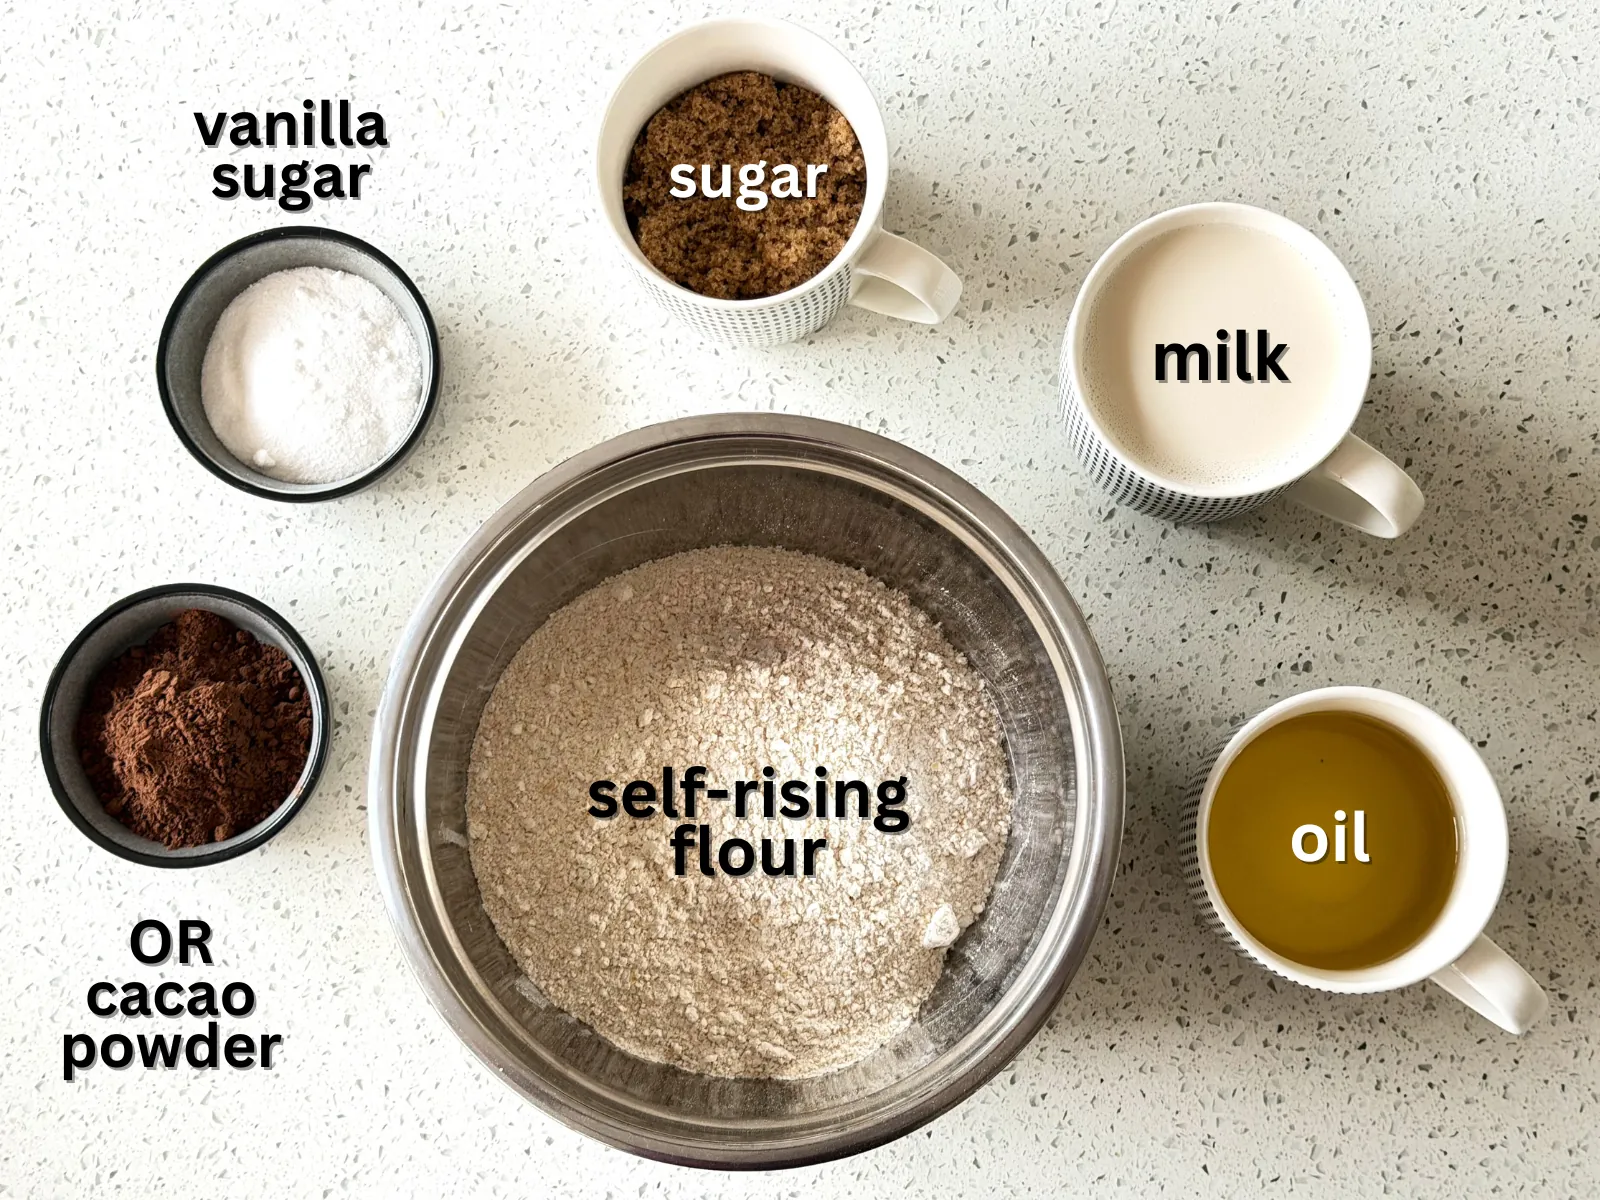
Ingredients needed for one cake:
- 2 cups of self-rising flour (I'm using healthier whole wheat flour).
If you're not used to whole wheat flour, I would recommend starting with half a cup of whole wheat flour and 1.5 cups of self-rising flour, then gradually increasing the ratio. - 1 cup of milk of your choice, I used soya milk (plus extra if needed)
- ½ cup of sugar (we like to use brown non-refined sugar), add more if you desire a sweeter cake
- ½ cup of oil of your choice (I used sunflower oil)
The Easy DIY Substitute for Self-Rising Flour
Don't have self-rising flour on hand? No problem. You can easily make your own substitute by whisking baking powder into standard all-purpose flour (this works for whole wheat all-purpose flour, too).
A common general rule is to use 2 teaspoons of baking powder for every 1 cup of flour. However, baking powder brands can vary, so it is always a good idea to check the specific recommendations on the package you have.
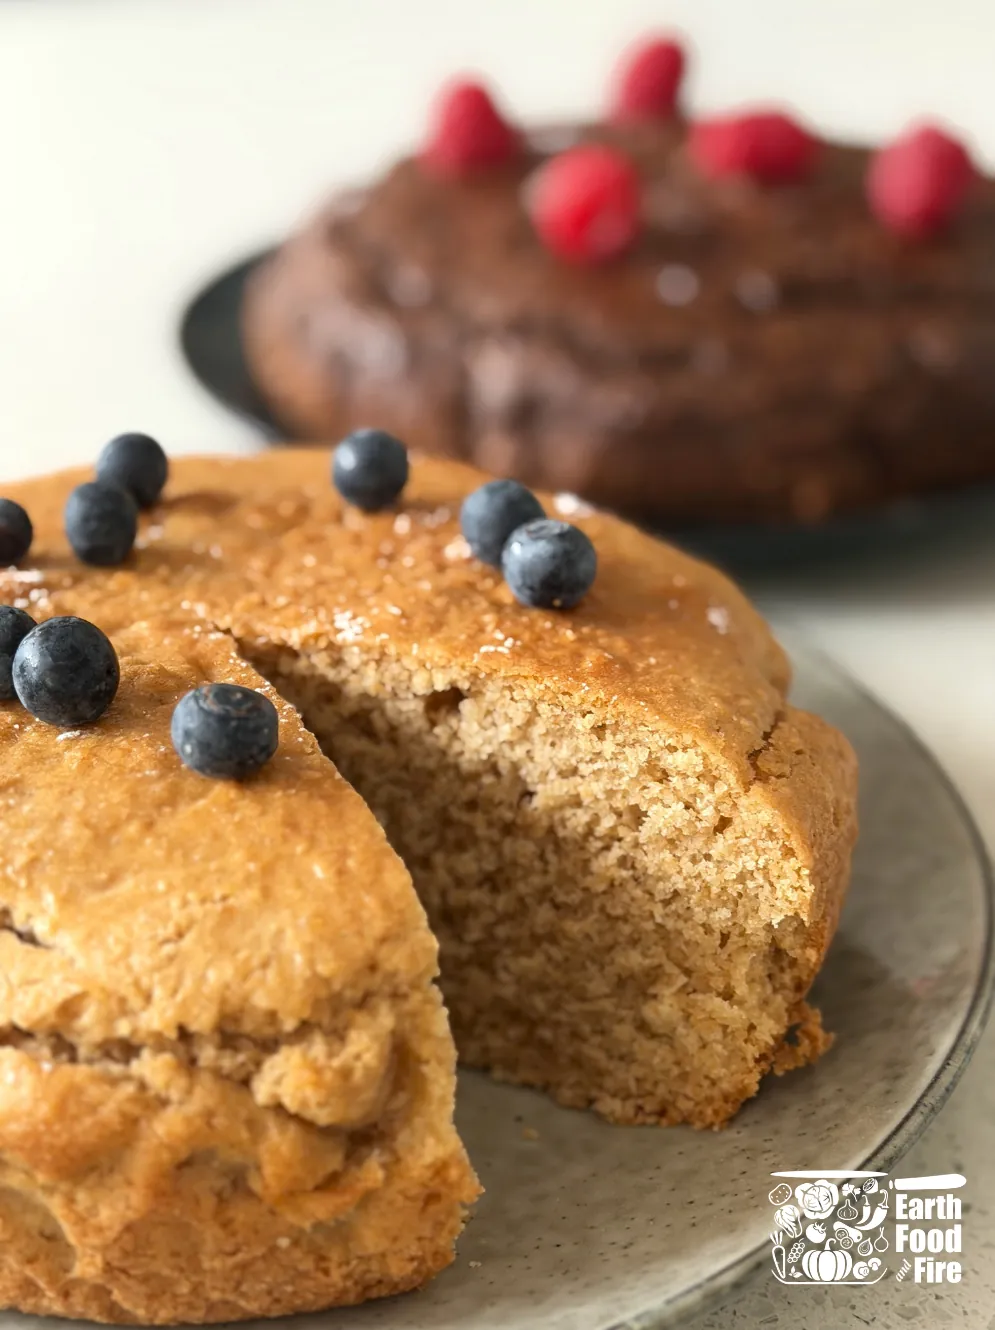
Recipes For Cakes: The Classic Vanilla Variant
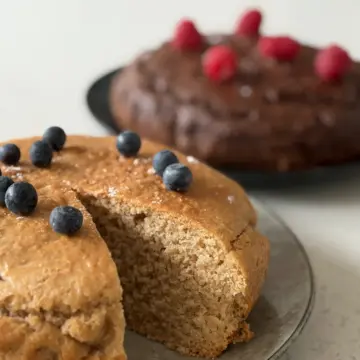
This is the perfect everyday cake. It is delicious simply dusted with powdered sugar, but it is easily dressed up for dessert.
Make it your own: Try slicing it in half to sandwich a layer of jam in the middle, then top each slice with whipped cream and fresh berries.
- 1 pack of vanilla sugar (25g) OR 1 tablespoon of vanilla essence.
Add flavor to the base:
To the ingredients listed above, add:
Method:
- Preheat your fan-forced oven to 350°F (180°C).
- Place all the base ingredients and your vanilla flavoring choice into a large bowl.
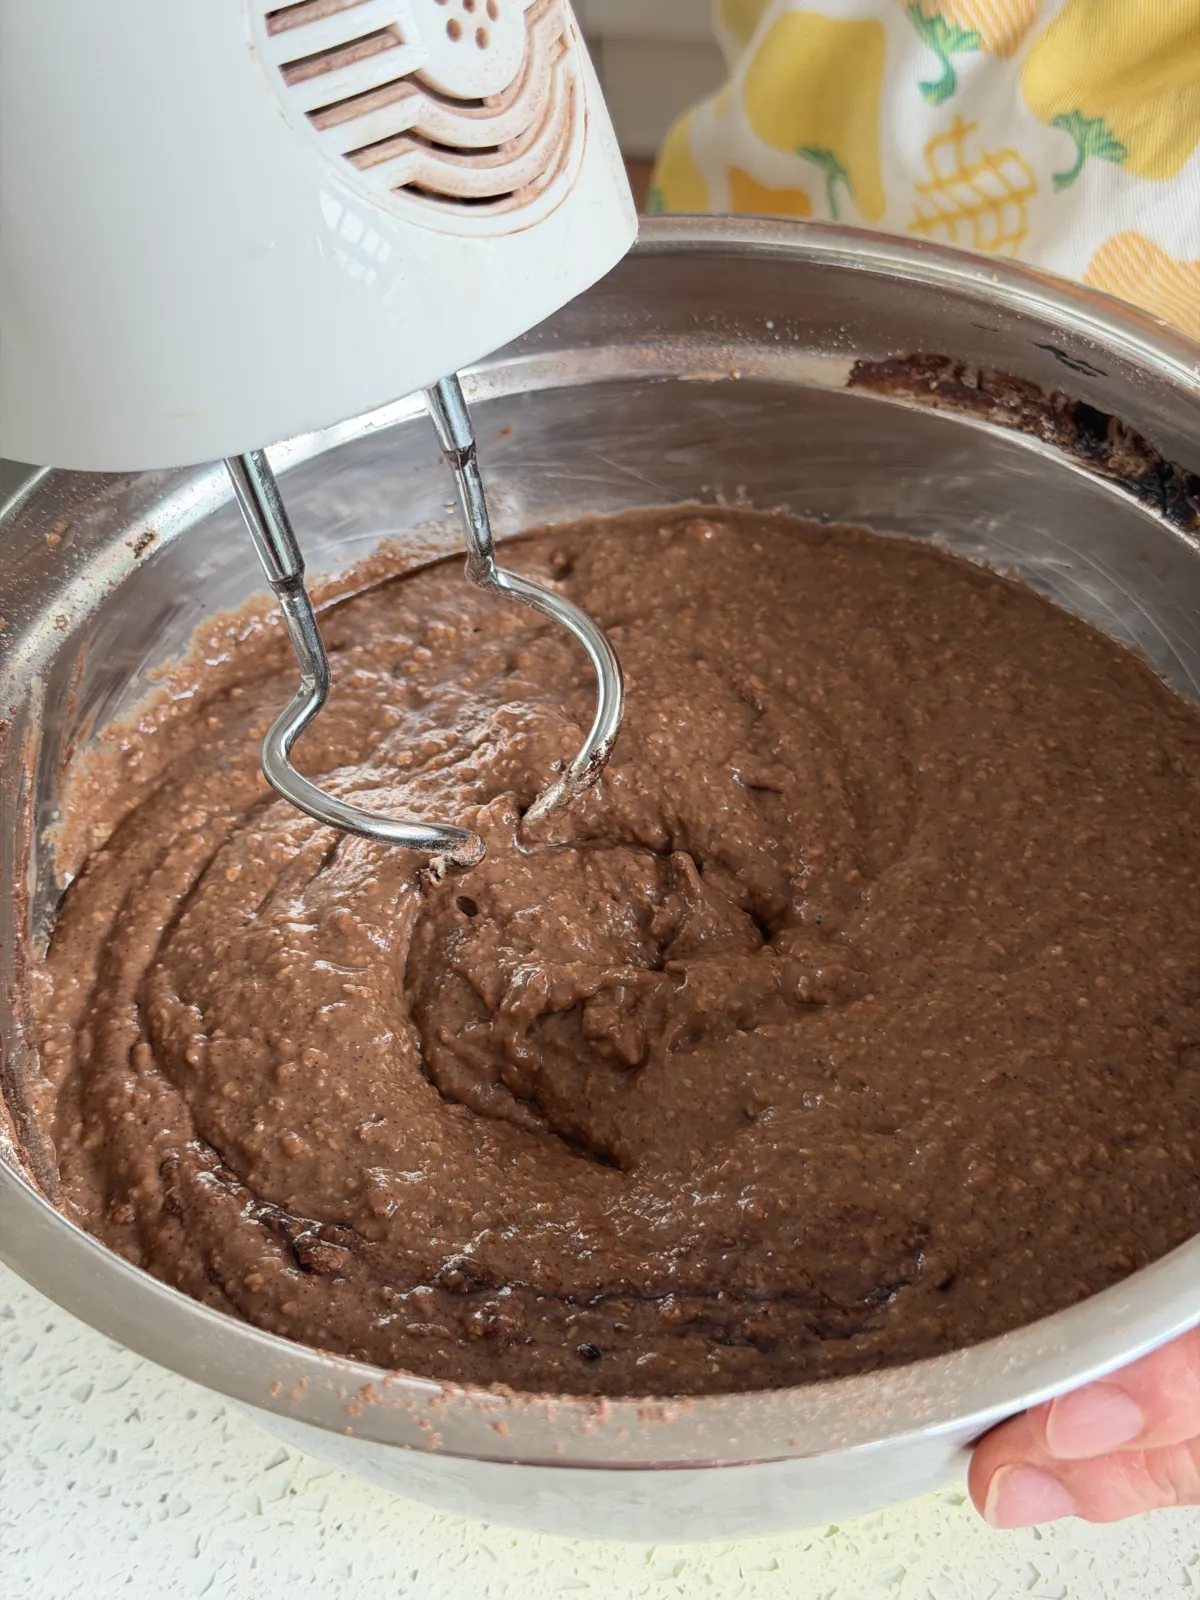
- Mix everything together by hand or with a hand-held electric mixer until just combined. Do not overmix.
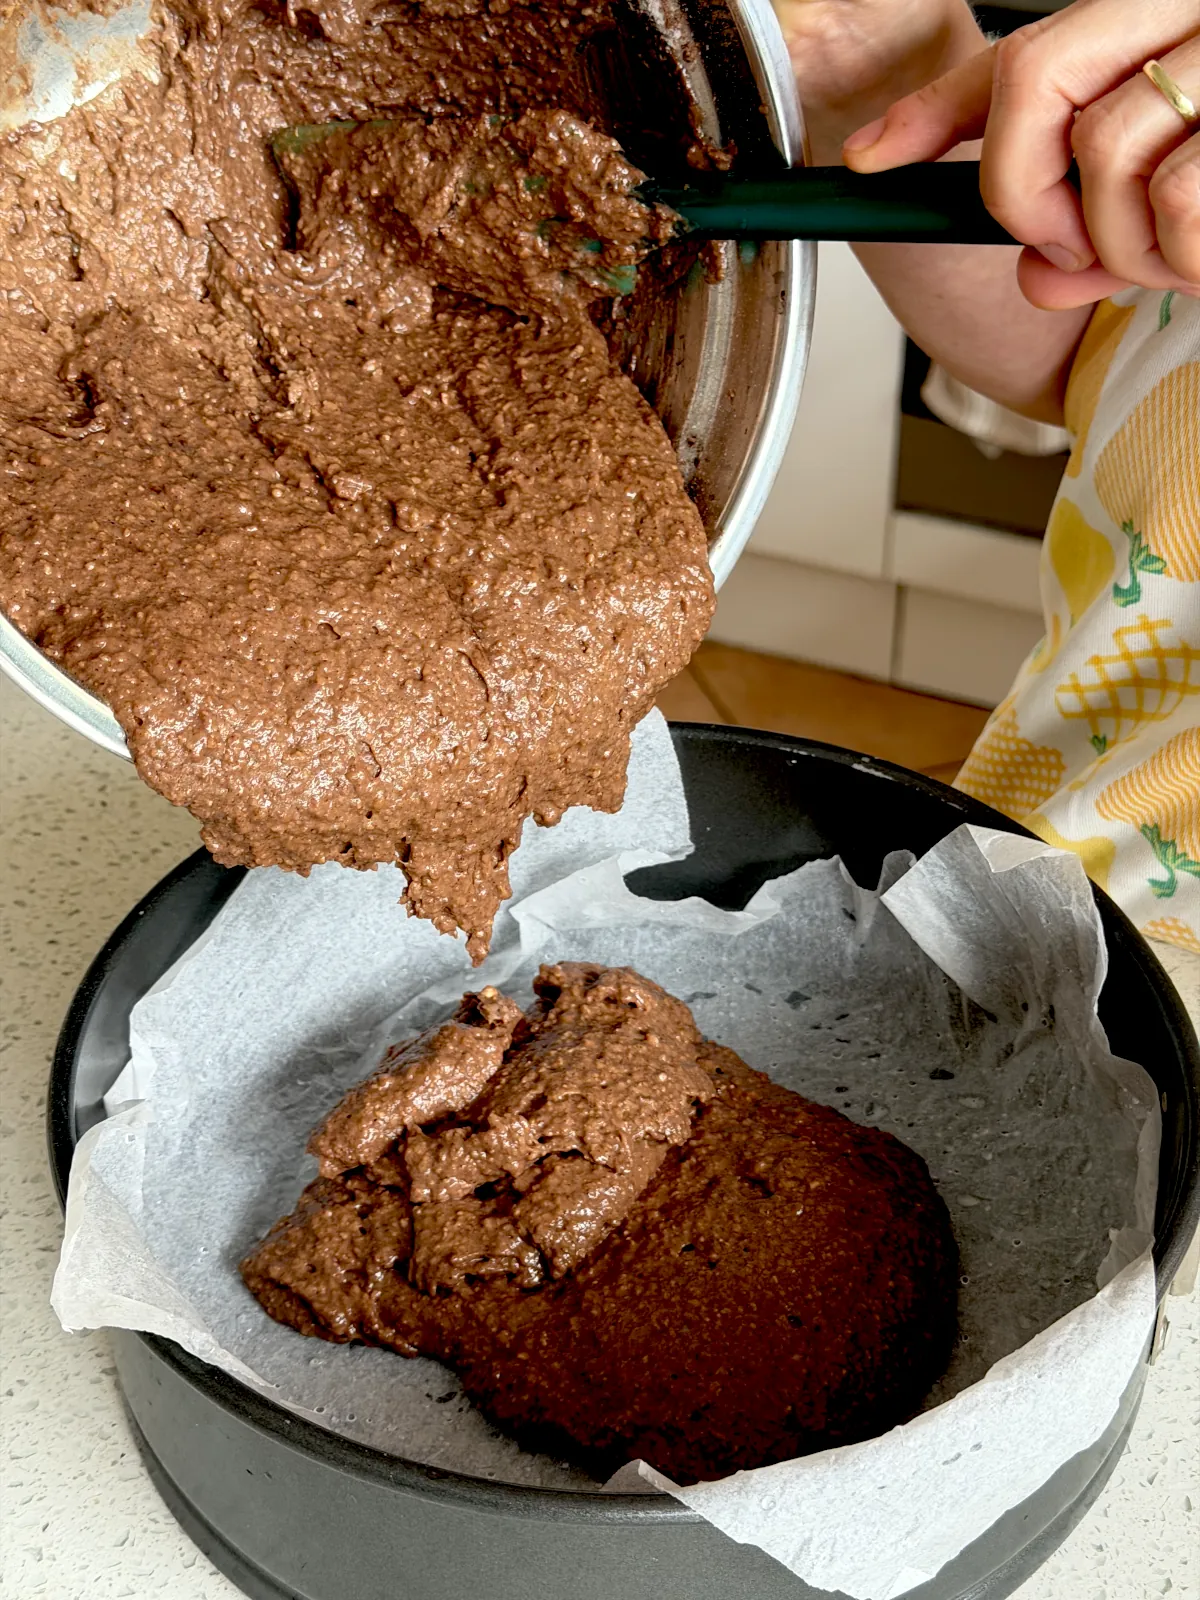
- Pour into your prepared 9-inch / 230 mm round pan.

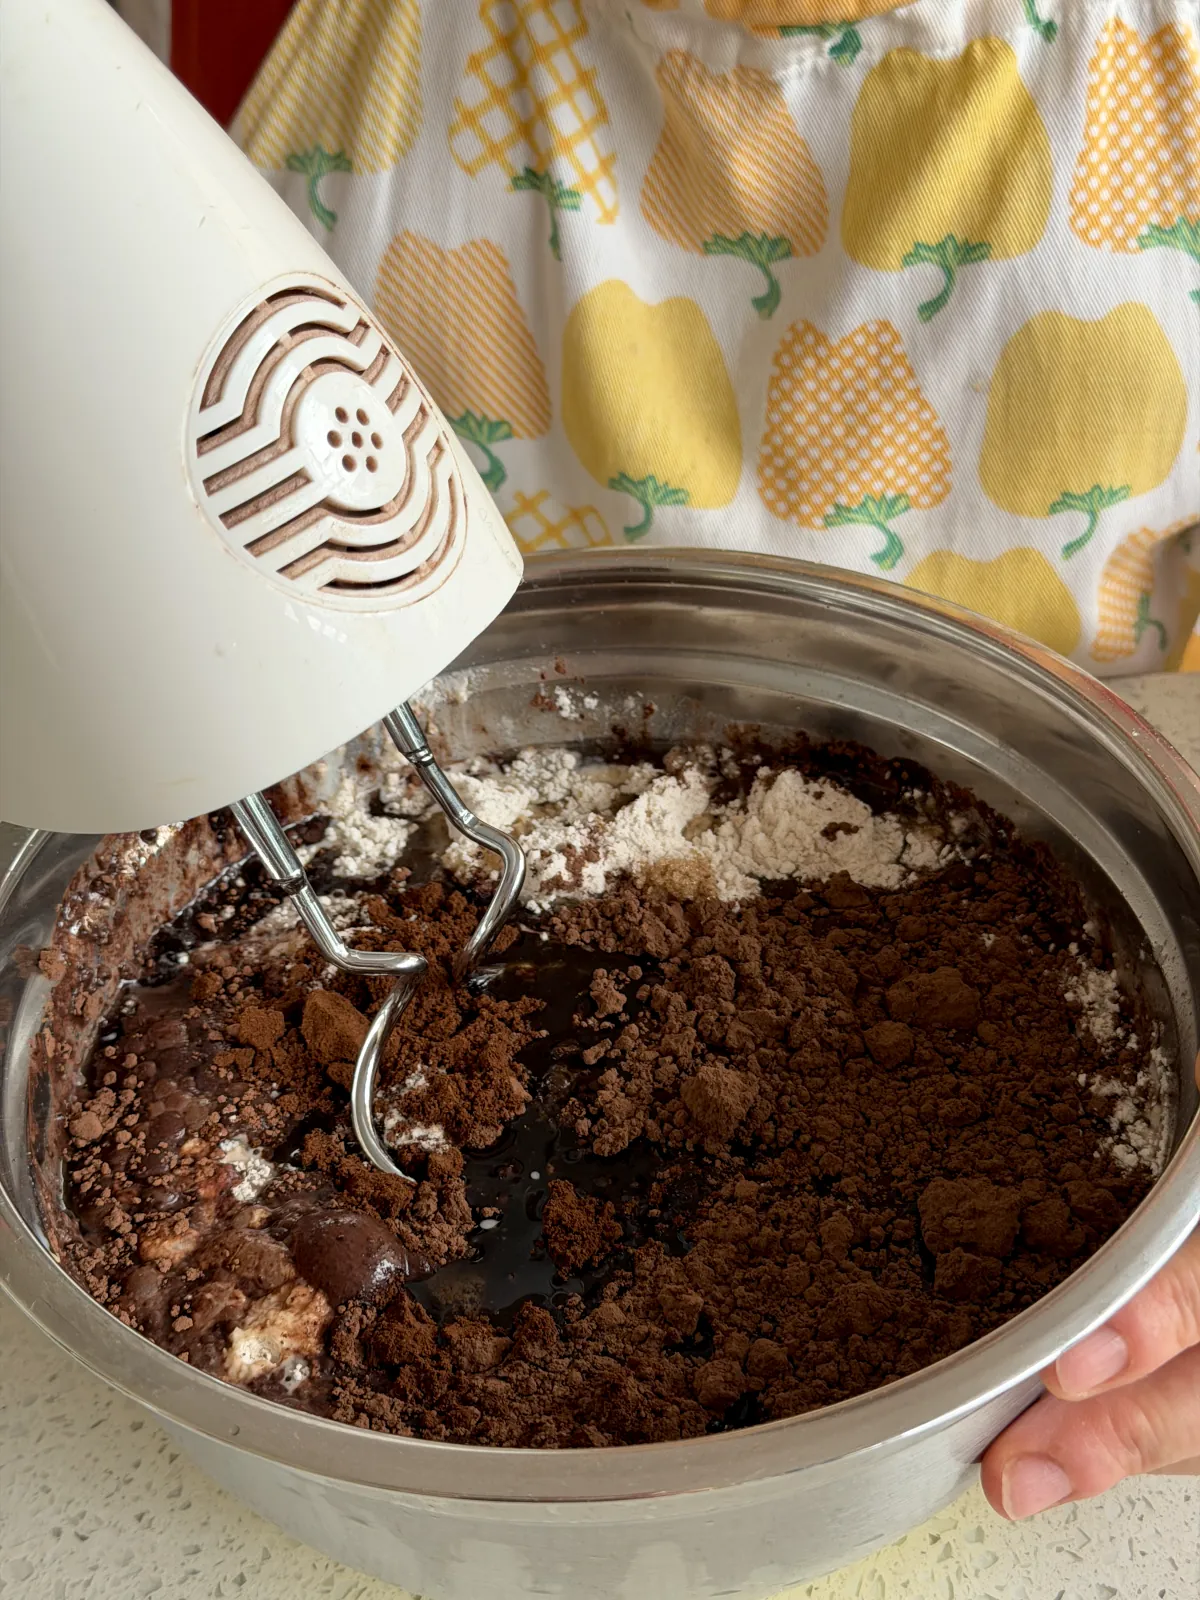
Recipes For Cakes: The Chocolate Variant
Rich, chocolatey, and just as simple as the vanilla version.
Make it your own: While delicious on its own, this batter is also a great canvas for add-ins because chocolate loves company! Feel free to fold in some fruit just before baking - sliced bananas or fresh raspberries are classic pairings that work wonderfully here. Pitted cherries or a little orange zest would also be fantastic additions.
Add flavor to the base:
To the ingredients listed above, add:
- 3 tablespoons of cacao powder.
Bonus Mocha twist: If you love a mocha flavor, add 1 tablespoon of instant or ground coffee along with the cacao!
Method:
- Preheat your fan-forced oven to 350°F (180°C).
- Place all base ingredients, including the cacao powder (and coffee, if using), into a bowl.
- Mix with your hand-held mixer until combined.
- Pour into your prepared 9-inch / 230 mm round pan.
Baking Instructions and Important Tips
Bake in your preheated fan-forced oven at 350°F (180°C) for 40–50 minutes.
Crucial Tip: Every Oven Is Different
Don't just rely on the timer. The depth of your batter and your specific oven will change cooking times.
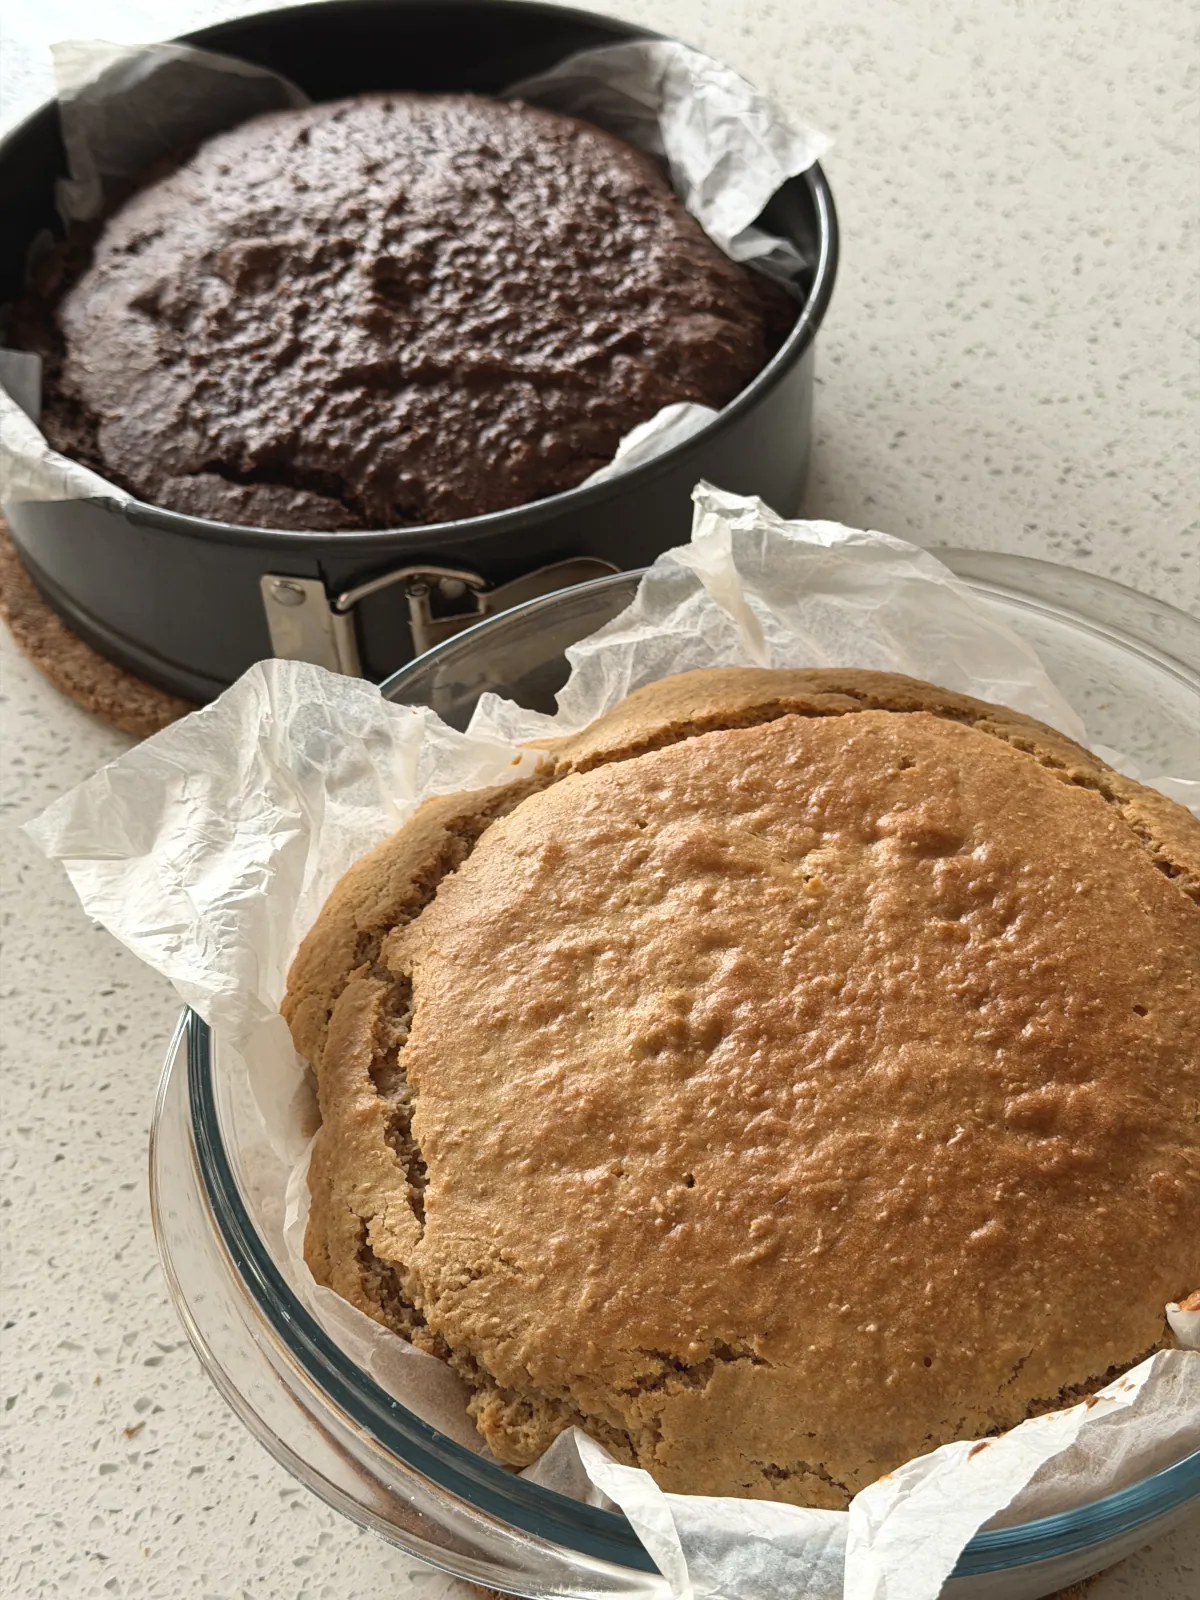
When I baked these two cakes together, my chocolate cake sat lower in the pan and was finished in exactly 40 minutes. My vanilla cake was taller and deeper, and required the full 50 minutes.
How to check for doneness:
Start checking your cake after about 20 minutes by inserting a bamboo skewer into the center. If it comes out with wet batter, it needs longer. Check every 10 minutes thereafter. The cake is done when the skewer comes out clean or with just a few moist crumbs.
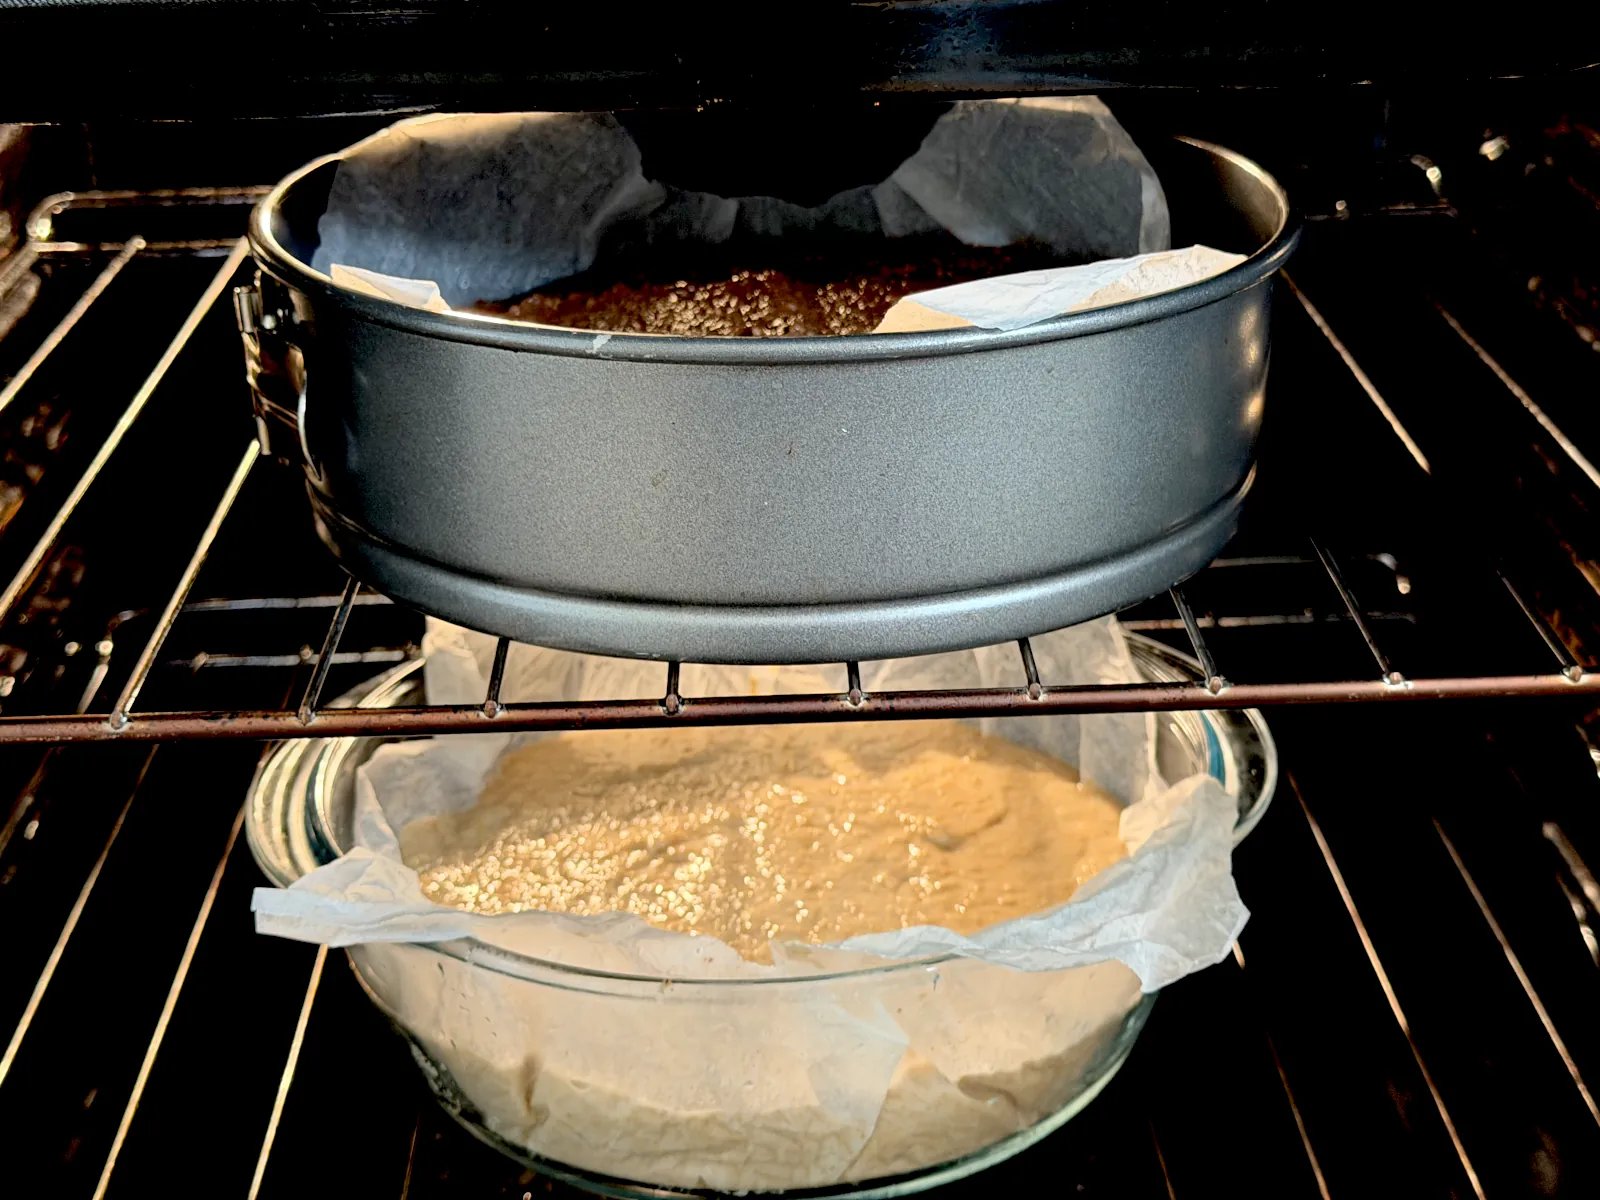
Baking two at once?
If you are baking both cakes at the same time on different levels in your oven, rotate the pans and swap their shelves halfway through baking to ensure they cook evenly.
Enjoy this slice of family tradition 🥮!
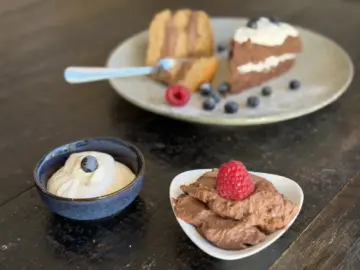
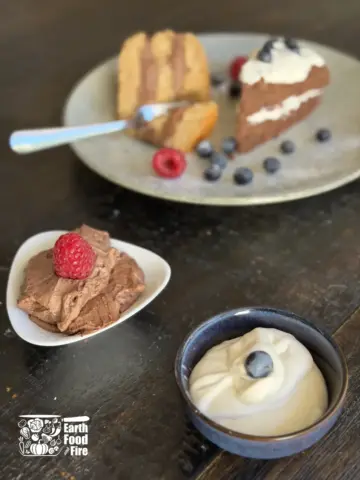
Once your cake is baked and completely cooled, it’s ready to be dressed up! We highly recommend pairing these simple sponges with our luxurious, no-cook dairy fillings to turn them into a real treat.
No-Cook Cake Cream Fillings
Made the recipe? Comment & Rate it below, then take a picture and tag us on Facebook. For more homemade cooking from scratch recipes, follow us on Facebook & Pinterest.
Recipe
Grandmother's Easiest One-Bowl Cake (Vanilla or Chocolate)
Equipment


Ingredients
Master Base Batter:
- 2 cups Self-rising flour (whole wheat recommended)
- ½ cup Sugar brown non-refined is the best
- ½ cup Sunflower oil (or other neutral oil)
- 1 cup Milk of your choice (plus an extra splash if needed—see tips)
Choose Your Variation (Add to base):
For Vanilla Classic:
- 1 pack (25g) Vanilla sugar OR
- 1 tablespoon Vanilla extract
For Rich Chocolate:
- 3 tablespoon unsweetened cocoa powder
- 1 tablespoon instant or ground coffee (Optional Mocha Twist)
Instructions
- Preheat your fan-forced oven to 180°C (350°F). Line a 9-inch round cake pan with parchment paper.
- In a large mixing bowl, add all the Master Base Batter ingredients.
- Add the ingredients for your chosen variation (either Vanilla OR Chocolate) directly into the same bowl.
- Using a hand-held electric mixer on low speed, mix until just combined. Do not overmix.
- Because whole wheat flour absorbs more liquid, the batter will be thick. If it seems too stiff, add a splash more milk until you reach a workable batter consistency.
- Pour batter into the prepared pan. Bake for 40–50 minutes.
- Start checking after 40 minutes by inserting a bamboo skewer into the center. The cake is done when the skewer comes out clean.
- Let the cake cool in the pan for 10 minutes before transferring to a wire rack to cool completely.
Notes
Nutrition
Nutrition info is auto-generated. This information is an estimate; if you are on a special diet, please use your own calculations.

Al Ghouse
Tried the chocolate one … came out really well. And that wet parchment trick, never seen that before, using it every time now!