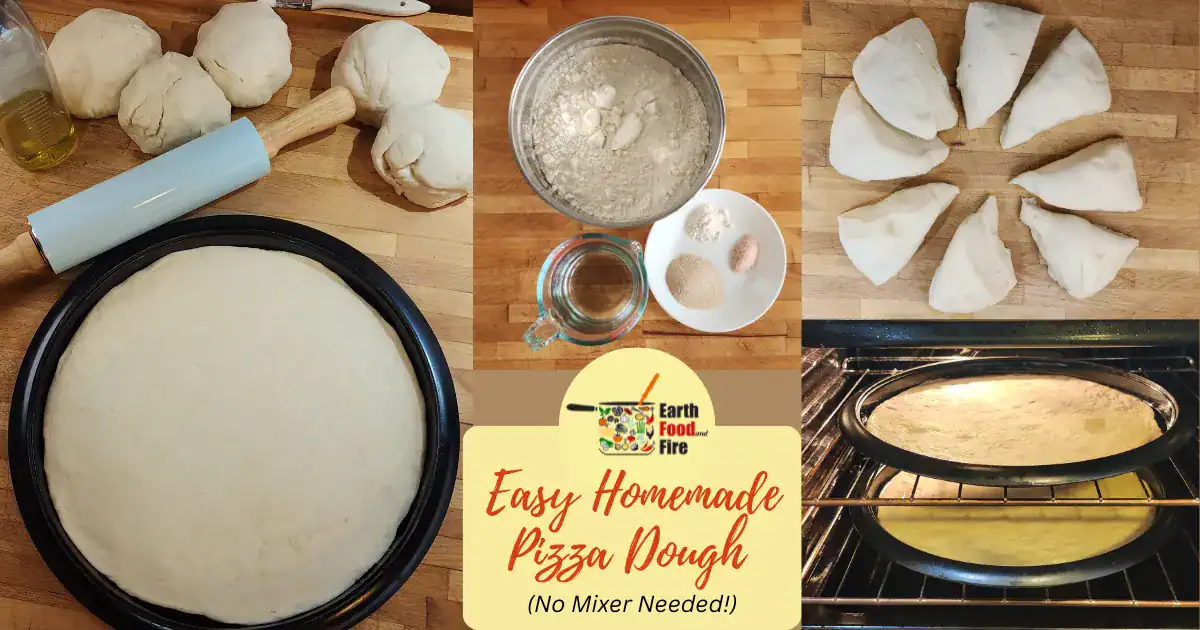
Baking homemade pizza is a relaxed way to spend a Saturday afternoon over good food at our home. Pizza is fun to make, always delicious, and everyone can have their favorite toppings. Let us share our favorite pizza dough recipe, which you can make by hand - no stand mixer required!
This is a simple and reliable method for making a great-tasting pizza dough that is somewhere between the very thin Italian style and the thick US-style pizza dough base.
The recipe is inspired by Australian Master Pizza Chef Theo Kalogeracos, the World Champion Pizza Maker of the 2010 International Pizza Challenge in Las Vegas, US. This makes it an Aussie take on Italian pizza dough worth trying in North America. (Pizza is indeed a worldwide phenomenon.)
This post contains affiliate links for which we may be compensated if a purchase is made through the links provided at no extra cost to you. For more information, please read our affiliate disclosure.
Table of Contents
A Quick Slice of Pizza History 🍕
The humble pizza is a staple in modern kitchens, but its roots go way back - thousands of years, in fact!
- Ancient beginnings: Flatbreads topped with oils and herbs were eaten by the ancient Egyptians, Greeks, and Romans. The idea of adding toppings to bread isn’t new - it’s just evolved!
- Naples, Italy - the birthplace of modern pizza: The pizza we know today - with tomato sauce, cheese, and toppings - was born in Naples in the late 1700s. It started as a humble street food for the working class.
- Royal approval: In 1889, pizza got a royal nod when Queen Margherita of Savoy visited Naples. A local pizzaiolo made her a pie with tomato, mozzarella, and basil to represent the Italian flag - and the Margherita pizza was born!
- Pizza goes global: Italian immigrants brought pizza to the United States in the early 1900s. After WWII, American soldiers returning from Europe helped spread the love for this delicious dish, and the rest is history.
Fun Pizza Facts
- World record: The largest pizza ever made was over 13,990 square feet - that’s bigger than a football field!
- Popular topping: Love it or hate it, pepperoni remains the most popular pizza topping in North America.
- Frozen firsts: The first frozen pizza hit grocery stores in the 1950s - changing dinner time forever.
- Pizza emoji 🍕: It was added to keyboards in 2010, and has been a top food emoji ever since.
Homemade Pizza Dough Recipe
This recipe is a reliable method for making a great-tasting pizza dough that is somewhere between the very thin Italian style and the thick US-style pizza dough base.
The beauty is in its simplicity - just a few ingredients and some time to knead the dough. That said, prepare the pizza dough ahead, as it takes up to half a day to rise and develop flavor and texture.
We love to prebake the pizza dough base and then either freeze it for later or have it ready for the party, where everyone can add their favorite pizza toppings.
Ingredients
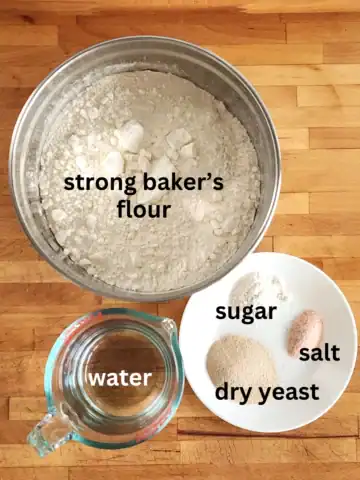
- 2 ¼ pounds / 1 kg strong baker's flour (12–15% protein)
- 4 teaspoons / 20g dry yeast (or 4 teaspoons / 40g fresh yeast)
- 2 teaspoons / 10g salt (we use Himalayan pink salt)
- 2 teaspoons / 10g sugar
- 2.5 cups / 600 mL of cold water
What is Strong Baker’s Flour?
Strong baker’s flour is a high-protein wheat flour, typically containing 12–15% protein. It’s also labeled as "bread flour" in grocery stores, and it’s our go-to choice for recipes that need a sturdy dough, like pizza, focaccia, or artisan bread.
The higher protein content means it has more gluten-forming potential, which gives the dough elasticity and chew, and helps it rise well. The dough will also better hold its shape during baking and create more texture and crust, exactly what we like for our homemade pizza bases.
You can use regular all-purpose flour or the finest grind 00 flour instead. Your dough will still work, but the texture may be softer and less chewy. We believe the strong baker's flour, or bread flour, is what adds the special taste and texture to this pizza dough recipe.
Instructions
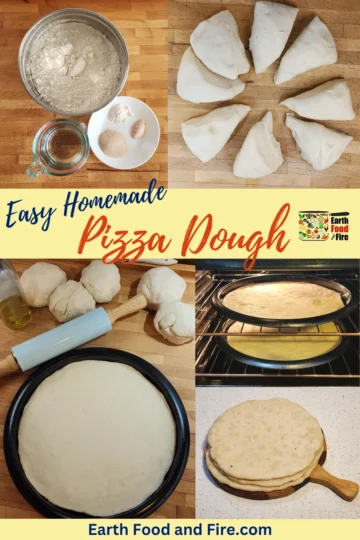
1. Mix the pizza dough ingredients with water
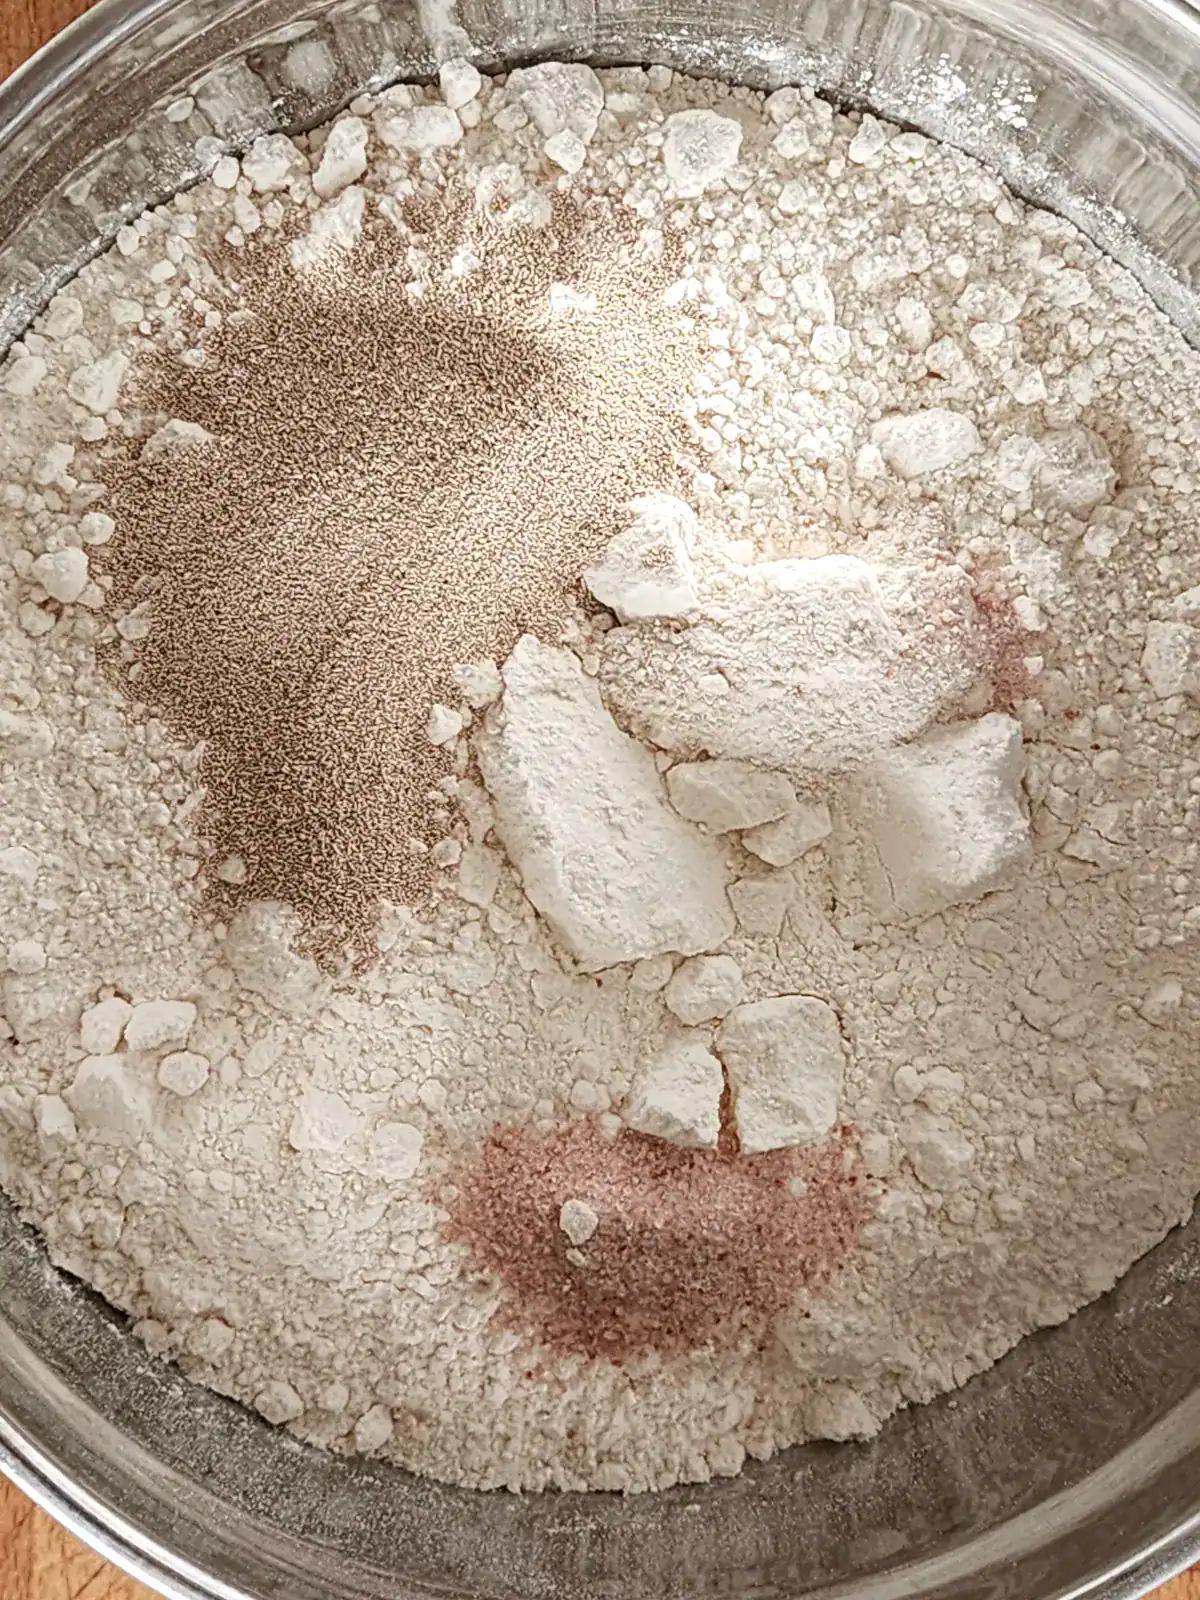
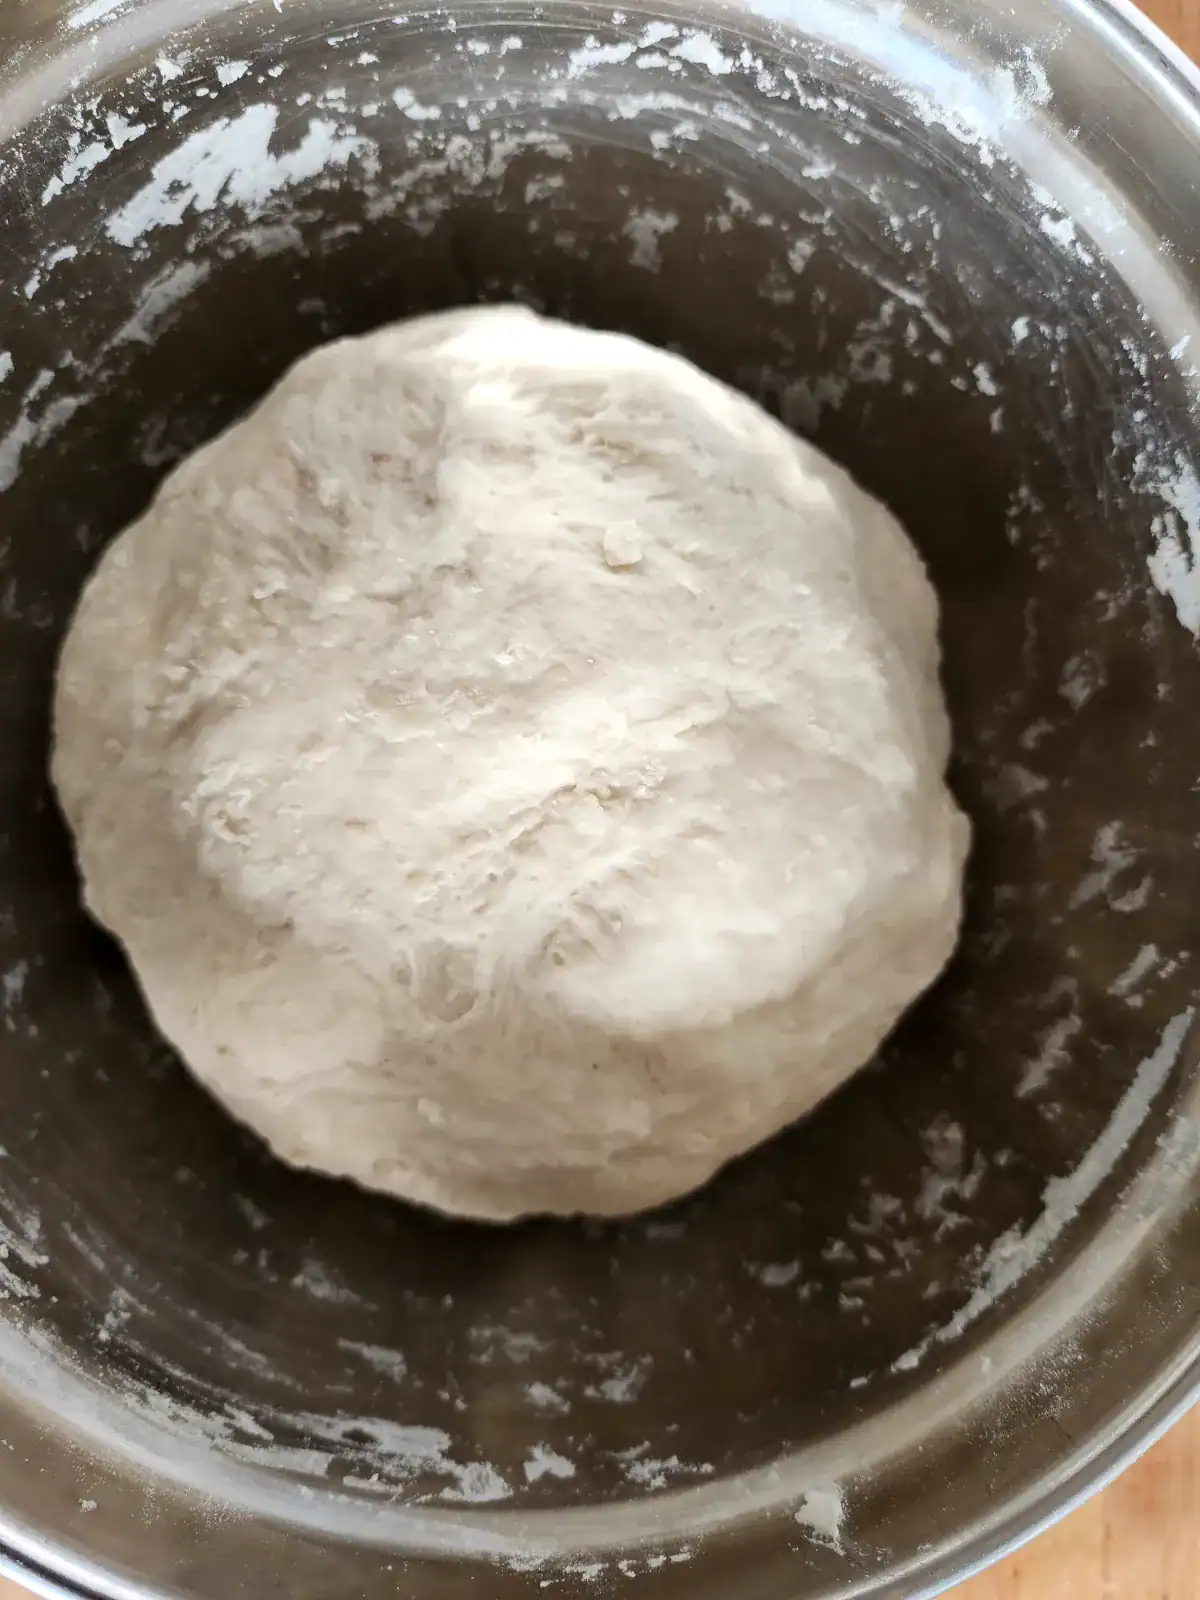
Combine the flour, yeast, salt, and sugar in a large bowl. Mix everything together, then form a well in the centre of the flour.
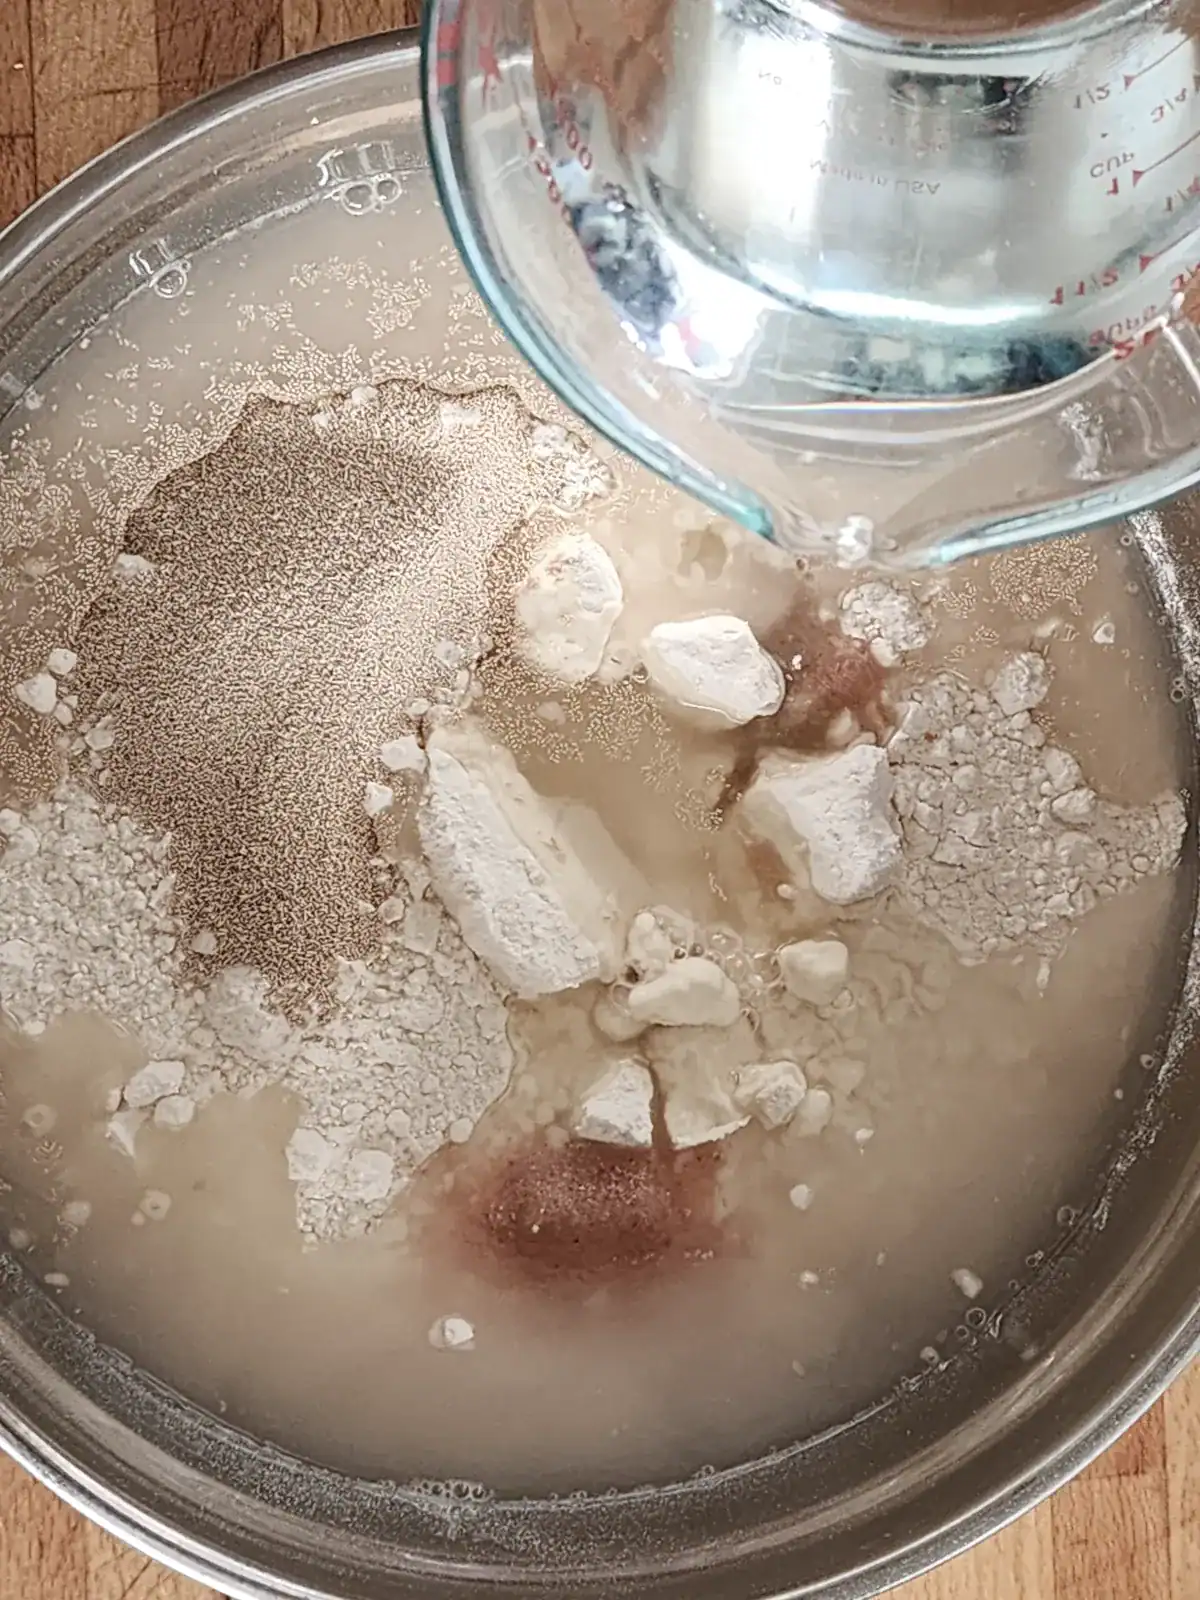
Pour 2.5 cups / 600 mL of the cold water into the well and gradually start incorporating it into the flour by gently pushing the edges of the flour into the water. Use a wooden spoon and later your fingers to mix the dough until everything combines nicely without lumps - this should take about 3–4 minutes.
Note: Always use cold or room temperature water - never warm - to avoid activating the yeast too quickly.
If the dough feels too dry even after a few minutes of mixing, you can add a little bit more water - no more than ¼ cup (60 ml), and only as needed. It's always easier to add more water than to fix a dough that's too sticky.
2. Rest the dough for 10 minutes
Let the pizza dough rest for 10 minutes - this pause allows the gluten to relax and hydrate, making the dough more elastic and easier to knead.
3. Knead the dough for 10 minutes
Once rested, begin kneading the dough using the palms and heels of your hands. Press and push the dough away from your body, then turn it a quarter turn and repeat. Continue kneading for about 10 minutes, or until the dough forms a smooth, elastic ball.
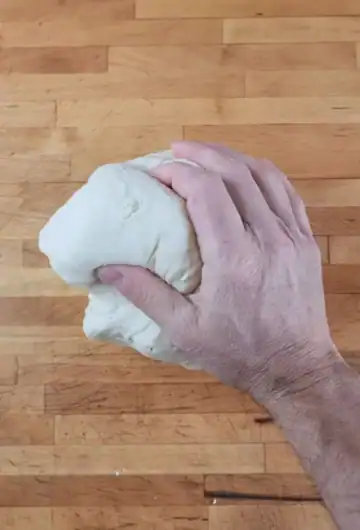
Now, kneading for 10 minutes will give you a pretty good workout. If the full ball of dough is hard to manage for you, you can divide it in half and knead it in two batches. Just give it the love it needs, and work the dough into a smooth texture that stretches easily when spread thin.
Tip: A well-kneaded dough will feel slightly springy and have a smooth surface - it should look almost like plasticine.
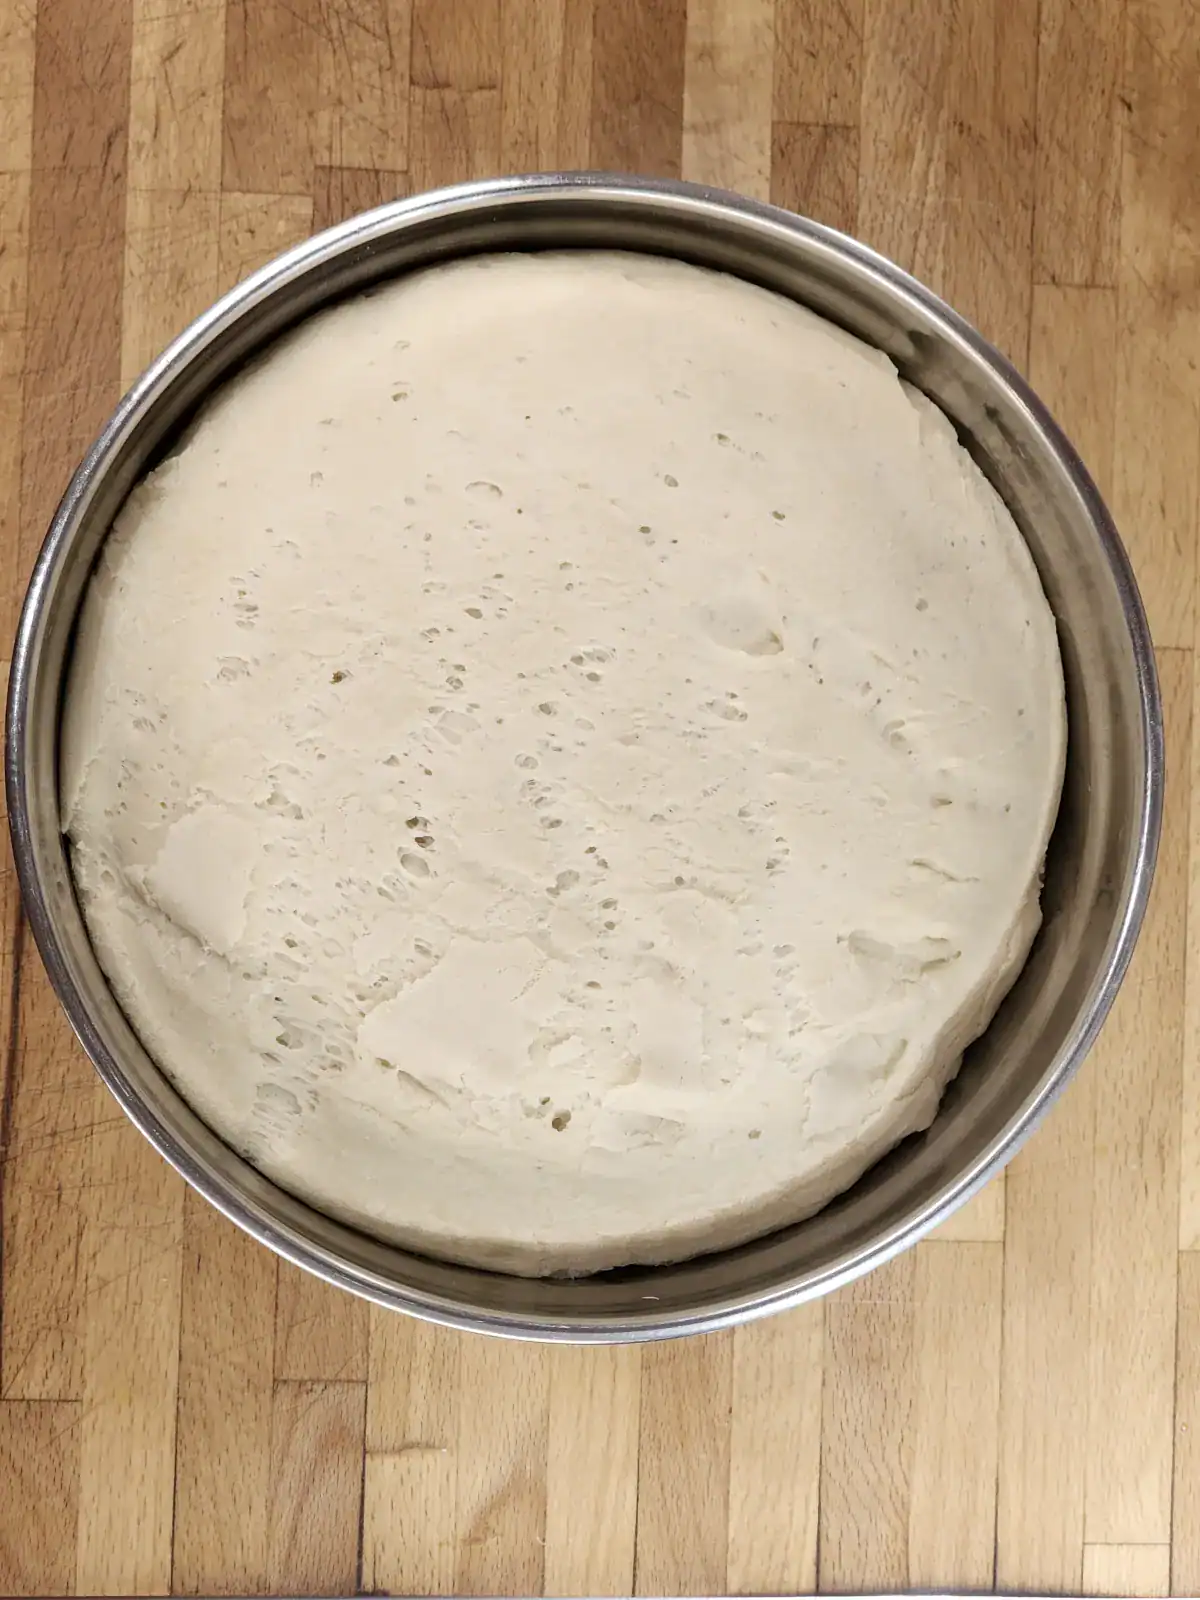
4. Let the pizza dough rise
Put the dough in a bowl and let it rise slowly. On a warm day, this will take about 1-1.5 hours. In cooler weather, let it rest for 2-3 hours (or even half a day). The dough develops better flavor and texture as it rises.
We use a large bowl with a lid to keep the dough from drying. If you do not have a bowl with a lid, covering it with a kitchen towel or plastic wrap (Saran wrap) works as well. In the winter, we often place the bowl in a sunny spot by the window to take advantage of the natural warmth.
On overcast days, we let the dough rise in our oven on the "Defrost" setting, which keeps the temperature around 90°F (30°C) - perfect for a gentle, consistent proof.
If your oven doesn’t have that setting, just set it up on temperature 80°F to 100°F (27°C to 38°C). Or turn your oven to the lowest temperature briefly for about 2 minutes, then switch it off before placing the dough inside to rise in the residual warmth.
5. Preheat the oven
Once the dough has risen, preheat your oven to 430°F / 220°C (we use the "Pizza" setting on ours). The oven will usually be ready by the time you finish making the pizza bases.
Note: The instructions above are for a standard kitchen oven. If you have a dedicated pizza oven, follow the instructions that came with it - some ovens go up to 950°F / 500°C.
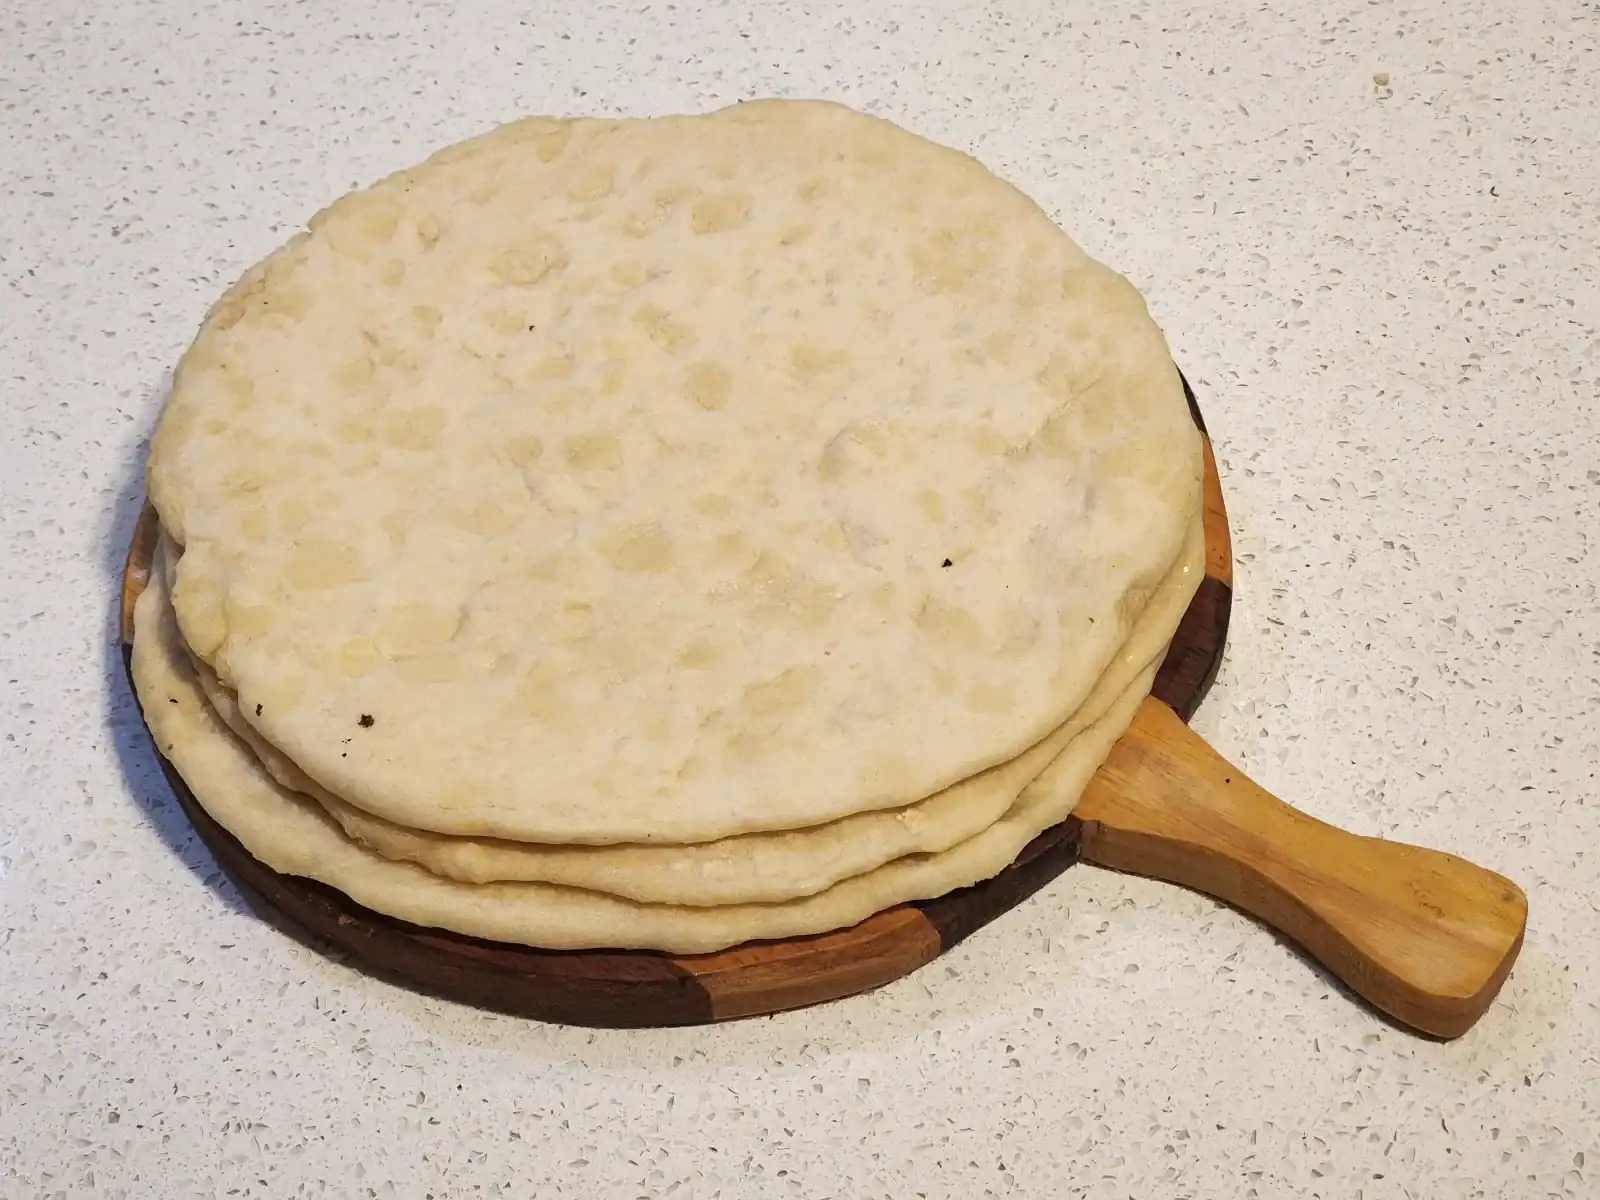
6. Divide the dough and roll it out
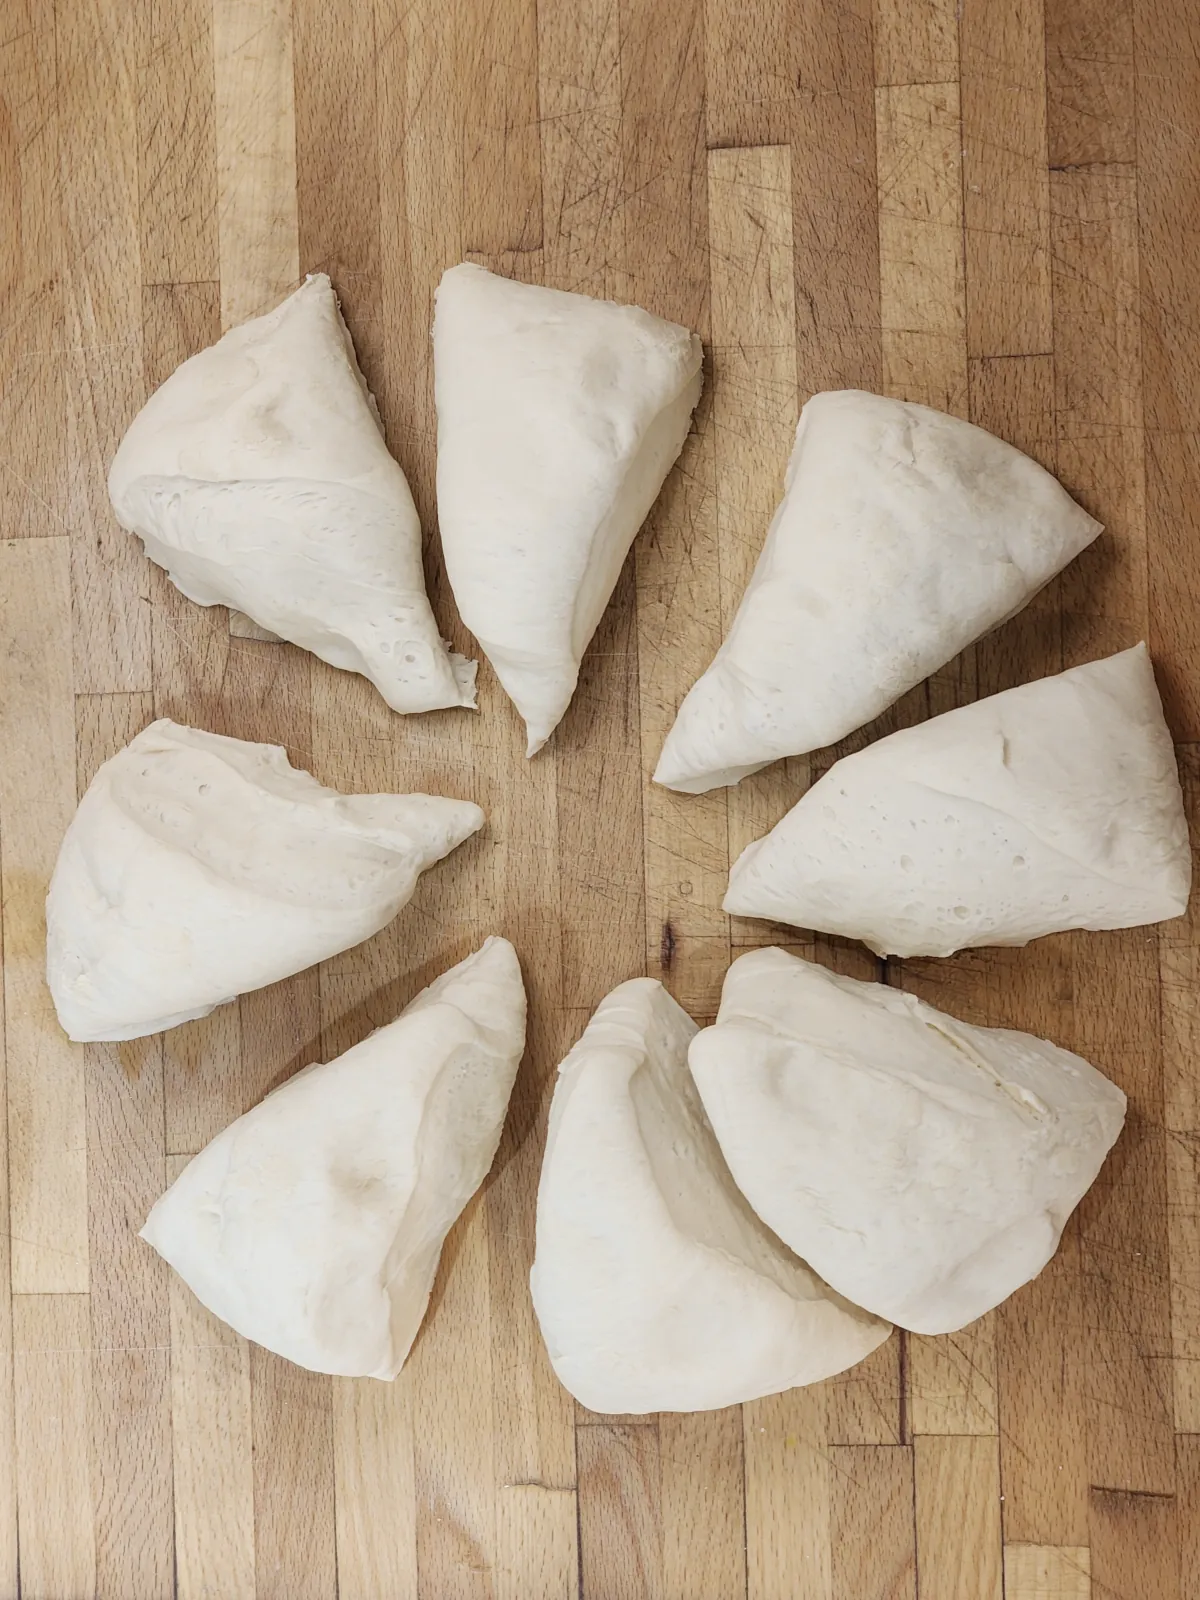
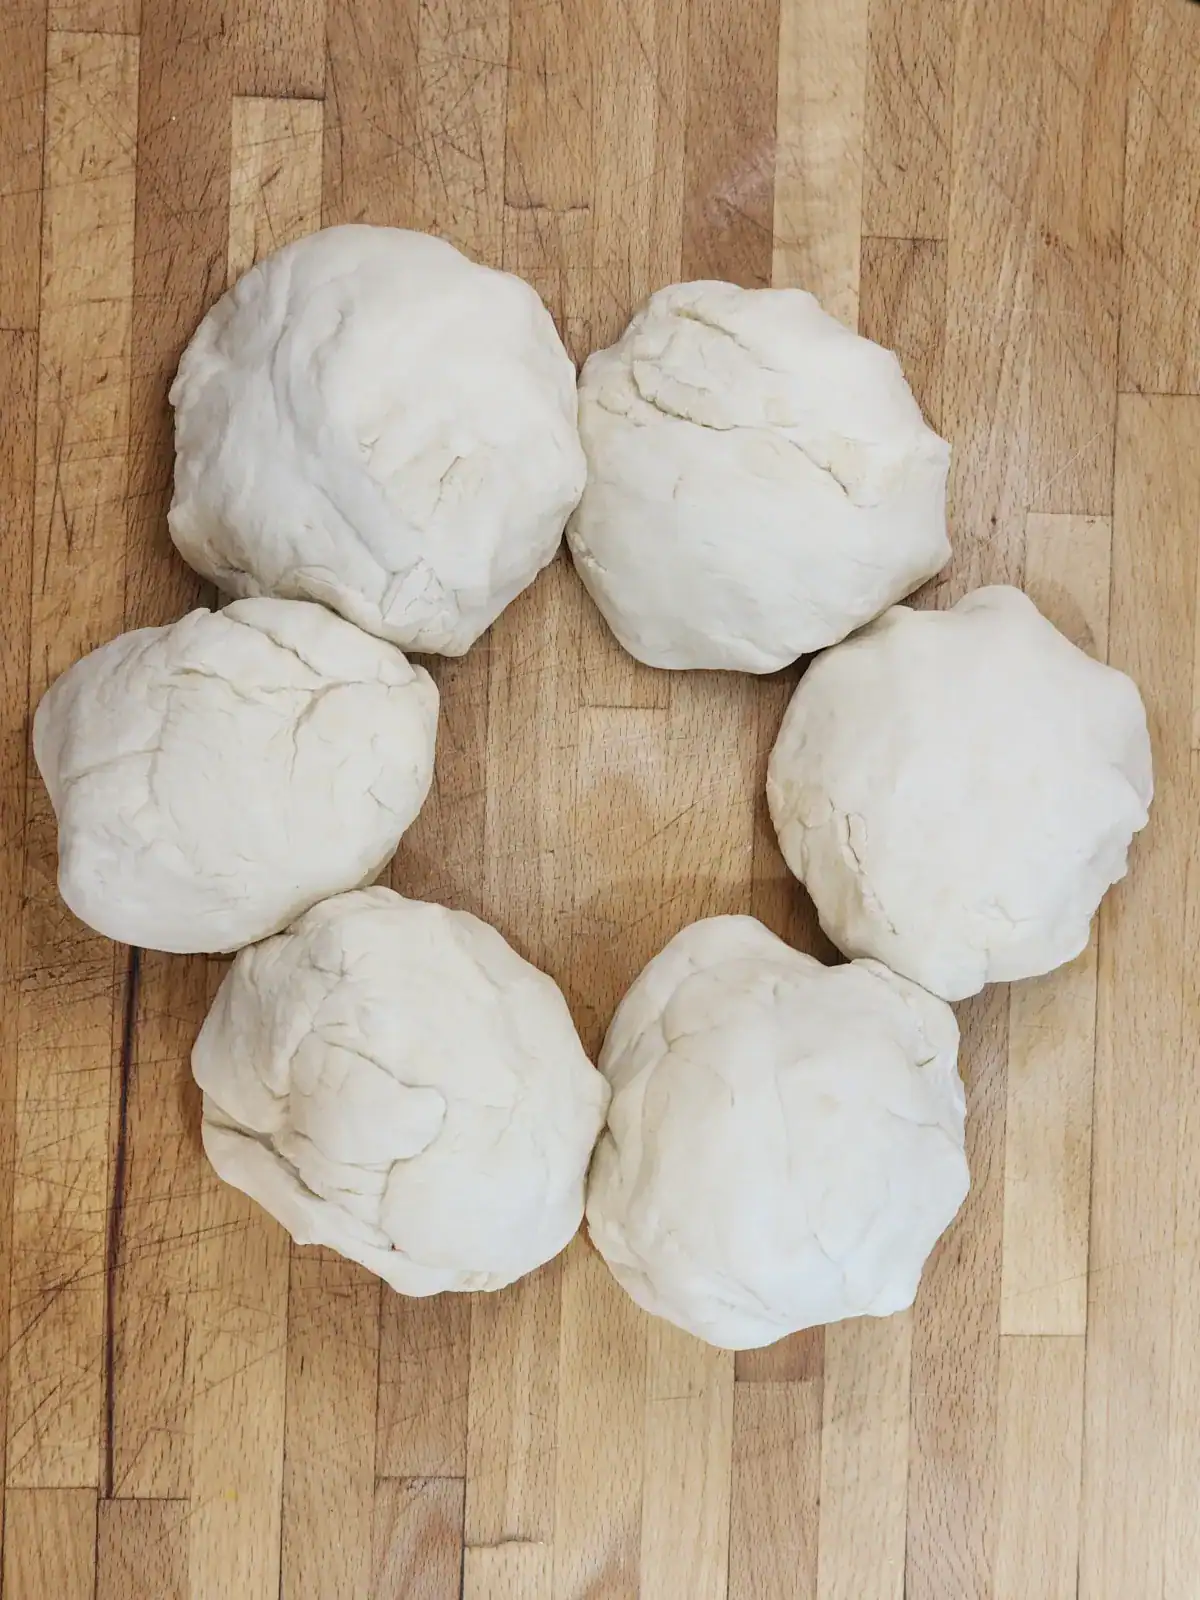
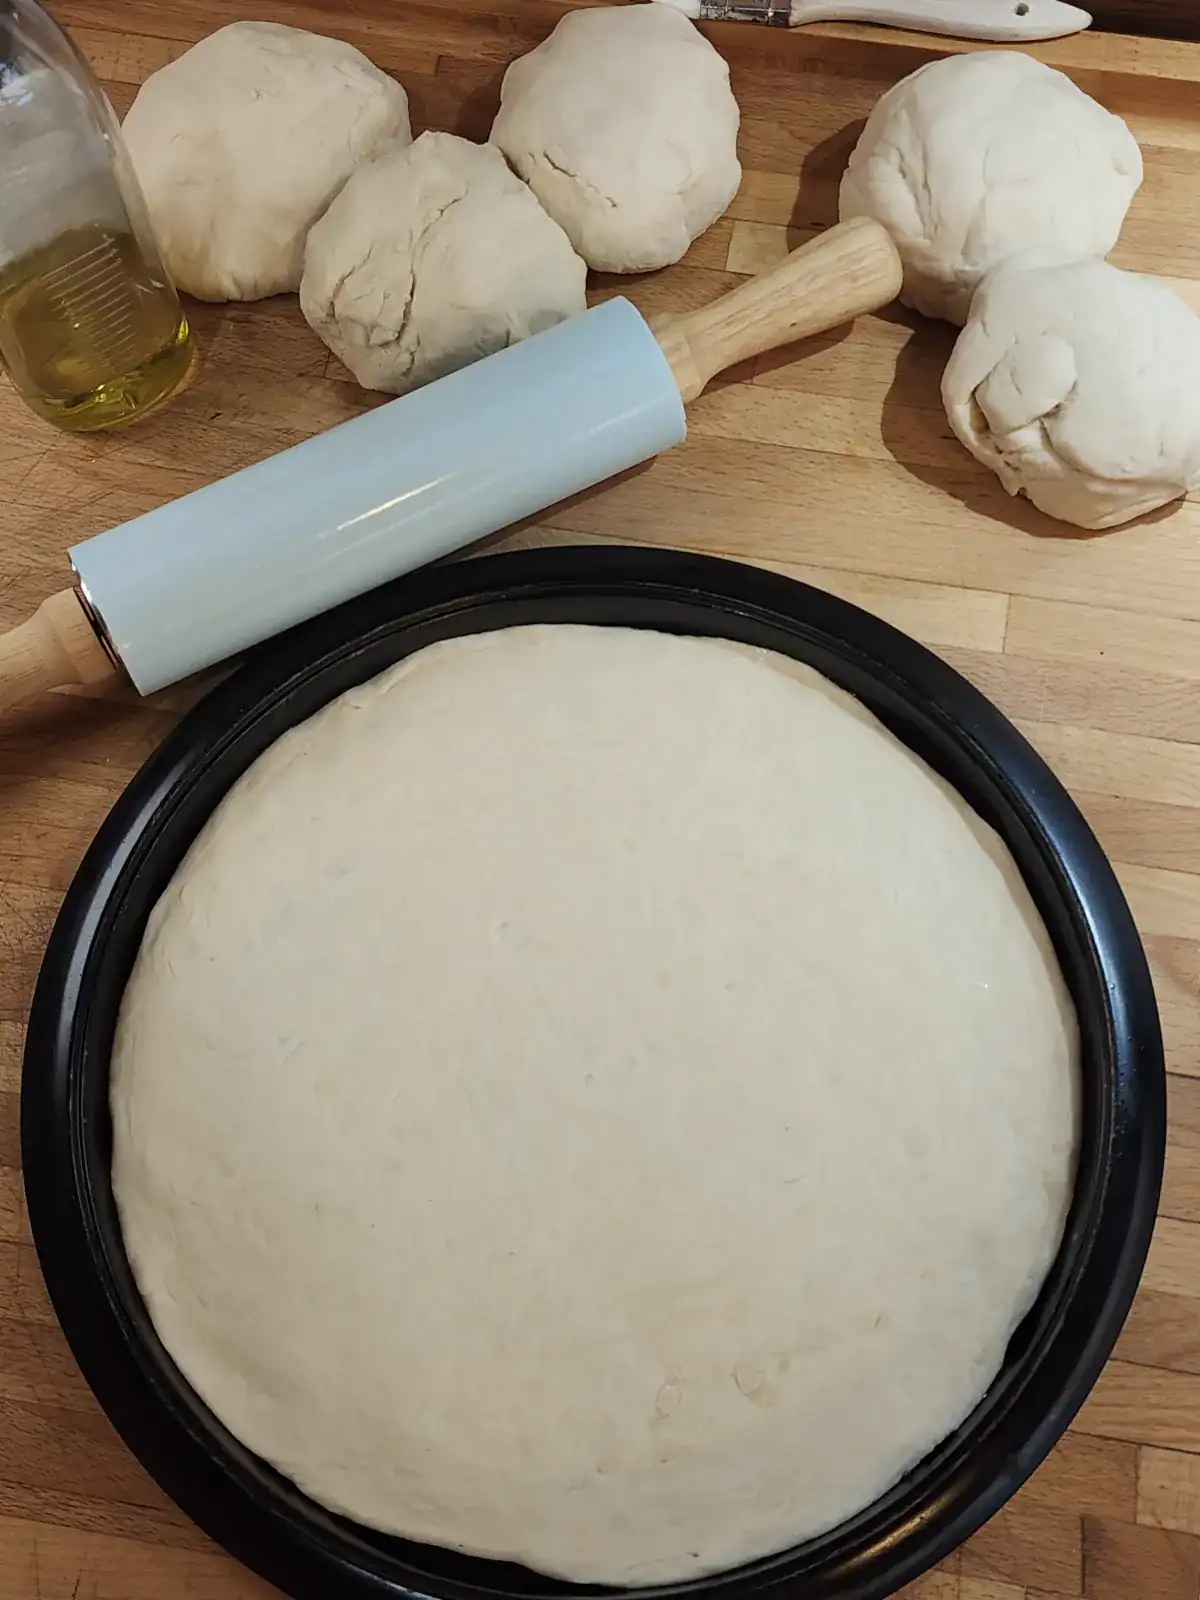
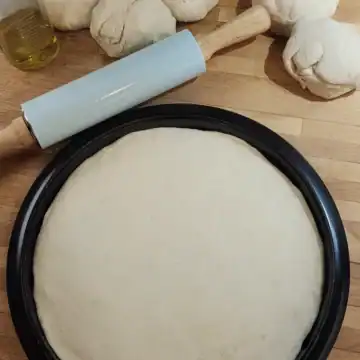
Take the pizza dough out of the bowl and shape it into a ball. Divide it into 6-8 equal portions. Dividing the amount into eight pieces will give thinner Italian-style pizza bases. We like to split this amount into six pieces for a slightly thicker base and crust. Try what tastes best for you.
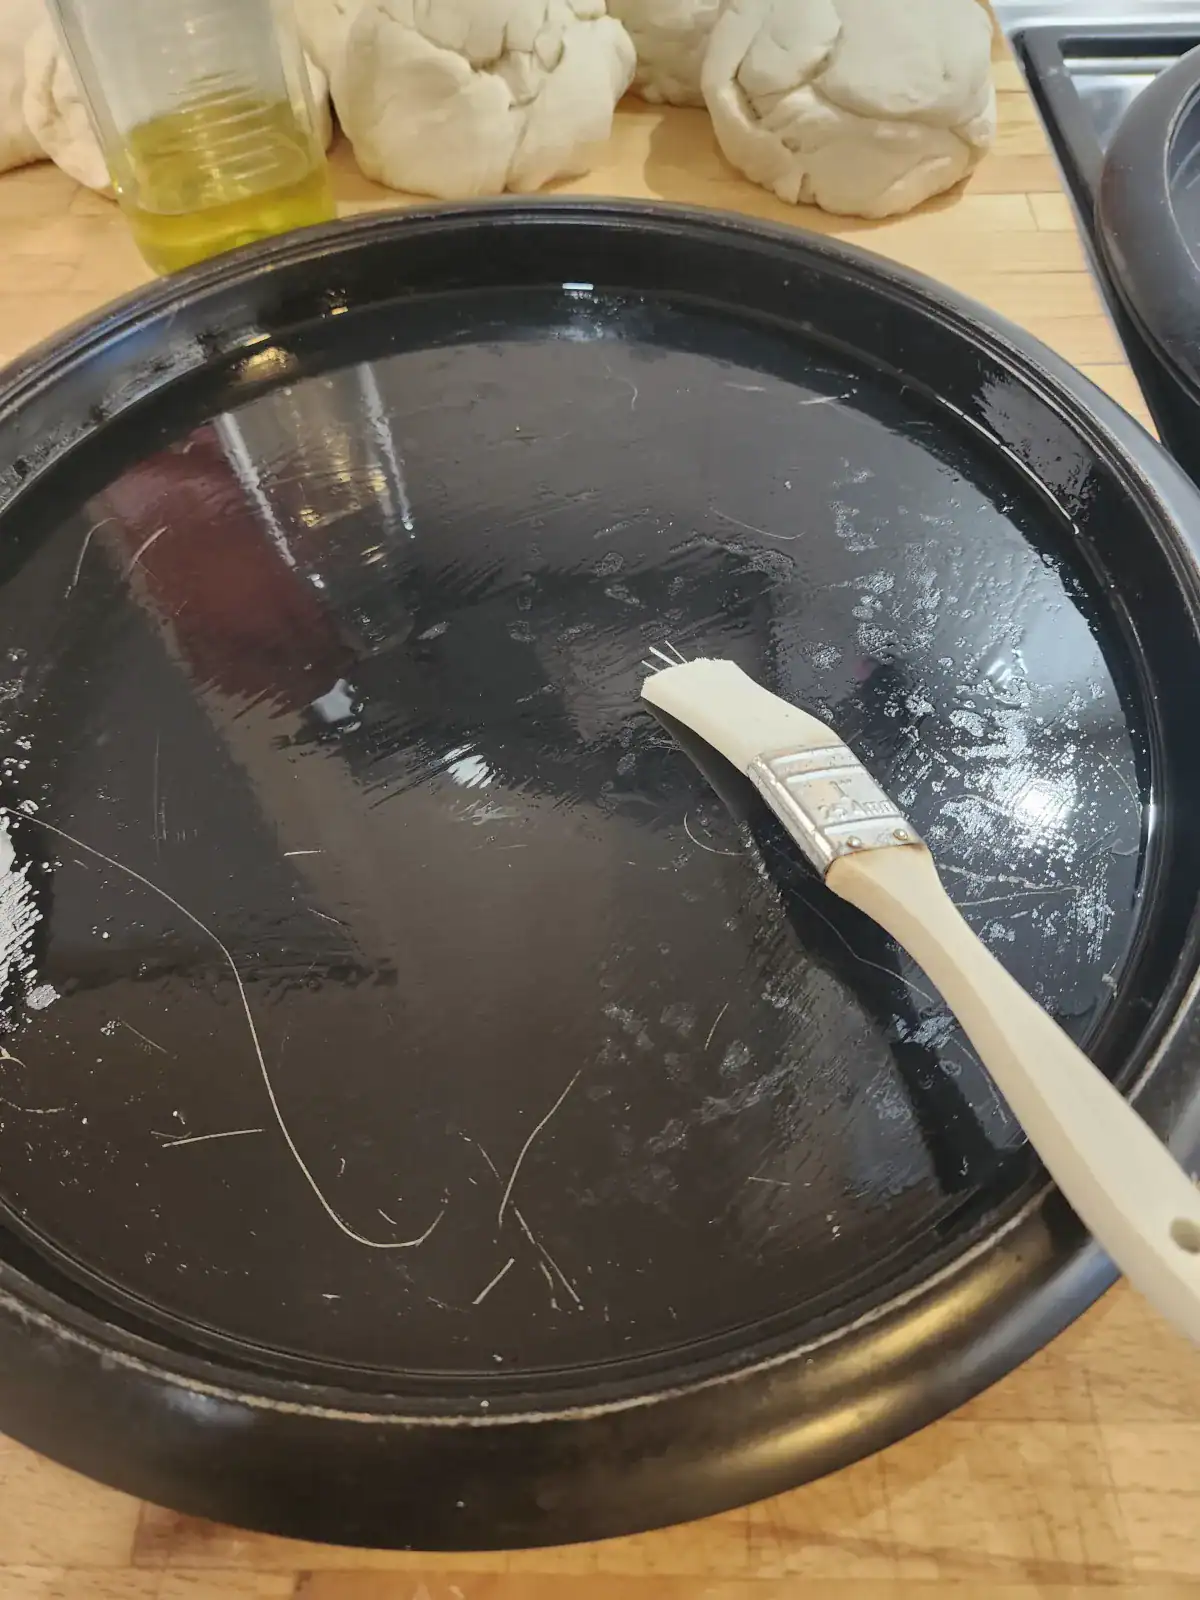
Lightly oil the pizza tray to prevent the dough from sticking.
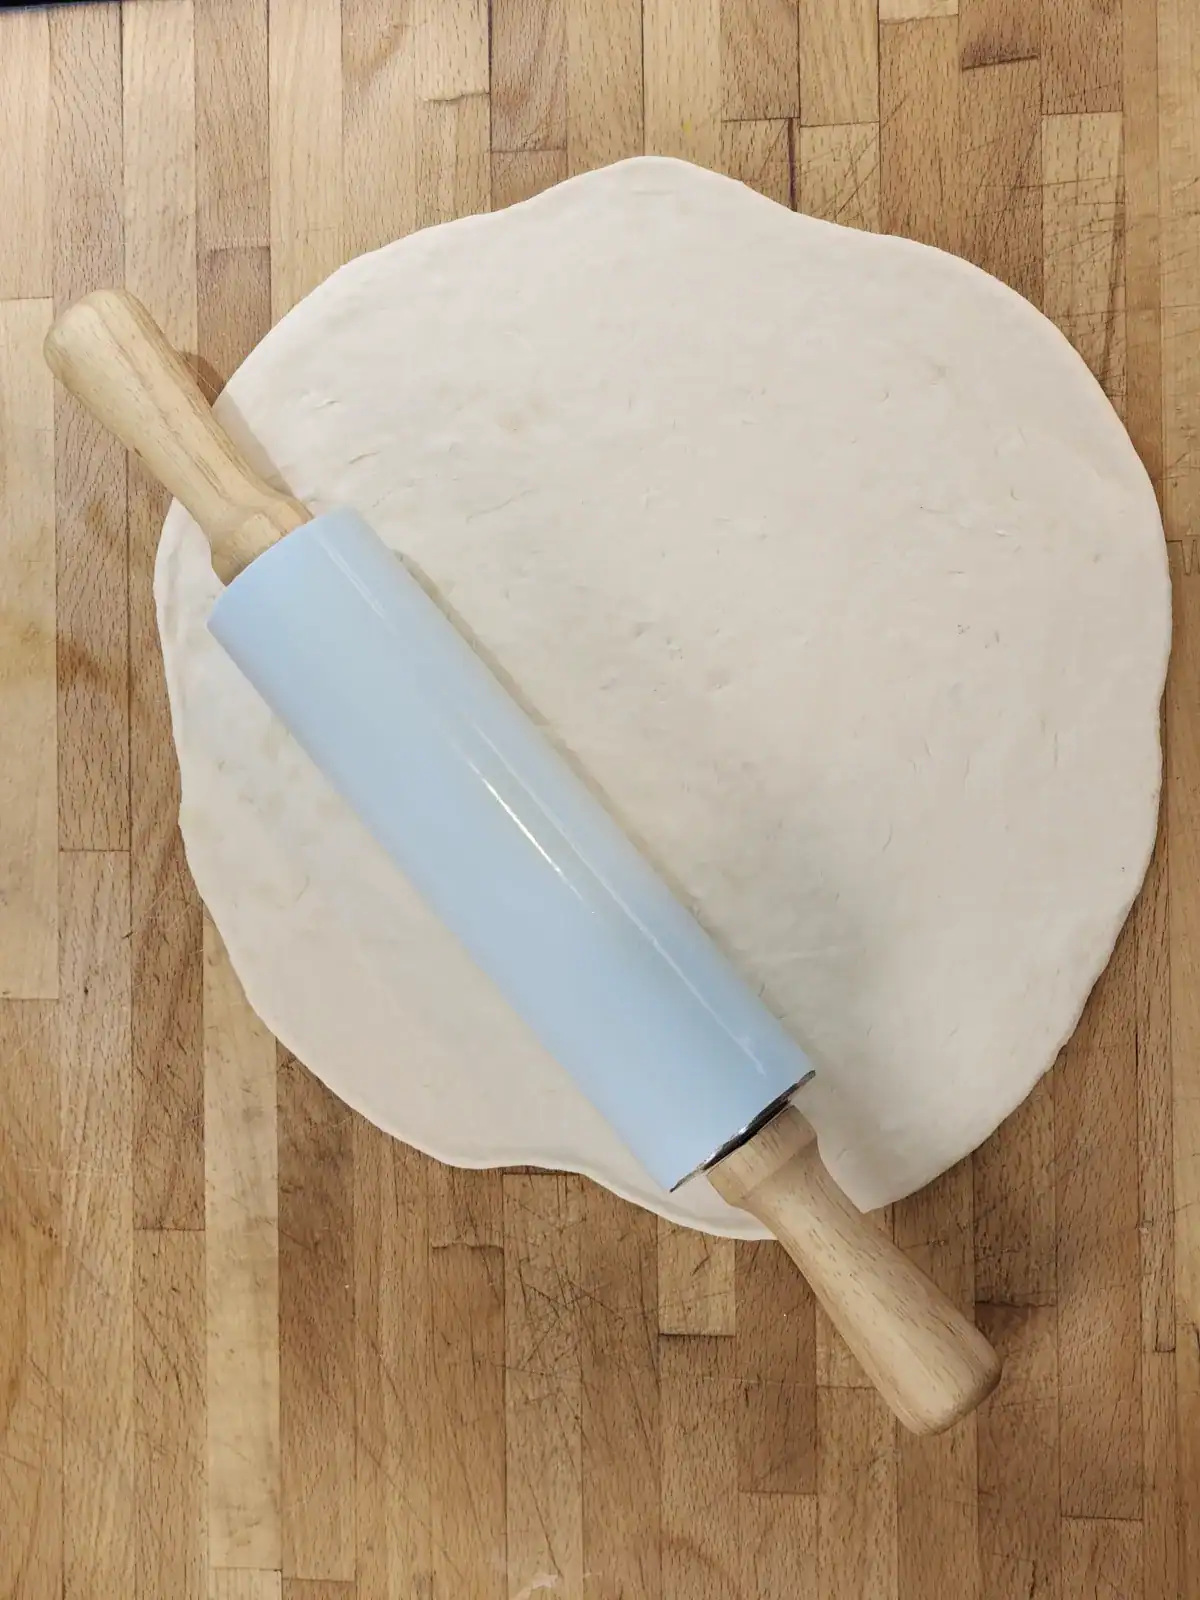
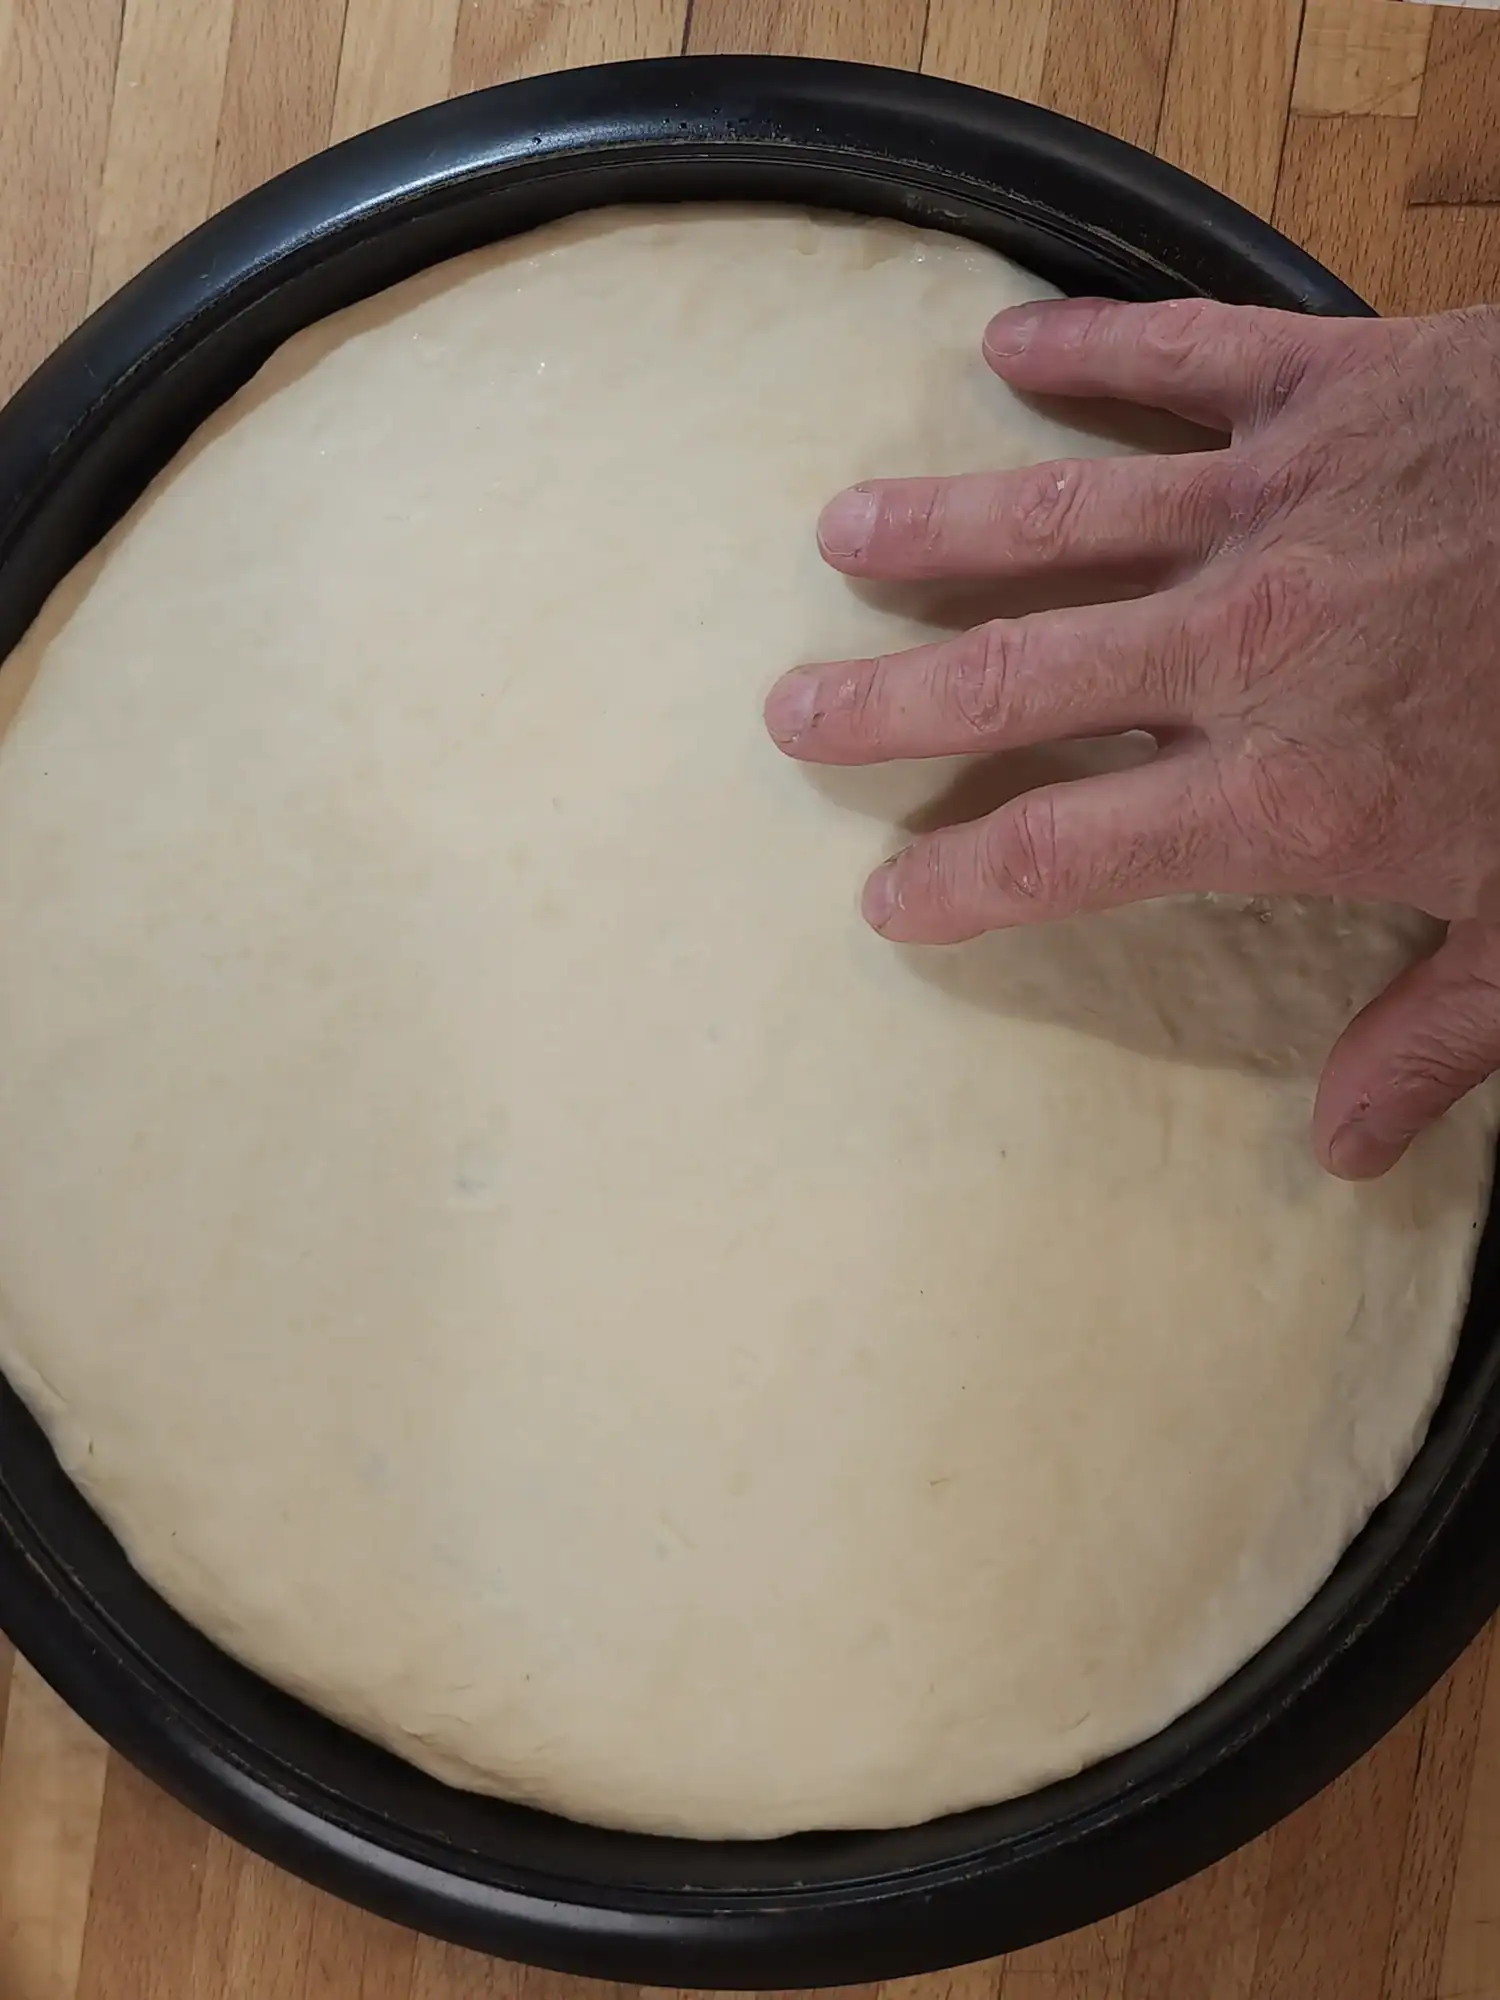
Then, use a rolling pin to flatten each piece into a circle on a lightly floured surface. Transfer the dough onto the tray and stretch it out by hand to fill the tray completely. If you like crusty ends, you can also thicken the edges.
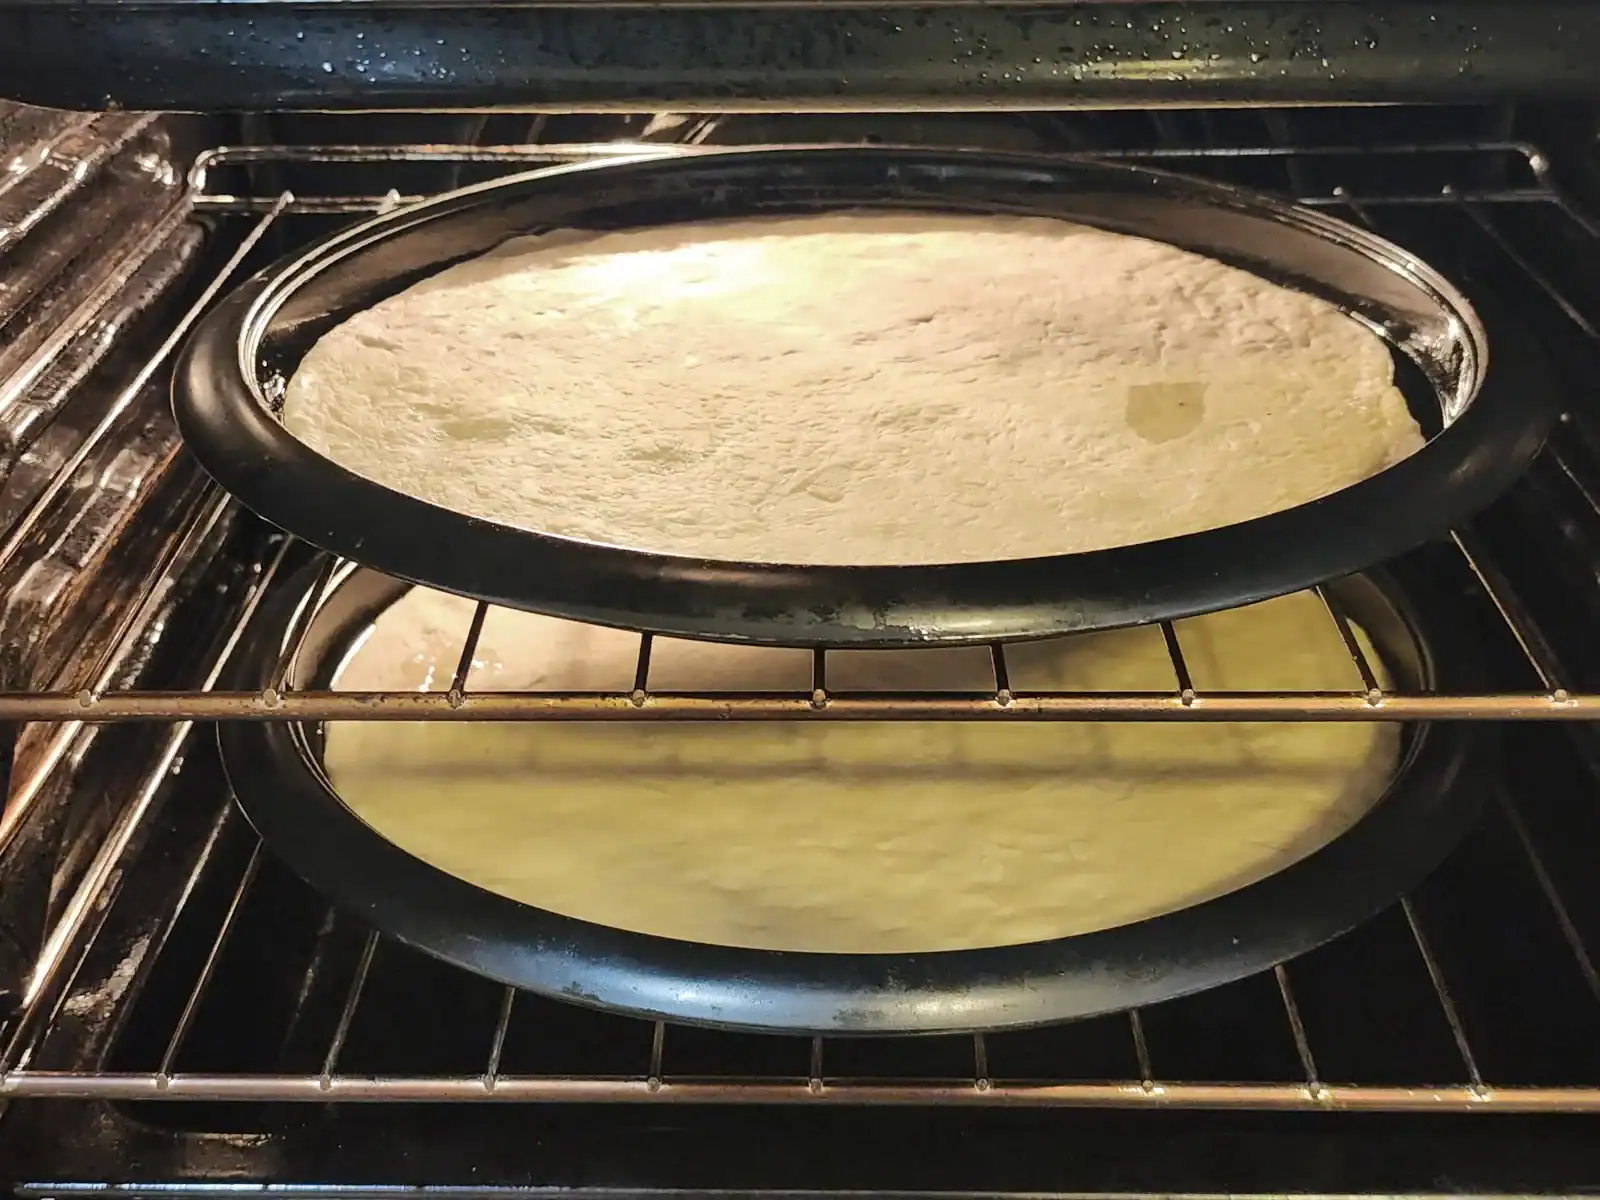
7. Prebake the pizza base
Place the trays in the oven and prebake the pizza bases for 3 minutes. This step helps create a sturdy base that’s easy to top and can be frozen for later if desired - perfect for quick weeknight dinners.
Note: The instructions above are for a standard kitchen oven. If you have a dedicated pizza oven that heats up to more than 430°F / 220°C, you will need to watch the dough and shorten the time.
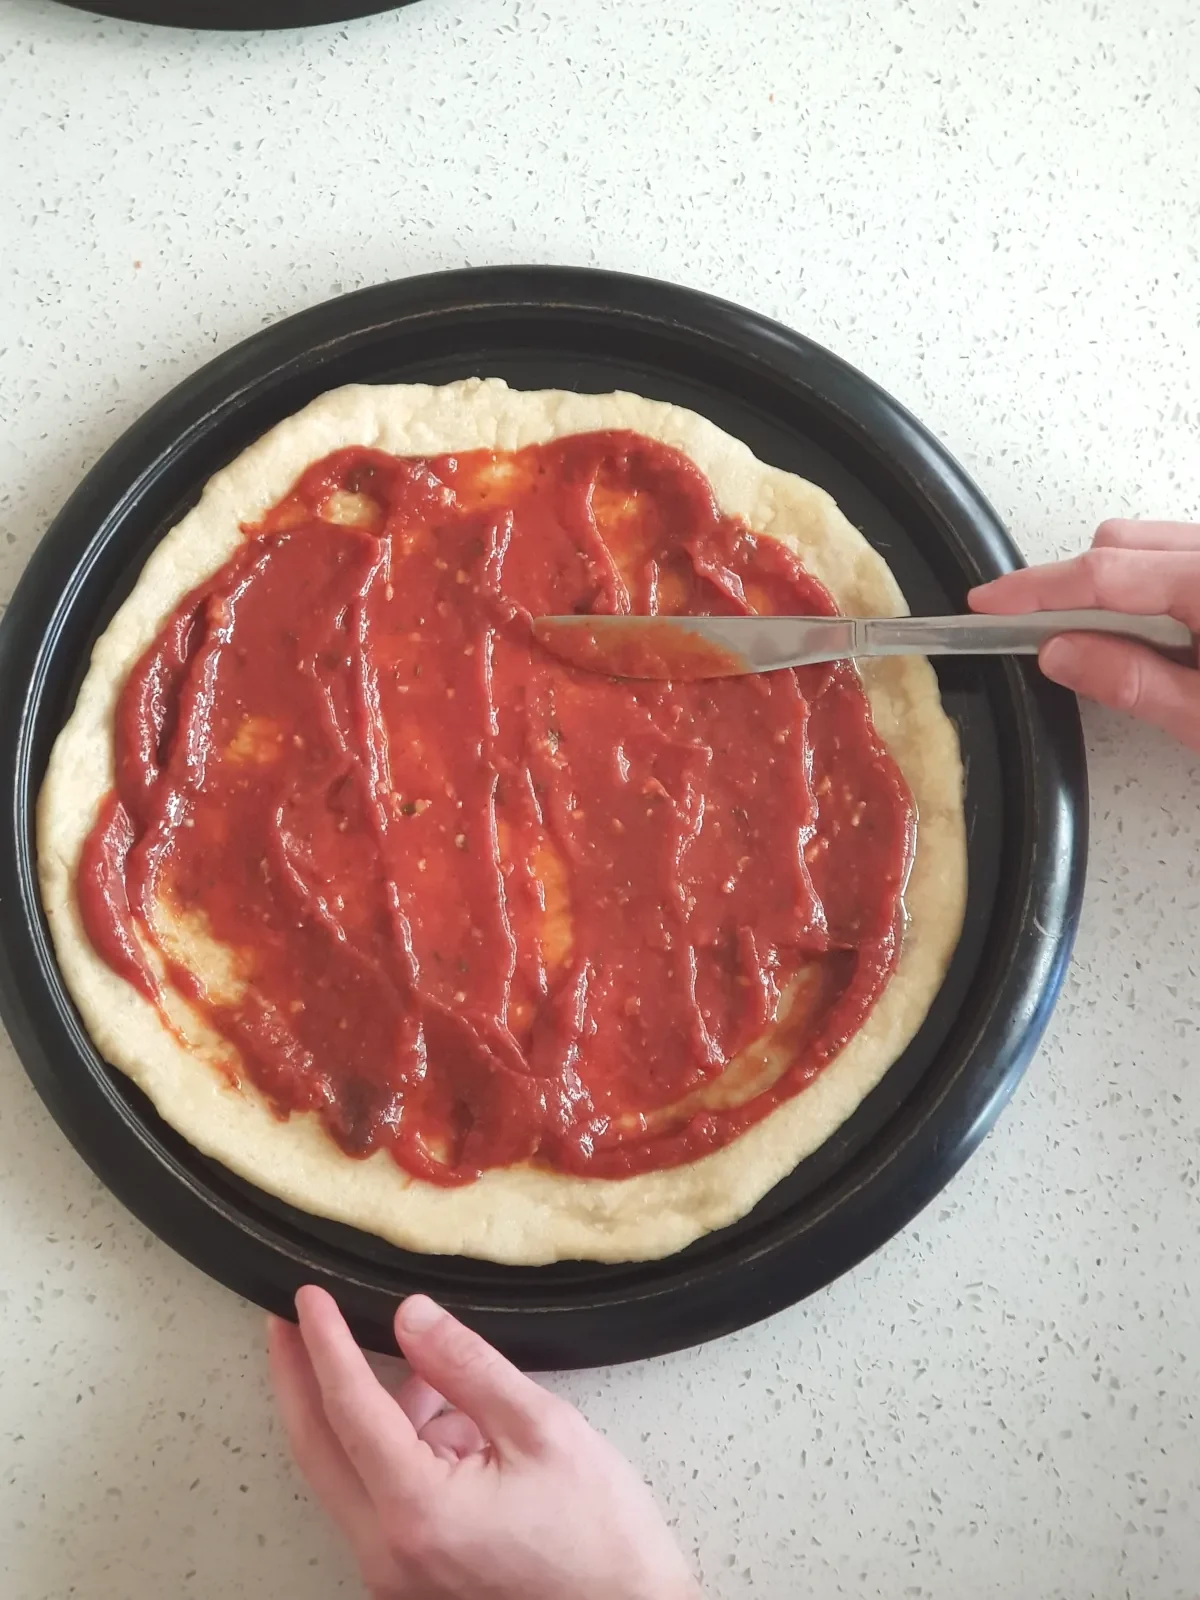
6. Add toppings and bake
Once prebaked, remove the bases from the oven. Watch out for the hot pizza pan edges - wear mittens or let the prebaked base cool down before you start with toppings.
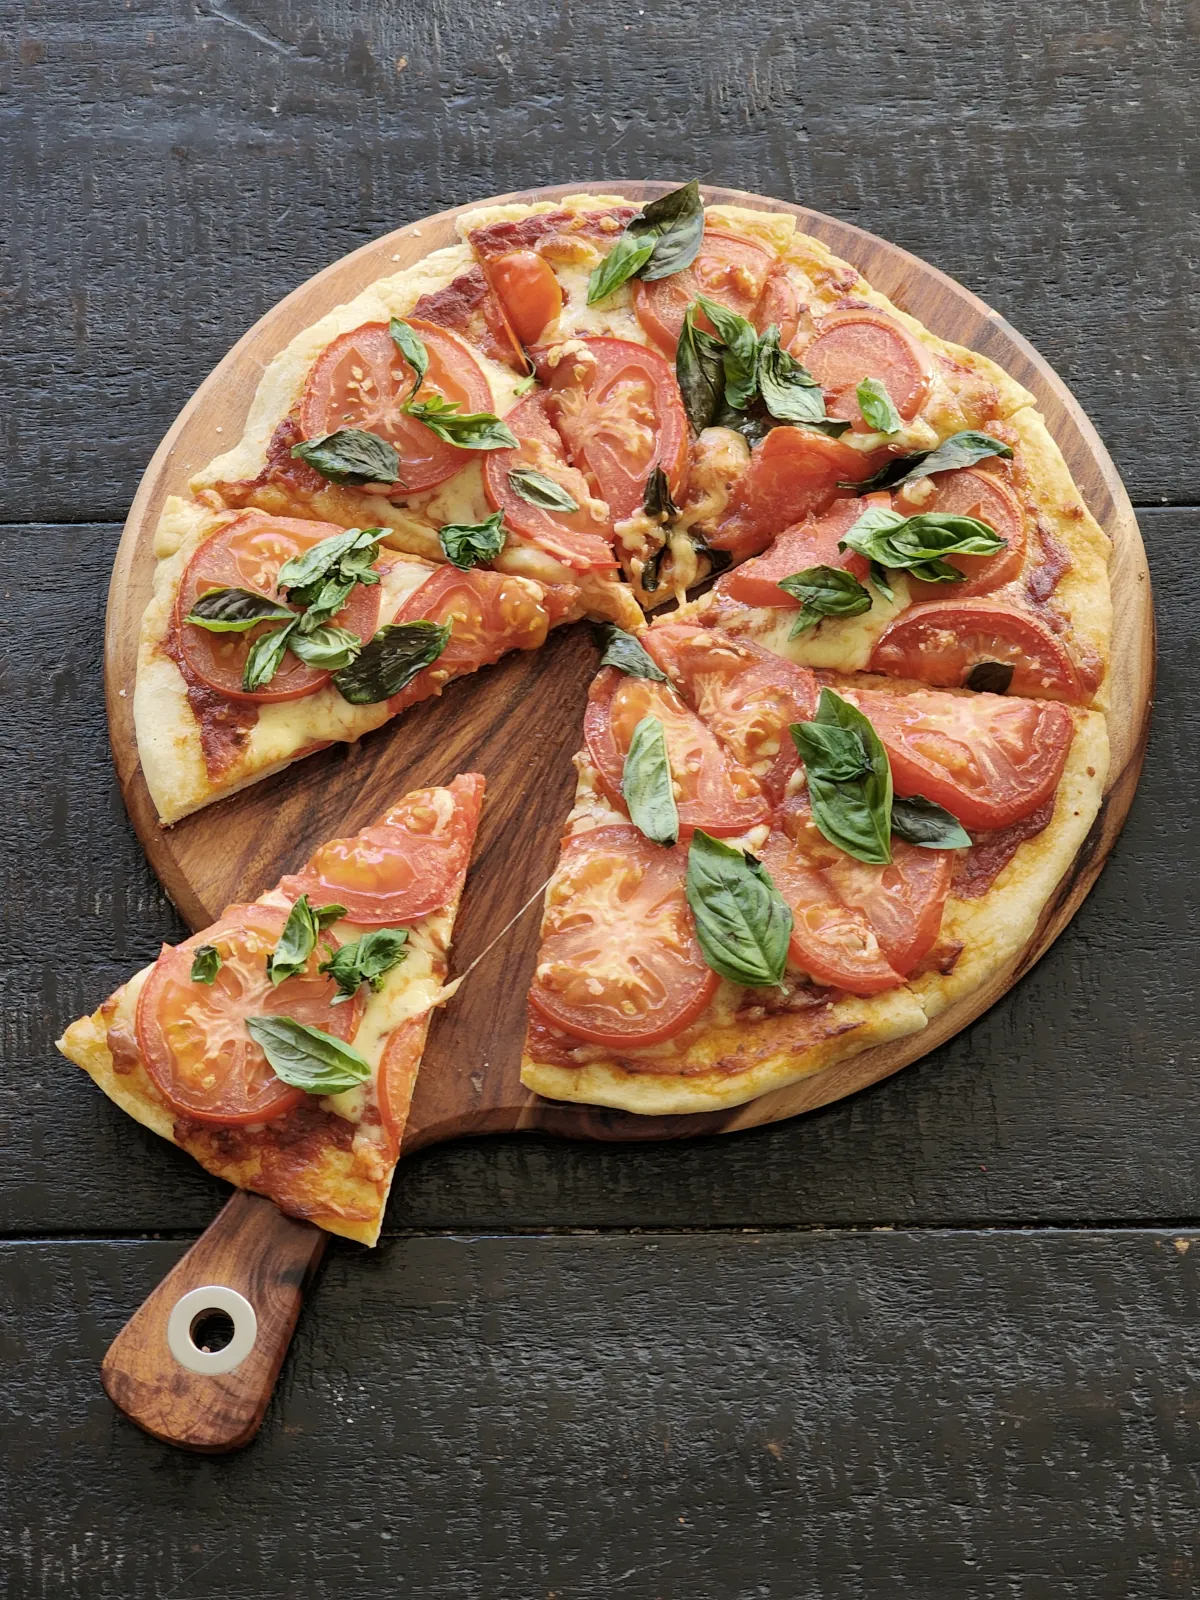
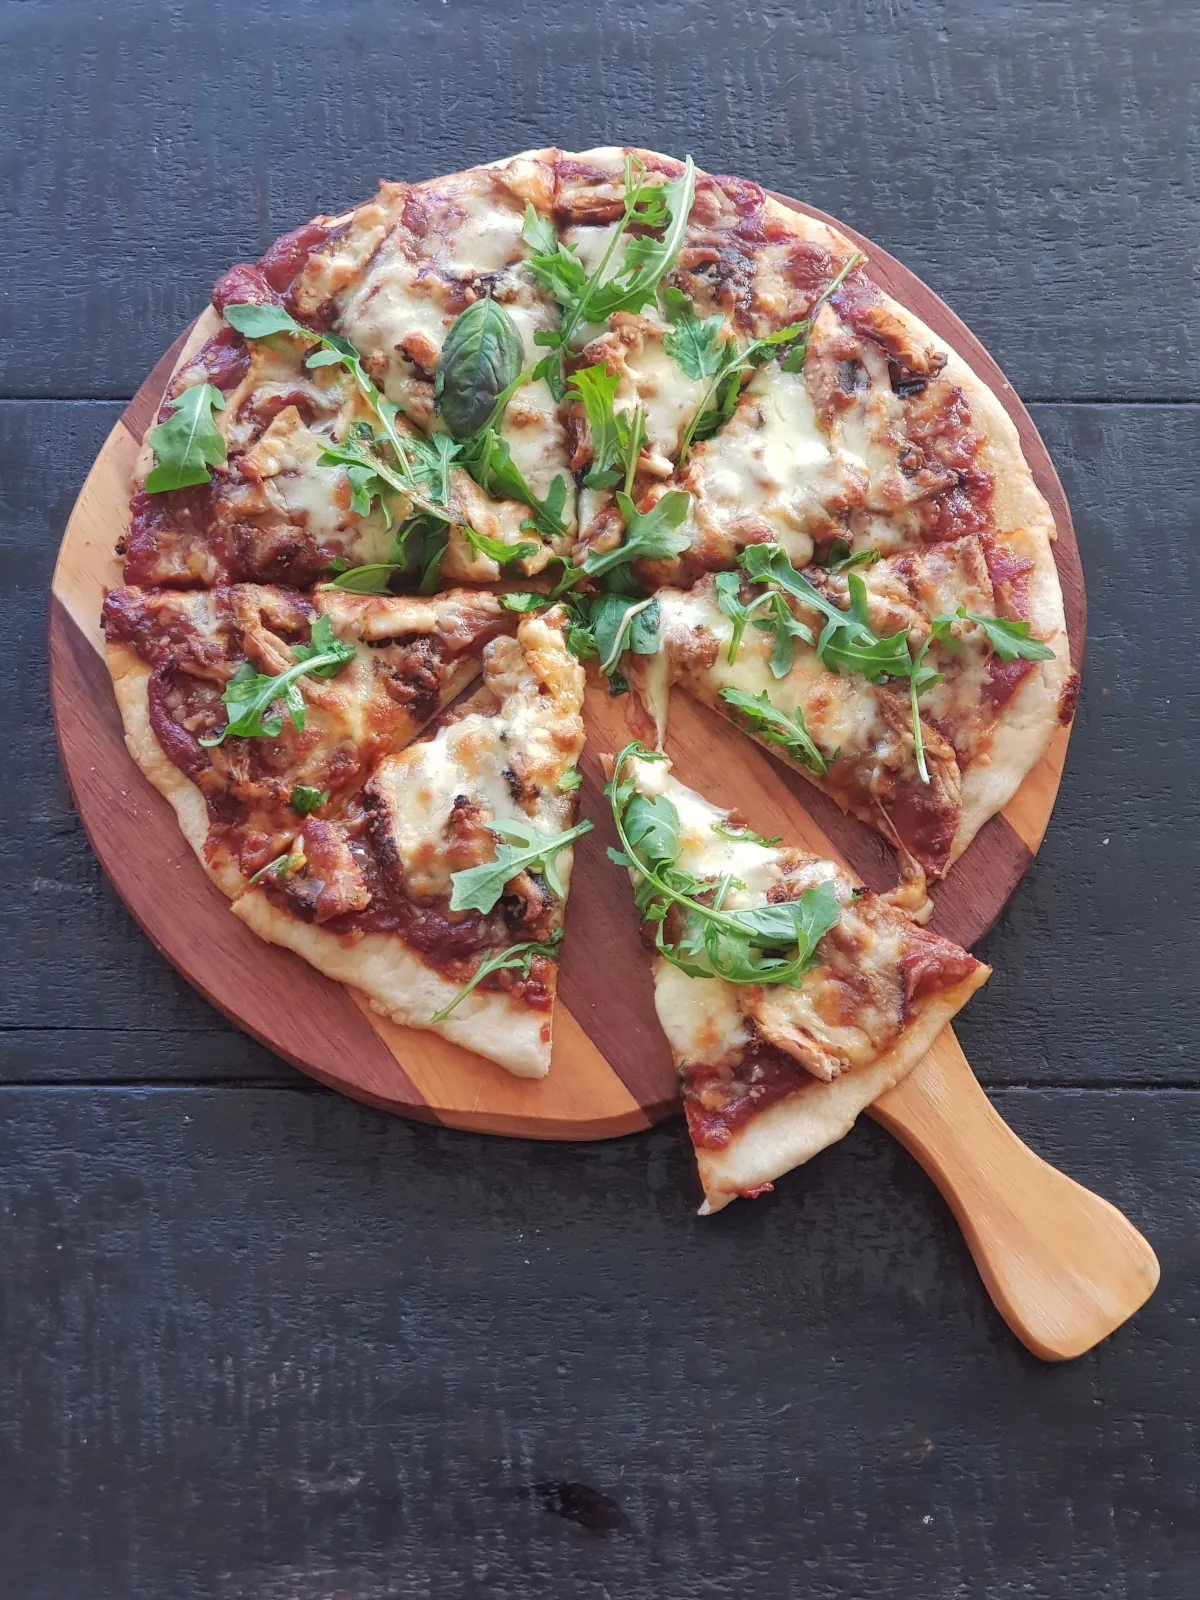
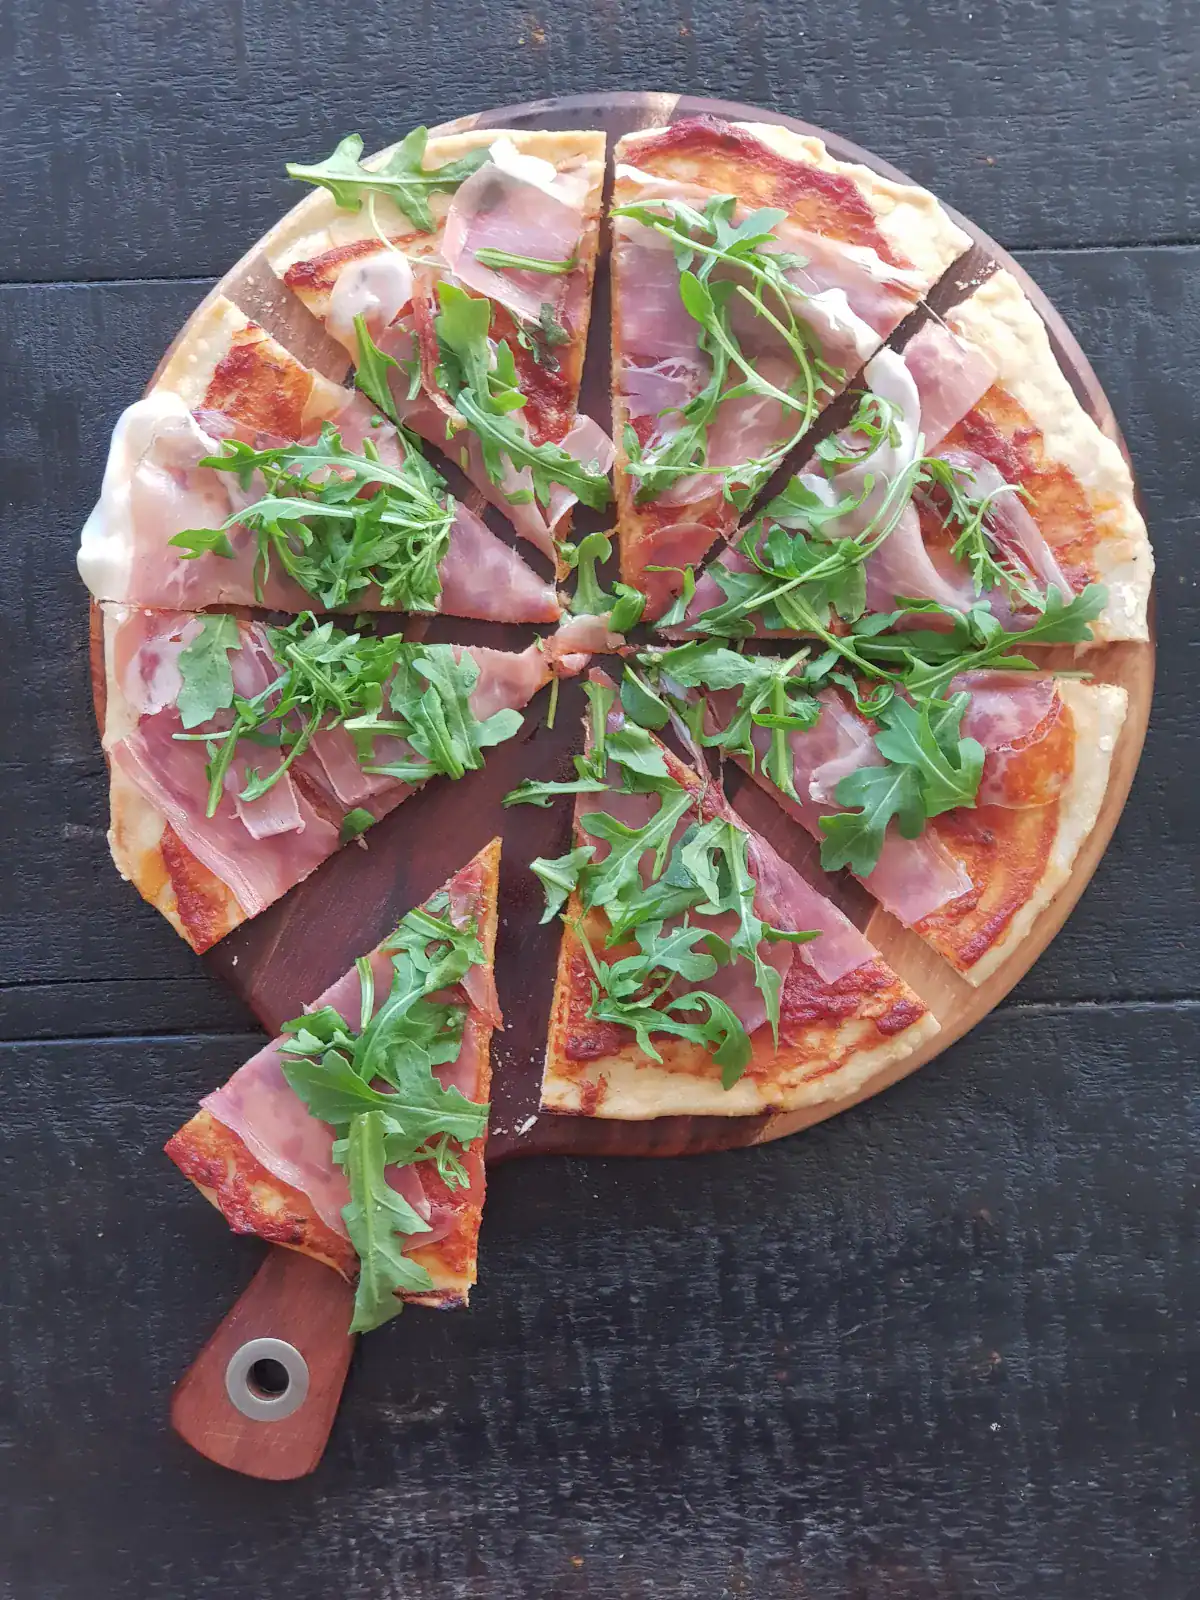
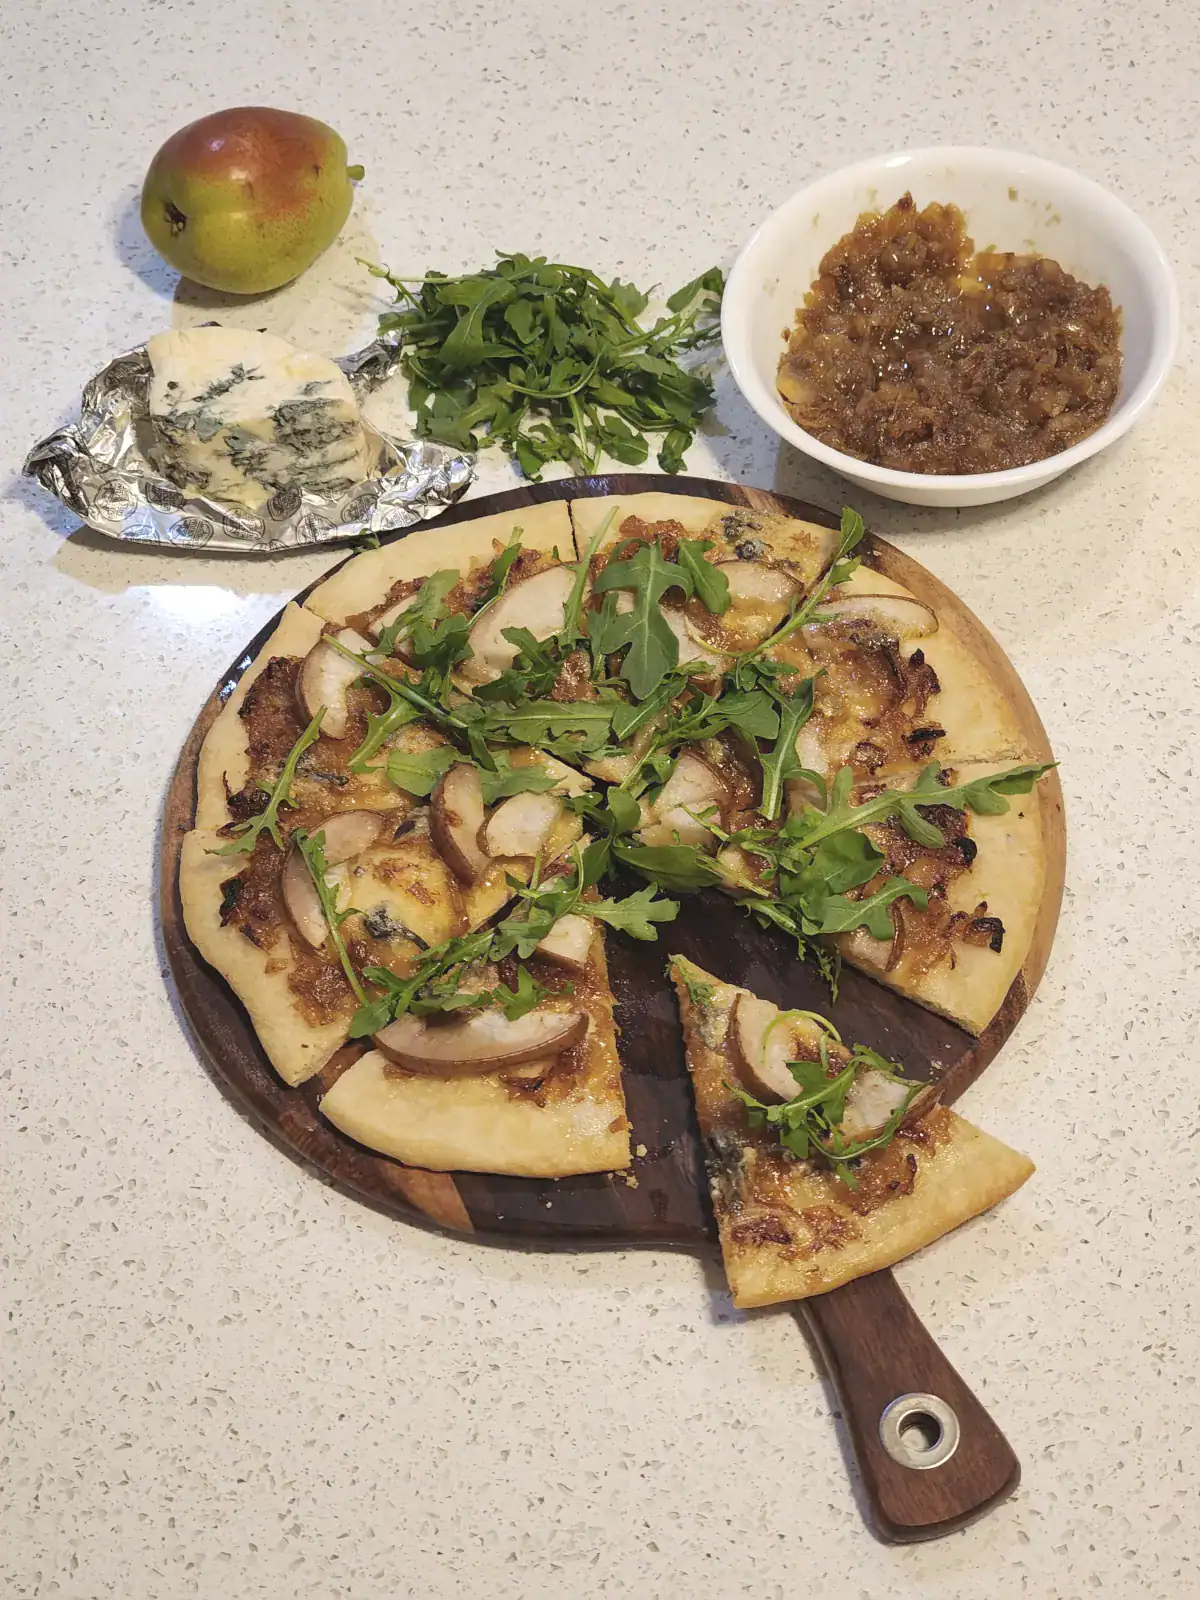
Spread your favorite toppings - start from the outside and work your way into the center. Check out our family favourite pizza toppings here.
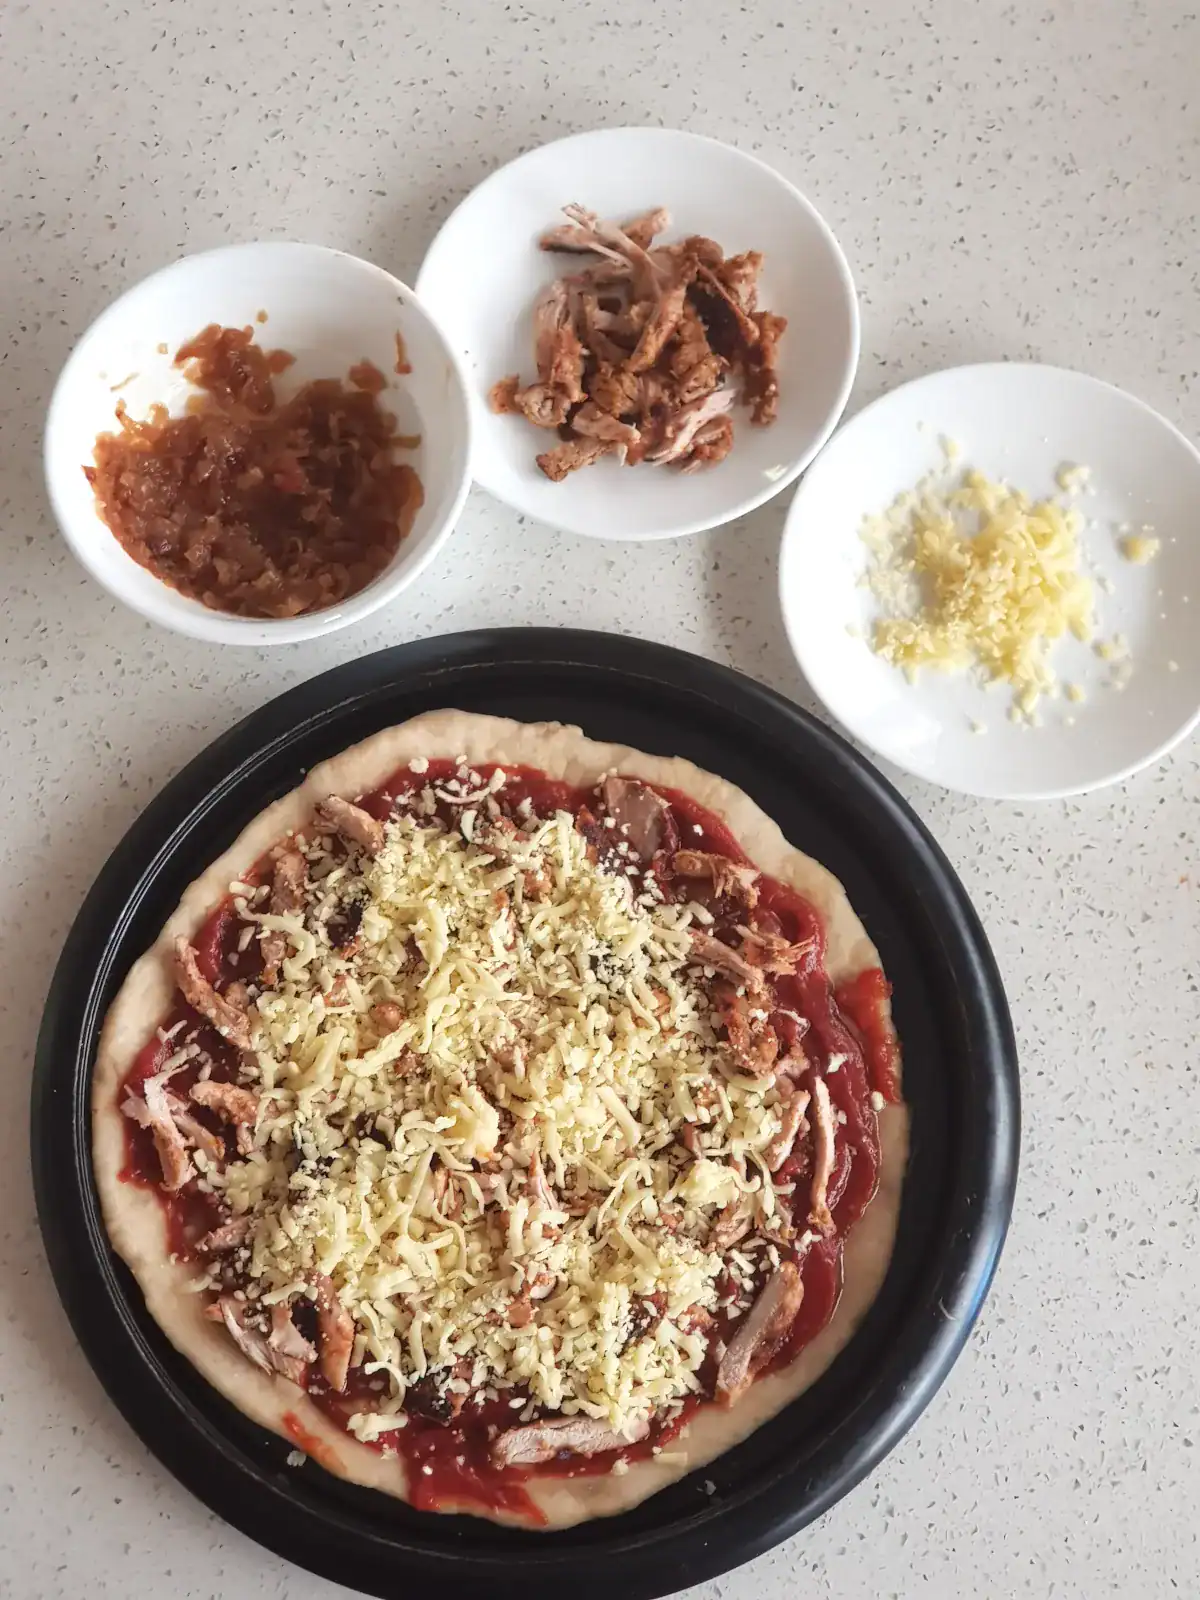
Once topped up, return the pizzas to the oven and bake at 430°F / 220°C for another 10–15 minutes, depending on your oven. Keep an eye on the crust - once the edges start to turn a light golden brown, they're ready to go!
Note: If you use a dedicated pizza oven that heats up far higher (up to 950°F / 500°C), you will need to watch the pizza, as it will bake in a significantly shorter time, more like 1-3 minutes.
Storage Tips
- Freezer-friendly: Prebaked pizza bases freeze well. Wrap individual pizza bases in plastic wrap or separate them with baking paper and put them in a plastic bag. Store in the freezer for up to 2 months.
- Reheating: Add toppings to frozen bases and bake straight from frozen for a quick weeknight dinner. The bases usually defrost enough while your oven is preheating and while you're adding the toppings, so there's no need to thaw them in advance.
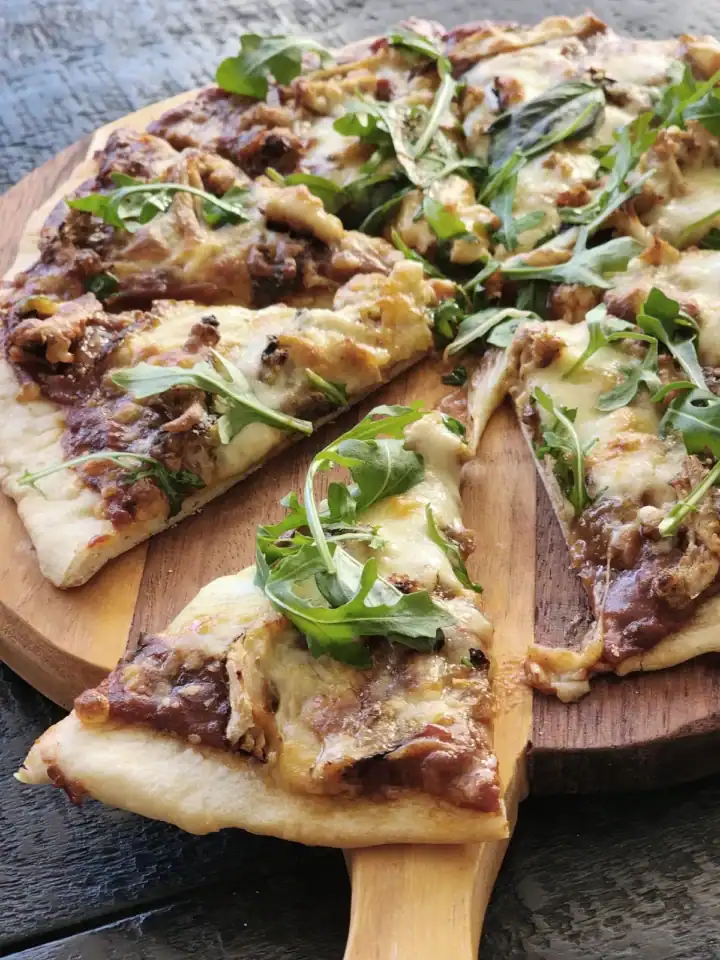
This homemade pizza dough is a great base for all your favorite toppings. Once you get the hang of it, you'll never go back to store-bought!
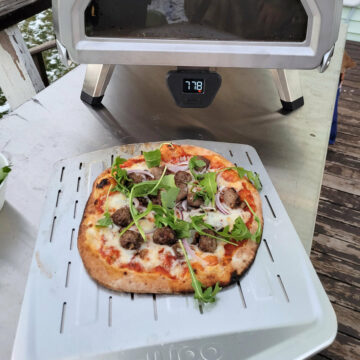
Use this recipe for:
Wood Fired Meatball Pizza
Our favorite homemade pizza toppings:
See our family favorite pizza toppings article for detailed ingredients and layering.
Recipe
Easy Homemade Pizza Dough (No Mixer Needed!)
Equipment

Ingredients
- 2 ¼ pounds strong baker's flour (12–15% protein)
- 4 teaspoon dry yeast (or 4 teaspoons / 40g fresh yeast)
- 2 teaspoon salt (we use Himalayan pink salt)
- 2 teaspoon sugar
- 2.5 cups cold water
Instructions
Mix the pizza dough ingredients with water
- In a large bowl, mix flour, yeast, salt, and sugar. Make a well in the center and pour in 2.5 cups (600 mL) cold water. Gradually mix with a spoon, then your hands, until a rough dough forms (about 3–4 minutes). Use only cold or room temperature water to avoid activating the yeast too fast. If dough feels dry, add up to ¼ cup (60 mL) more water, a little at a time.
Rest the dough
- Let the pizza dough rest for 10 minutes - this pause allows the gluten to relax and hydrate, making the dough more elastic and easier to knead.
Knead the dough
- Knead the dough for about 10 minutes until smooth and elastic, using the palms of your hands to push and turn. If it's too much to handle at once, split it in half. Well-kneaded dough should feel springy and look smooth, like plasticine.
Let the pizza dough rise
- Place the dough in a large bowl and let it rise until doubled. In warm weather, this takes 1–1.5 hours; in cooler temps, 2–3 hours or longer. Cover with a lid or kitchen towel to prevent drying. On cold days, let it rise in a sunny window or in the oven on a low (90°F/30°C) setting. If needed, briefly warm the oven, then turn it off before placing the dough inside.
Preheat the oven
- Once the dough has risen, preheat your oven to 430°F / 220°C (we use the "Pizza" setting on ours). The oven will usually be ready by the time you finish making the pizza bases.
Divide the dough and roll it out
- Turn the dough out and divide into 6–8 pieces. Six makes a thicker crust, eight gives a thinner base. Lightly oil your pizza tray. Roll each piece into a circle on a floured surface, then transfer to the tray and stretch to fit. Thicken edges if you like a crusty finish.
Prebake the pizza base
- Place the trays in the oven and prebake the pizza bases for 3 minutes. This step helps create a sturdy base that’s easy to top and can be frozen for later if desired - perfect for quick weeknight dinners.
Add toppings and bake
- Carefully remove prebaked bases from the oven and let cool slightly. Add your favorite toppings, starting from the edges. Bake at 220°C (430°F) for 10–15 minutes, until the crust turns light golden brown.
Notes
Nutrition
Nutrition info is auto-generated. This information is an estimate; if you are on a special diet, please use your own calculations.


Nathan
Great pizza dough, it's our go-to recipe now.