Making your own homemade beef jerky is much easier then many people may think, and is a great way to stock up on this popular snack without spending a fortune. The perfect snack when camping, on a hike, or just looking for a healthy bite while on the go, making your own beef jerky lets you create a variety of flavors while foregoing the preservative laced store bought kind. Naturally gluten free, Paleo and Whole 30 friendly, homemade beef jerky is the perfect snack for anyone!

One of the oldest ways of preserving meat, beef jerky has been used for generations by cultures around the world to store raw meat for extended periods of time without refrigeration. By removing all the moisture from the meat, you remove a vital element bacteria require to spoil food: water.
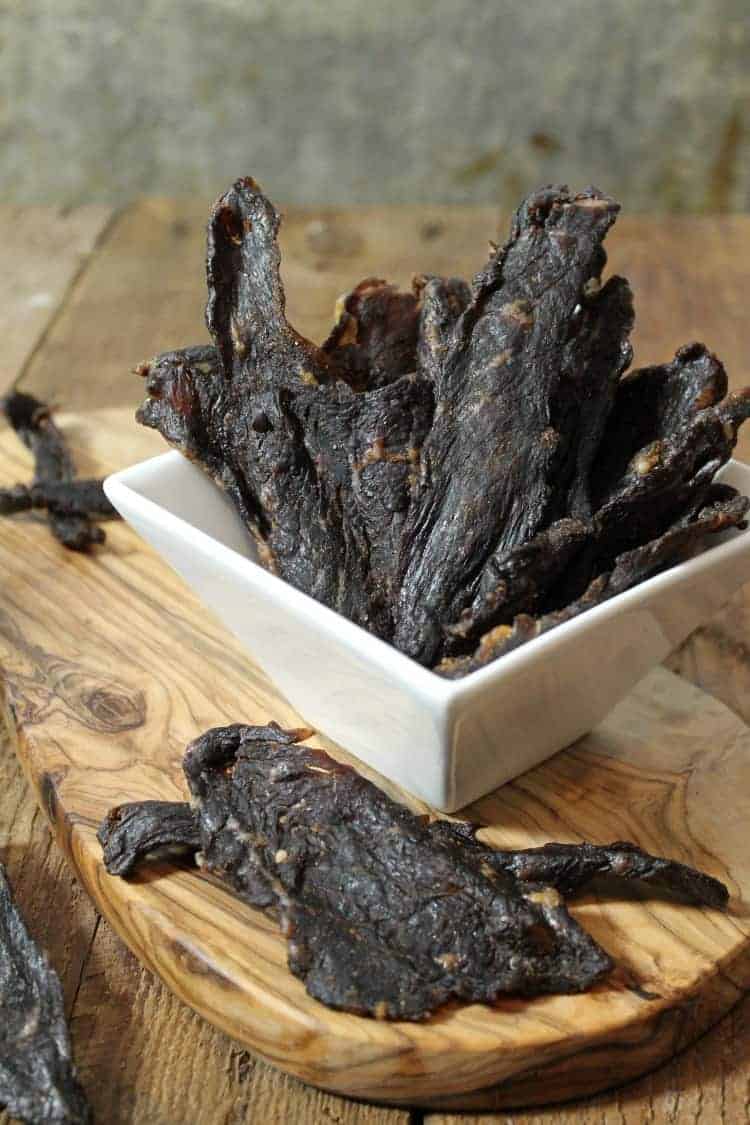
Nowadays jerky is eaten more as a snack instead of as a main food source, but it's popularity has not been diminished by those in need of a quick energy boost. When fully dried, homemade beef jerky is chewy, has a slight crack to it when bent, and is quite dark in color. Traditionally beef jerky was sun dried in the open air, but for sanitary reasons we'll forgo that method here and I'll discuss how to dehydrate beef jerky and how to make beef jerky in the oven.
This post contains affiliate links for which I may be compensated if a purchase is made through the links provided. For more information please read my affiliate disclosure.
What Cuts Of Meat Are Best For Making Beef Jerky?
When making your own beef jerky at home it is important to choose a very lean cut of meat. Fat doesn't 'dry' and will go rancid and spoil after a week or so at room temperature, ruining all your hard work. By choosing a cut of meat that is very lean and has no, (or very little) fat, you extend how long your jerky will last for once dried.

Of course all meat has some fat, so it is important to trim away as much of it as you can when making your own beef jerky.
The best cuts of meat for beef jerky are:
- Eye of Round, Top Round, or Bottom Round Roast
- Sirloin or Sirloin Tip
- Flank Steak
- Venison (Deer) Roast
- Pork Loin
All the above listed cuts are quite lean with minimal internal, if any marbling(fat). Any exterior fat cap should be trimmed of prior to making jerky. Note that you do not have to use only beef to make jerky. Venison jerky as well as pork jerky are quite popular, and can easily be made the same way beef jerky is made at home.
Do You Have To Marinade or Season Beef Jerky?
While dry rubbing, (or simply not seasoning beef jerky was the traditional of making it), marinading the meat first has become a popular way of creating and infusing various flavors.
Dry rubbing the meat with spices and salt prior to drying your jerky has the benefit of naturally drawing out some of the moisture present in the meat. Seasoning your jerky in this way will usually create a stiffer end product and will take less time to dry then if you where to marinate your meat first.
Marinading your jerky meat first has allowed for the creation of many more flavors, such as teriyaki jerky, Dr Pepper flavored jerky etc.. Marinades tend to help tenderize the meat as well, providing you with a more pliable jerky. Since you are adding moisture to the meat through marinading, you will need to pat dry the meat prior to drying, and the process may take a little longer.
My Favorite Homemade Beef Jerky Recipe
This recipe is a simple one I first found in Michael Ruhlmans cookbook, 'Charcuterie'. A great read and reference guide for anyone interested in making and reserving you own cured meats.
To make this homemade beef jerky you'll need:
- 2.5 lbs boneless beef - all fat trimmed away
- 1 tablespoon onion powder
- 1 teaspoon garlic powder
- 1 teaspoon paprika
- ¾ tablespoon salt
The flavoring ingredients here are optional, and are the ones I feel create a well balanced, slightly salty, old fashioned jerky. You can adjust the seasonings as you see fit, though I recommend always using salt to help preserve the meat.
Oven Dried Beef Jerky Instructions
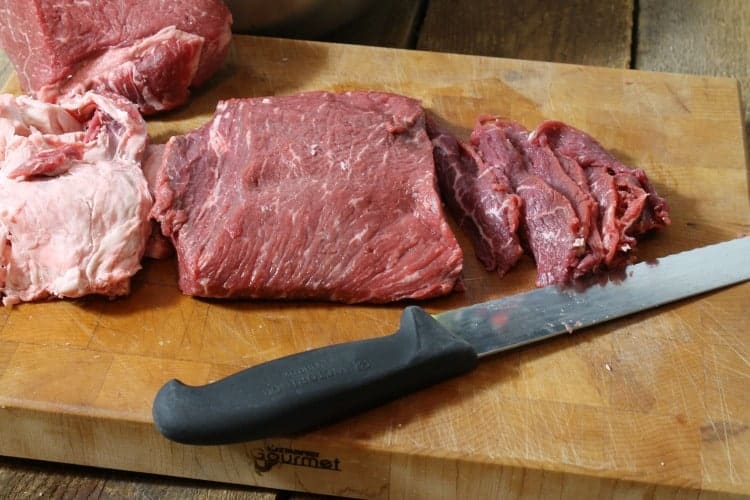
- Start by trimming all the fat away from the outside of the beef. If you see a thick vein of fat running through the middle, pen up the roast, following this line, and cut the fat out.
- Slice the beef jerky into ⅛th inch (¼ cm) thick strips with a sharp chefs knife or serrated slicer. You can place the raw beef in the freezer first for half an hour to firm it up prior to slicing, resulting in more even strips of beef.
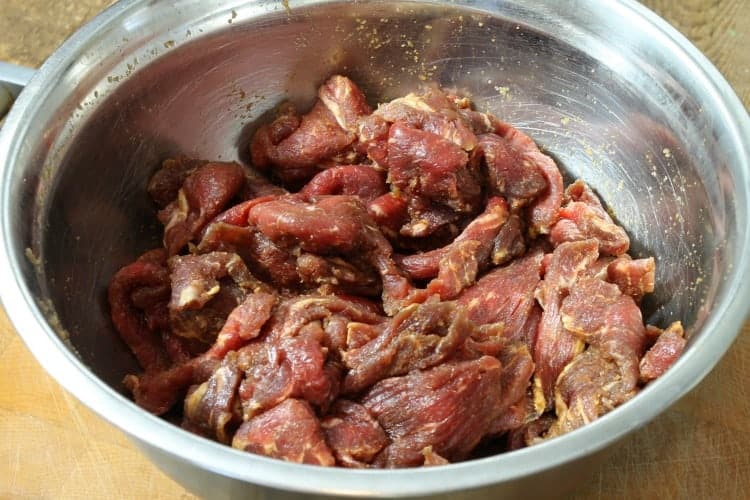
- Mix your seasonings in a bowl, and then sprinkle it over the sliced beef strips. Use your hands to mix it in well, and evenly distribute it. Cover and refrigerate for at least 2 hours, or ideally over night. I usually let my jerky sit for about a day before drying it.
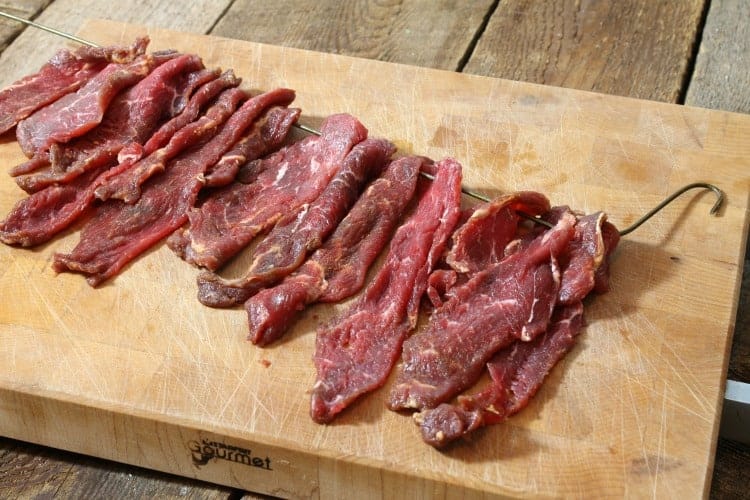
- Once you are ready to dry your jerky, pre heat your oven to 300F, and place tinfoil or a large sheet pan in the bottom to catch any drippings and prevent scorching. (See notes below on food safety). Thread the beef strips onto a wire hanger, or lay them out on a wire rack over a sheet pan.
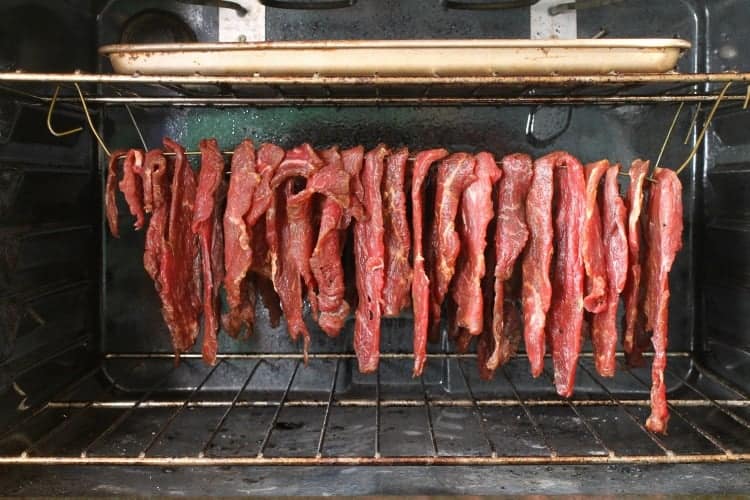
- Hang/Place the beef strips in the oven for about 10 minutes to get the meat to reach 160 F killing any bacteria prior to drying. Drop the temperature to between 130F / 55C and 140F / 60C to finish drying the beef. This can take anywhere from 4 to 8 hours depending on the temperature setting and the thickness of your beef jerky. If your lowest oven temperature setting is 170F / 77C wedge the door open with a wooden spoon to let heat escape and keep the temperature lower.
- Once the beef jerky is dark, fully dried, and has a slight crack when bent, the jerky is done. Remove the homemade beef jerky from the oven and let it fully cool. Use paper towel to soak up any beads of fat that may have appeared.
- Store the beef jerky in an airtight container for 3 to 4 weeks in a cool dry location, or vacuum seal it for an even longer shelf life. The jerky can easily be frozen or refrigerated to ensure no possibility of bacteria growth.


Food Safety When Making Homemade Jerky
While making your own homemade beef jerky is a safe way to preserve and consume meat, there are a few important food safety guidelines to keep in mind
- Always wash your hands and equipment before and after handling raw meat to prevent the chance of food-borne illness.
- Always marinate the beef strips covered and in the fridge. Never leave the beef at room temperature for any extended period of time.
- When drying the beef jerky, always heat to an initial temperature of 160F as per USDA Food Saftey Regulations, and then continue drying at a temperature between 130F and 140F. This allows the meat to dry quickly enough without chance of bacteria growing.
- If using a dehydrator or a dehydrate setting on your oven, always heat the jerky to 160F as mentioned in the recipe above, before dehydrating. If possible set your dehydrator to between 130F and 140F.
- When storing beef jerky always keep it in a dry, cool, and airtight location. If mold appears or the jerky smells or looks of in any way, toss it out. To ensure food safety refrigerate or freeze your beef jerky if storing for extended periods of time.
Made the recipe? Comment & Rate it below, then take a picture and tag me on Facebook & Instagram: @earthfoodandfire . For more from scratch recipes follow me on Instagram & Pinterest
Recipe

Homemade Beef Jerky
Ingredients
- 2.5 lbs boneless beef all fat trimmed away
- 1 tablespoon onion powder
- 1 teaspoon garlic powder
- 1 teaspoon paprika
- ¾ tablespoon salt
Instructions
- Start by trimming all the fat away from the outside of the beef. If you see a thick vein of fat running through the middle of the roast, follow this line and cut the fat out.
- Slice the beef jerky into ⅛th inch (¼ cm) thick strips with a sharp chefs knife or serrated slicer. You can place the raw beef in the freezer first for half an hour to firm it up prior to slicing, resulting in more even strips of beef.
- Mix your seasonings in a bowl, and then sprinkle it over the sliced beef strips. Use your hands to mix it in well, and evenly distribute it. Cover and refrigerate for at least 2 hours, or ideally over night. I usually let my jerky sit for about a day before drying it.
- Once you are ready to dry your jerky, pre heat your oven to 300F, and place tinfoil or a large sheet pan in the bottom to catch any drippings and prevent scorching. (See notes below on food safety). Thread the beef strips onto a wire hanger, or lay them out on a wire rack over a sheet pan.
- Hang/Place the beef strips in the oven for about 10 minutes to get the meat to reach 160 F killing any bacteria prior to drying. Drop the temperature to between 130F / 55C and 140F / 60C to finish drying the beef. This can take anywhere from 4 to 8 hours depending on the temperature setting and the thickness of your beef jerky. If your lowest oven temperature setting is 170F / 77C wedge the door open with a wooden spoon to let heat escape and keep the temperature lower.
- Once the beef jerky is dark, fully dried, and has a slight crack when bent, the jerky is done. Remove the homemade beef jerky from the oven and let it fully cool. Use paper towel to soak up any beads of fat that may have appeared.
- Store the beef jerky in an airtight container for 3 to 4 weeks in a cool dry location, or vacuum seal it for an even longer shelf life. The jerky can easily be frozen or refrigerated to ensure no possibility of bacteria growth.
Notes
- Always wash your hands and equipment before and after handling raw meat to prevent the chance of food-borne illness.
- Always marinate the beef strips covered and in the fridge. Never leave the beef at room temperature for any extended period of time.
- When drying the beef jerky, always heat to an initial temperature of 160F as per USDA Food Saftey Regulations, and then continue drying at a temperature between 130F and 140F. This allows the meat to dry quickly enough without chance of bacteria growing.
- If using a dehydrator or a dehydrate setting on your oven, always heat the jerky to 160F as mentioned in the recipe above first, before dehydrating. If possible set your dehydrator to between 130F and 140F.
- When storing beef jerky always keep it in a dry, cool, and airtight location. If mold appears or the jerky smells or looks of in any way, toss it out. To ensure food safety refrigerate or freeze your beef jerky if storing for extended periods of time.
Nutrition
Nutrition info is auto-generated. This information is an estimate; if you are on a special diet, please use your own calculations.


Lucy
I have never made jerky before. After doing internet searches, yours seems like the best one to try. Your instructions are very clear and thorough. I like that your recipe is just a plain rub, which is what I want, not marinades which have questionable ingredients, im after natural. I will post after I have made it. Thanks heaps for a great post!
Chef Markus Mueller
Can't wait to see your the results of your beef jerky Lucy!
Cassie
I had no idea I could make beef jerky at home so I'm really intrigued to give it a try. Such a great snack!
Saima
The perfect dry snack for an outing, beef jerky is! I love that it is made so easily. Never thought it took such little effort to make beef jerky.