Most people I have met, assume once a food thermometer starts giving wonky readings that it's broken, and time to go buy a new one. Before you do, keep reading! Most food thermometers are able to be easily re-calibrated from home. As I had previously talked about in my post on basic kitchen tools and equipment, food thermometers can play a crucial role in cooking and food safety.
Food thermometers help measure the internal temperatures of food and determine how far the food has been cooked, and whether it's safe to eat or not. Using a food thermometer is an important part of practicing food safety at home!
This post contains affiliate links for which we may be compensated if a purchase is made through the links provided at no extra cost to you. For more information, please read our affiliate disclosure.
Types of Food Thermometers
There are various different types of thermometers available to the home chef. While food thermometers also technically include sugar thermometers, though I will concentrate on the two most common thermometers that would be used by at home cooks.
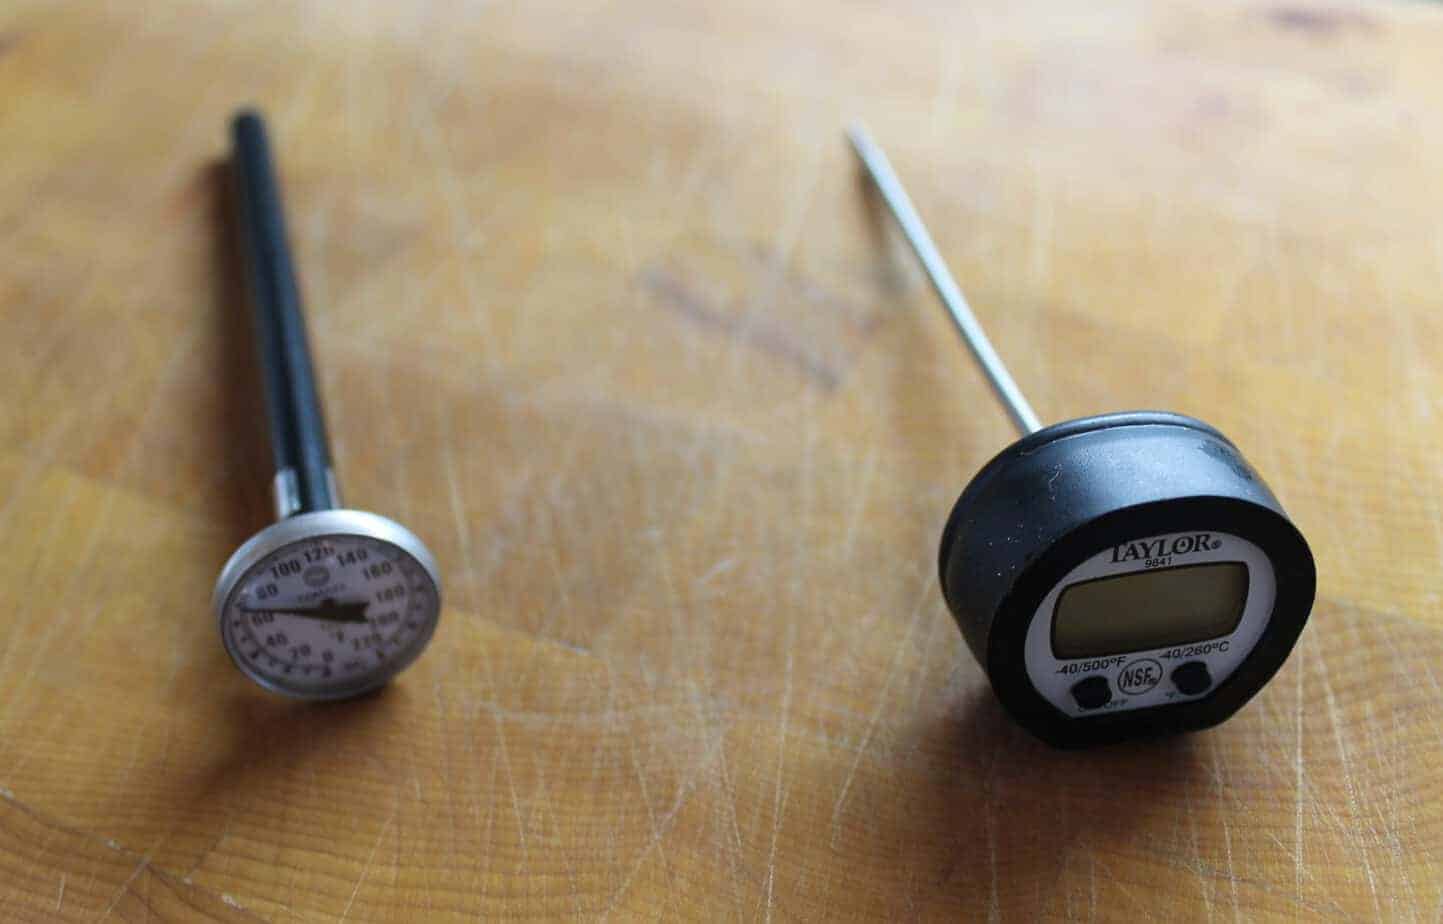
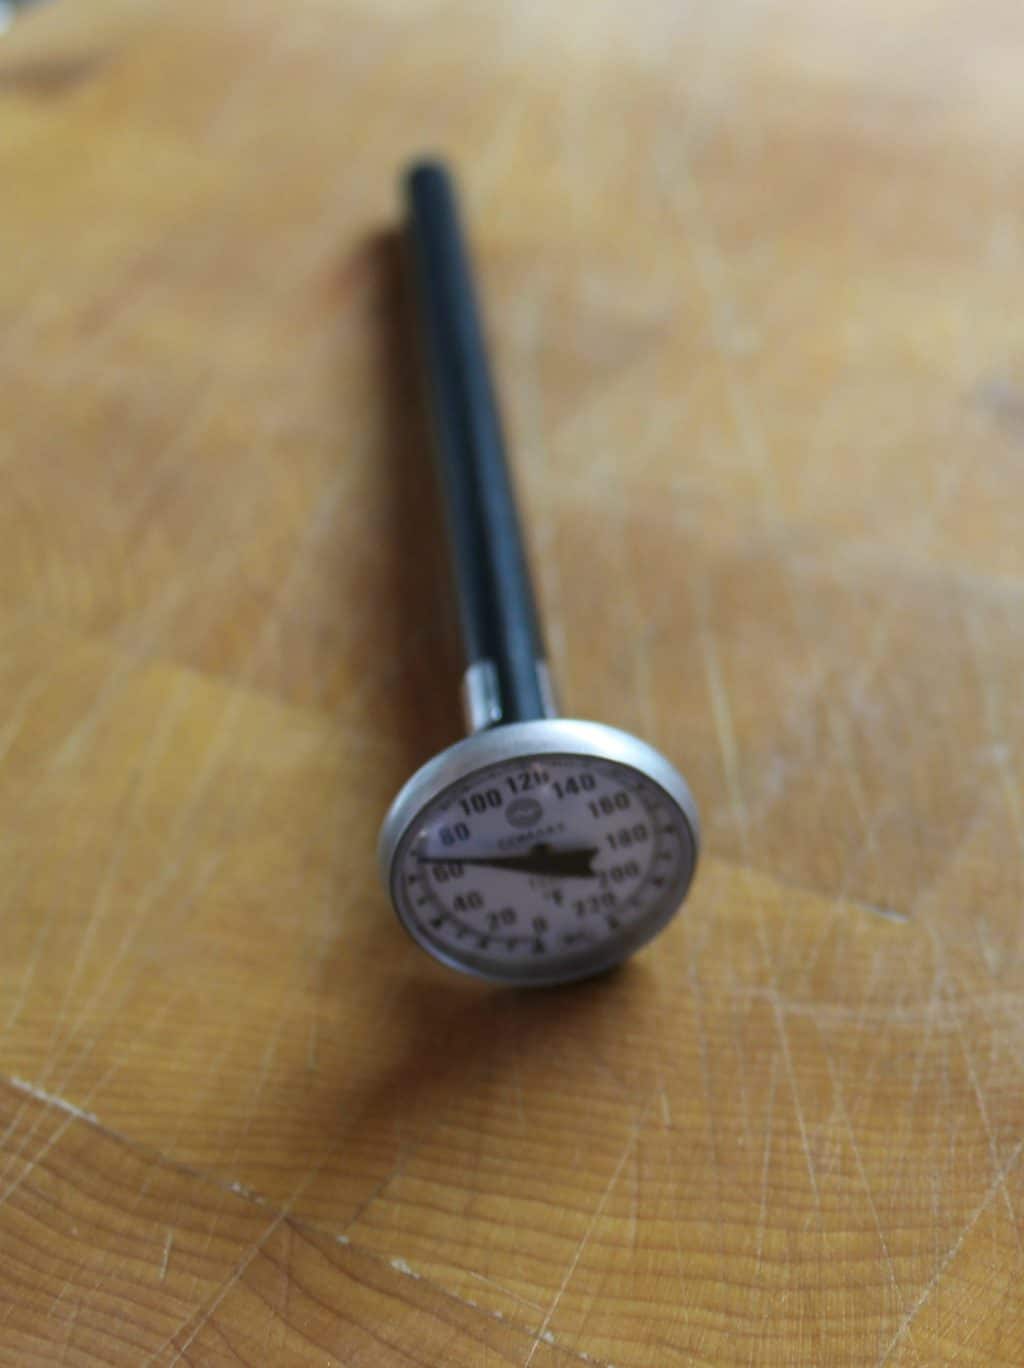
Mechanical Food Thermometers
Mechanical Food Thermometers (affiliate link) use a bimetallic strip which is a very thin coil of metal (imagine a spring) on which the dial or pointer that you see is attached to. As you take the temperature of an item with a mechanical food thermometer, the bimetallic strip expands or contracts as the temperature changes, moving the dial or pointer up and down the temperature dial.
The upside to these thermometers is that they require no battery. The down side to is that over time the bimetallic strip slightly bends and warps due to the constant changes in temperature. This requires the thermometer to be re-calibrated periodically in order to stay accurate.
You will notice a small nut usually at the base of the thermometer dial itself. This nut can be tightened to adjust the bimetallic strip to the right tension in order to keep expanding and contracting at the proper rate when heated and cooled.
Digital Food Thermometers
Digital food thermometers, (affiliate link) require a battery and measure the resistance of an electrical current as it travels through the metal probe. As the temperature changes, so does the resistance of the current, allowing for an accurate temperature reading on the display.
While some digital thermometers have a reset button, making for easy calibration some have more specific steps included in the manufacturer’s instructions to properly re-calibrate the thermometer.
The up side to digital thermometers is the quick, and accurate temperature reading. The downside is they require a battery, and if you don't happen to have a replacement battery, your thermometer won't work.
How To Re-calibrating Food Thermometers
Re-calibrating most mechanical and digital food thermometers usually involves a two-step process.
Ideally, you would want to be at, or near sea level so that the pressure from the atmosphere doesn’t change the boiling point of water. Since we know that at sea level, water boils at 100C or 212F and freezes at 0C or 32F, we can use this information to help re-calibrate the thermometer to these pre-set temperature points.

Set a base temperature
To begin, you will need to set a base temperature, where you know what the temperature will be prior to measuring it with the thermometer.
The easiest way to do this is with a pot of boiling water(100C at sea level) with at least 4 inches of water in it, and a crushed ice 'bath'. You want to get the temperature of the ice bath as close to 0C(32F) as possible.
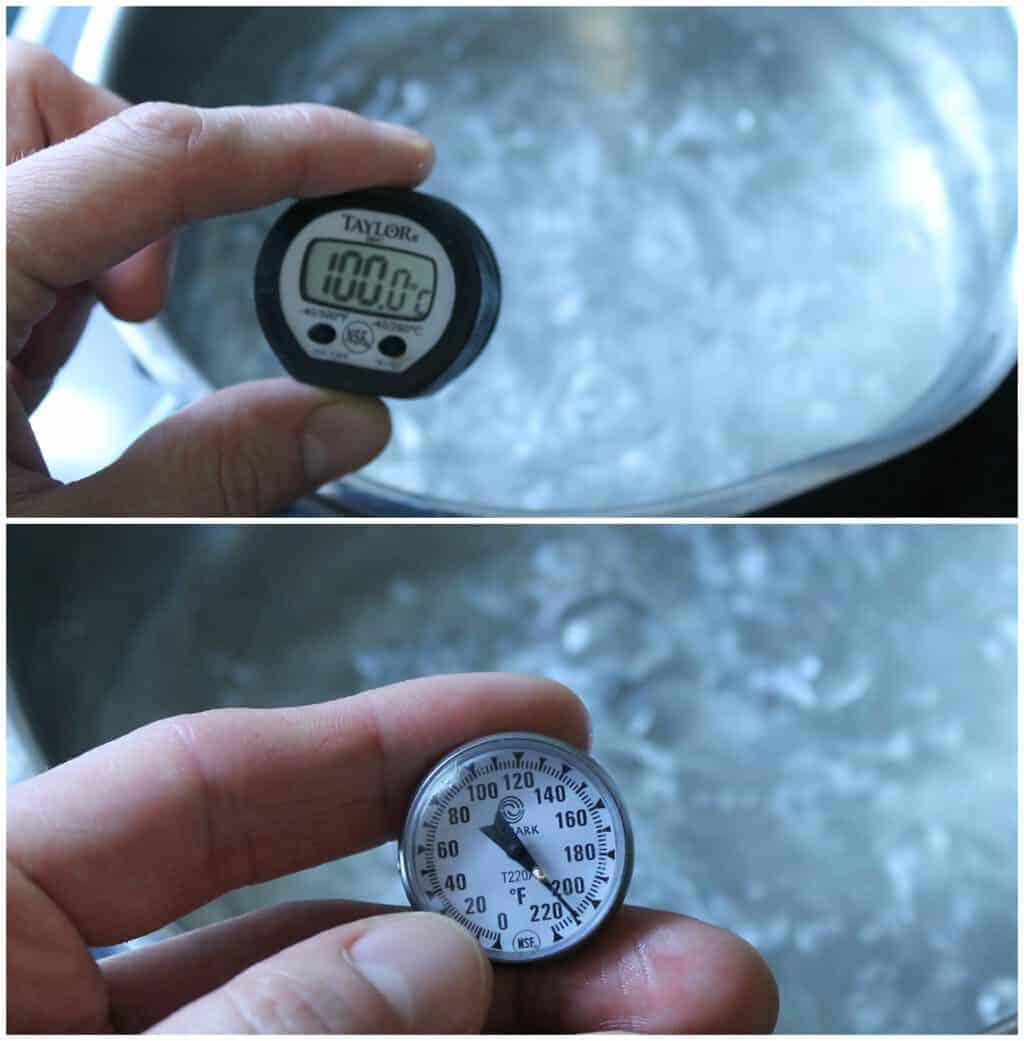
When you submerge the thermometer probe into the boiling water (be careful not to touch the bottom of the pot with the thermometer as it will have a higher surface temperature than the boiling water) the thermometer should read 100C or 212F.
If it doesn’t wait for the dial to stabilize and then adjust the nut on a mechanical food thermometer to 100C(212F) . On a digital thermometer you would hit 'reset' when you hit the target temperature.
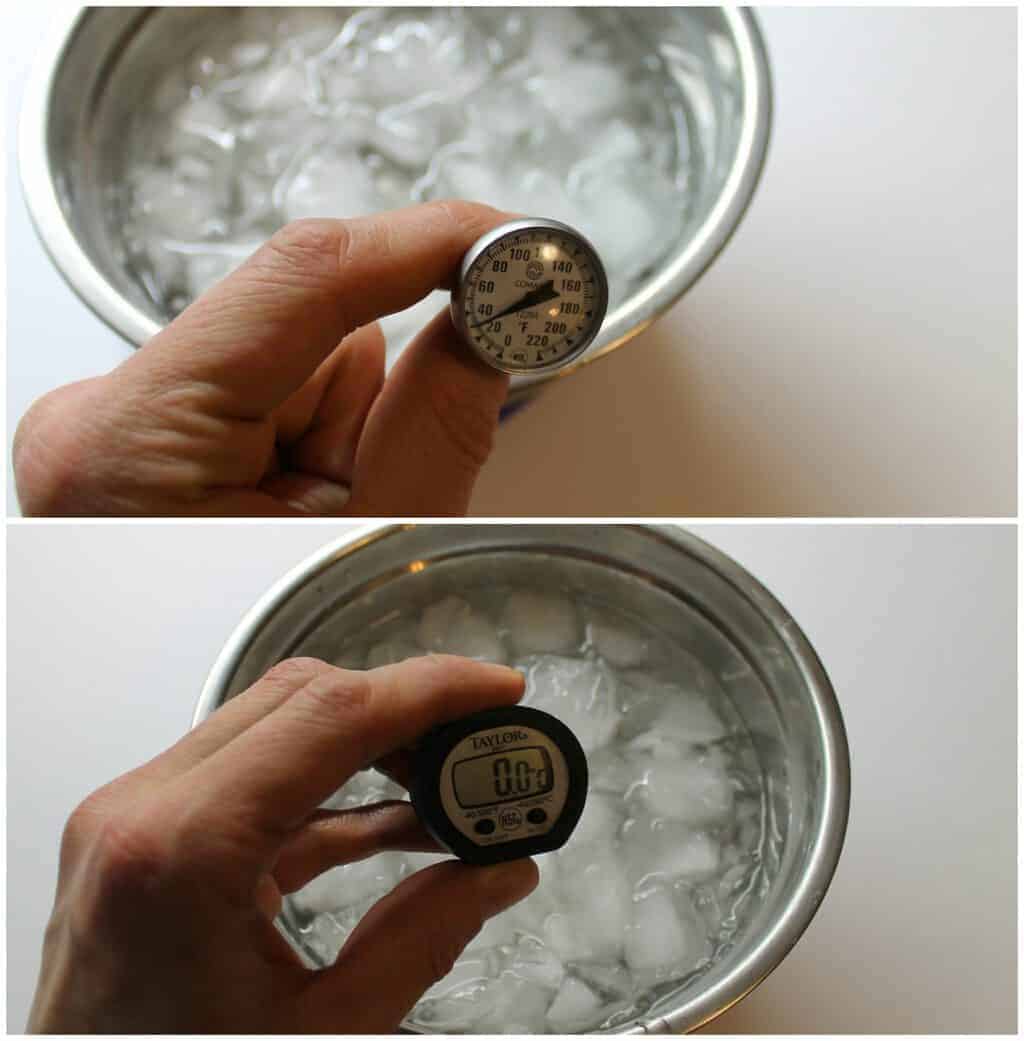
Let the thermometer come back to room temperature on its own so you don’t “shock” the metal before then placing it in the ice bath. When you submerge the thermometer in the freezing water bowl, the temperature should read 0C or 32F. If the pointer is off, again turn the nut under the dial until it does point to the correct temperature (0C or 32F).
You will know that the thermometer is properly reset, once both these readings hit the proper temperature mark in either boiling or freezing water.
It is best to re-calibrate thermometers after they have been dropped, used very frequently or gone from a very high temperature to a very low temperature very suddenly.
When it comes to digital thermometers, (affiliate link) some can unfortunately not be calibrated by the method explained above, since they work through the use of an electric current and may require manufacturers specific instructions.
Make sure you’re following me on Facebook, Twitter, Instagram, and Pinterest for weekly cooking tips, tricks, new recipes and to stay up to date with everything going on here at Earth, Food, and Fire!


Redawna
As a candy maker a proper working thermometer is absolutely essential in my kitchen.
Thanks for the information. Looking forward to trying this out.
Markus Mueller
Do you use a candy thermometer for making your candies or a regular food thermometer? While the regular one will work no problem, you may find a specialised candy thermometer to be more accurate! Though you will not be able to re-calibrate a real candy thermometer since it uses mercury(or whatever substitute is used these days)
Sean
Excellent resource. I love having these things at my disposal. As an endless kitchen tinkerer, it's nice to know that you've got the resources necessary to accurately experiment (not to mention make great food).
Markus Mueller
Thanks Sean! I'll be starting a basic chefs tips and tricks series soon time permitting!
Ulrike Mueller
Thank-you for this article. I never thought of it. Interesting to read!
[email protected]
Your welcome! I hope it helps you out! It's such a simple thing to do, but like you said most people dont know or think it is possible to reset these!