There's nothing quite like roasted garlic. It's rich, sweet, and creamy, nothing at all like the sharp, almost spicy flavour fresh garlic has. Roasting your own garlic at home is luckily very easy and requires no special skills or equipment.
You can use your oven-roasted garlic to make flavoured spreads, and dips, add it to meatballs and burgers, make salad dressings (such as this roasted garlic vinaigrette), or various appetizers (roast garlic and goat cheese stuffed mushrooms, anyone?). Basically in any recipe that calls for garlic, you can substitute roasted garlic for a smoother, richer flavour.
This post contains affiliate links for which we may be compensated if a purchase is made through the links provided at no extra cost to you. For more information, please read our affiliate disclosure.
A way of preserving garlic.
If you grow your own garlic at home, roasting garlic in the oven is a great way to preserve large amounts of it. While you can hang garlic to dry, hard neck garlic especially will start to either sprout or go bad after 6-8 months.
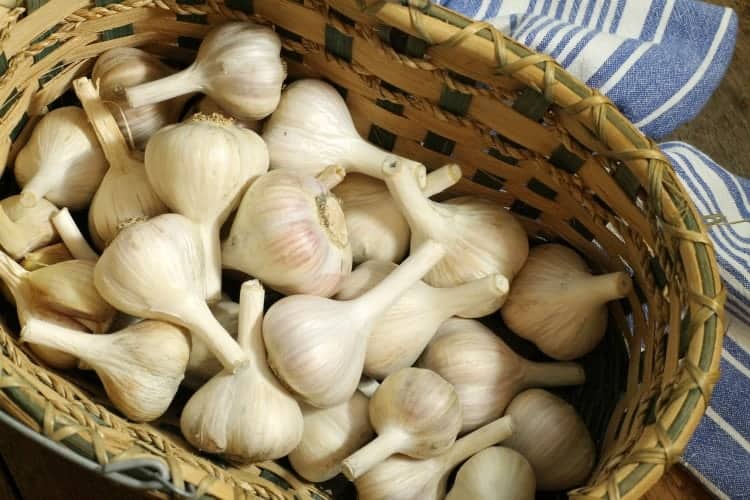
This is why dehydrating or roasting garlic as a way of preserving it for cooking is an excellent idea. Roasted garlic can be kept in oil in the fridge for 2-3 weeks, or you can freeze the roasted garlic until needed.
How long does it take to roast garlic?
Roasting whole heads of garlic as described in the recipe below takes about 40-50 minutes in the oven at 400F.
This time frame can change a little depending on the size of the garlic bulb, the individual cloves, the age of the garlic, as well as the actual oven temperature, (most home ovens run either a little hotter or cooler than indicated in the display).
Pro Tip: If you are in a rush you can speed up the roasting process by breaking the head of garlic apart, separating all the cloves and roasting the cloves individually in oil. Roasting garlic like this takes about 20 minutes and is great if you only want to roast a small amount.
So how do you do it?
Easy! Start by selecting the largest and firmest heads of garlic. The larger the cloves the more roasted garlic you'll end up with, but it will also take a little longer than using bulbs with smaller cloves.
Preheat your oven to 400F. Peel any loose skin of the bulb and discard it, but make sure to keep the bulb itself intact.
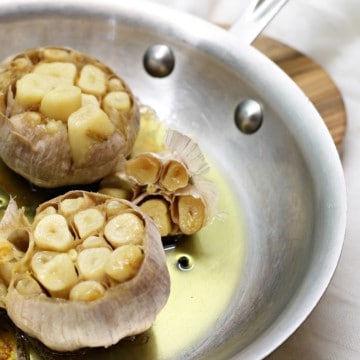
Cut the top of the garlic bulb open, exposing the individual cloves inside. (You can roast this 'top' as well). Place the bulb with the cut side up in an oven-safe pan and pour half a cup of olive oil over the top of the bulb, letting the oil sink into all the cracks.
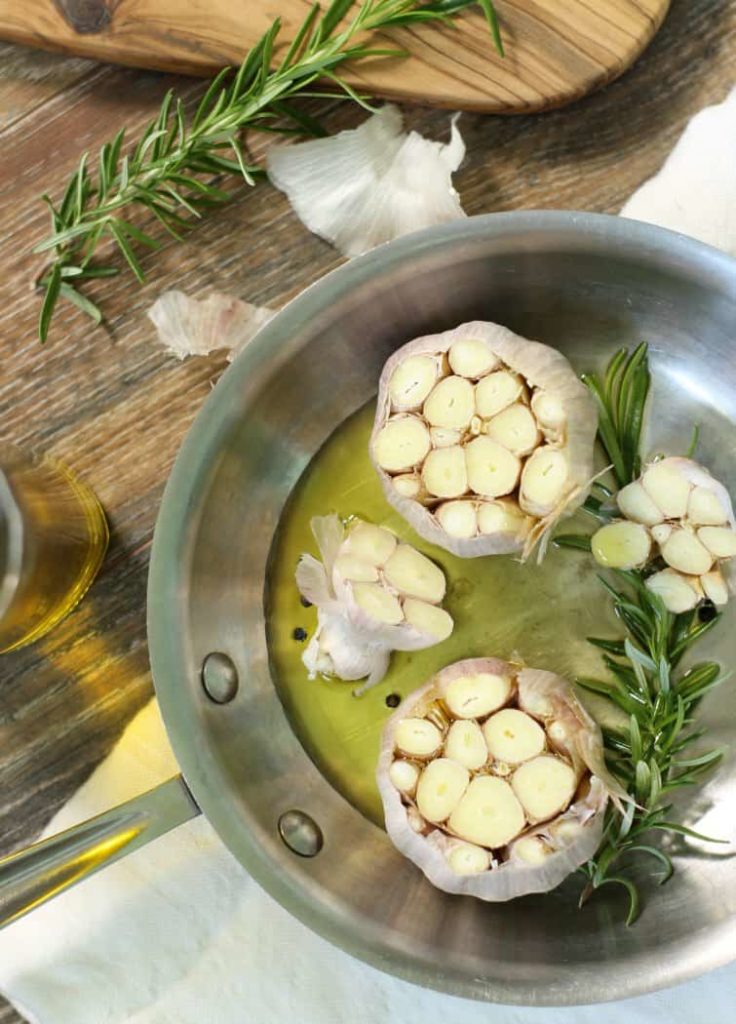
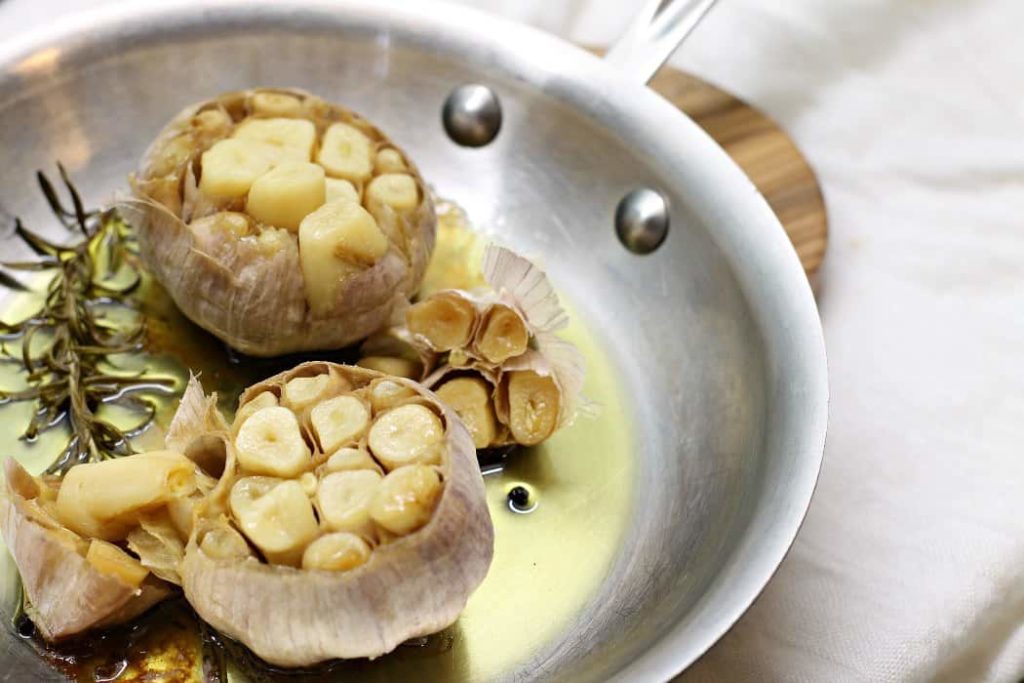
Cover the pan with tinfoil or a tight-fitting lid and place the pan in the hot oven. That's it! After 40 minutes check the garlic to see if it has started to brown and the cloves are buttery soft.
Once the roasted garlic has cooled you can literally squeeze the roasted garlic out of the bulb as if they were in a tube.
Use the roasted garlic to spread on freshly baked artisan bread or mash it into a salad dressing for a rich garlic flavour!!
Tips and Tricks
- Roasted garlic will easily last 4 to 5 days in the fridge if kept in an airtight container, a little longer if kept in submerged in the oil it was roasted in. Just don't store garlic submerged in oil at room temperature as it can cause botulism. Always refrigerate!
- Place a bulb of garlic in the oven to roast every time you cook a pot roast, or roast a turkey! It's multi-tasking at it's finest and the garlic can be used to help flavour your gravy as well!
- As mentioned above, you can roast individual cloves of garlic if that's all you have, or if you only need a small amount.
- Save the oil the garlic was roasted in! It's deliciously flavoured and can be used in marinades, and salad dressings.
- Place a few sprigs of rosemary or thyme in with the roasting garlic to add an earthy herb flavour to the garlic-infused oil. You could even add a small chili pepper or two if you want to add some heat!
Made the recipe? Comment & Rate it below, then take a picture and tag me on Facebook. For more from scratch recipes, follow me on Facebook & Pinterest.
Recipe
How To Roast Garlic
Ingredients
- 2 bulbs fresh garlic
- ½ cup olive oil
Instructions
- Start by selecting the largest and firmest heads of garlic. The larger the cloves the more roasted garlic you'll end up with, but it will also take a little longer than using bulbs with smaller cloves.
- Preheat your oven to 400F. Peel any loose skin of the bulb and discard it, but make sure to keep the bulb itself intact.
- Cut the top of the garlic bulb open, exposing the individual cloves inside. (You can roast this 'top' as well). Place the bulb with the cut side up in an oven-safe pan and pour half a cup of olive oil over the top of the bulb, letting the oil sink into all the cracks.
- Cover the pan with tinfoil or a tight-fitting lid and place the pan in the hot oven. That's it! After 40 minutes check the garlic to see if it has started to brown and the cloves are buttery soft.
- Once the roasted garlic has cooled you can literally squeeze the roasted garlic out of the bulb as if they were in a tube.
Nutrition
Nutrition info is auto-generated. This information is an estimate; if you are on a special diet, please use your own calculations.

Comments
No Comments